Standard Setup of Toolchain for Windows
Note
Currently only 64-bit versions of Windows are supported. 32-bit Windows can use the Legacy GNU Make Build System.
Introduction
ESP-IDF requires some prerequisite tools to be installed so you can build firmware for supported chips. The prerequisite tools include Python, Git, cross-compilers, CMake and Ninja build tools.
For this Getting Started we’re going to use the Command Prompt, but after ESP-IDF is installed you can use Eclipse or another graphical IDE with CMake support instead.
Note
Previous versions of ESP-IDF used the Legacy GNU Make Build System and MSYS2 Unix compatibility environment. This is no longer required, ESP-IDF can be used from the Windows Command Prompt.
Note
Limitations: - The installation path of ESP-IDF and ESP-IDF Tools must not be longer than 90 characters. Too long installation paths might result in a failed build. - The installation path of Python or ESP-IDF must not contain white spaces or parentheses. - The installation path of Python or ESP-IDF should not contain special characters (non-ASCII) unless the operating system is configured with “Unicode UTF-8” support.
System Administrator can enable the support via Control Panel - Change date, time, or number formats - Administrative tab - Change system locale - check the option “Beta: Use Unicode UTF-8 for worldwide language support” - Ok and reboot the computer.
ESP-IDF Tools Installer
The easiest way to install ESP-IDF’s prerequisites is to download one of ESP-IDF Tools Installers from this URL: https://dl.espressif.com/dl/esp-idf/?idf=4.4
What is the usecase for Online and Offline Installer
Online Installer is very small and allows the installation of all available releases of ESP-IDF. The installer will download only necessary dependencies including Git For Windows during the installation process. The installer stores downloaded files in the cache directory %userprofile%\.espressif
Offline Installer does not require any network connection. The installer contains all required dependencies including Git For Windows .
Components of the installation
The installer deploys the following components:
The installer also allows reusing the existing directory with ESP-IDF. The recommended directory is %userprofile%\Desktop\esp-idf where %userprofile% is your home directory.
Launching ESP-IDF Environment
At the end of the installation process you can check out option Run ESP-IDF PowerShell Environment or Run ESP-IDF Command Prompt (cmd.exe). The installer will launch ESP-IDF environment in selected prompt.
Run ESP-IDF PowerShell Environment:

Completing the ESP-IDF Tools Setup Wizard with Run ESP-IDF PowerShell Environment
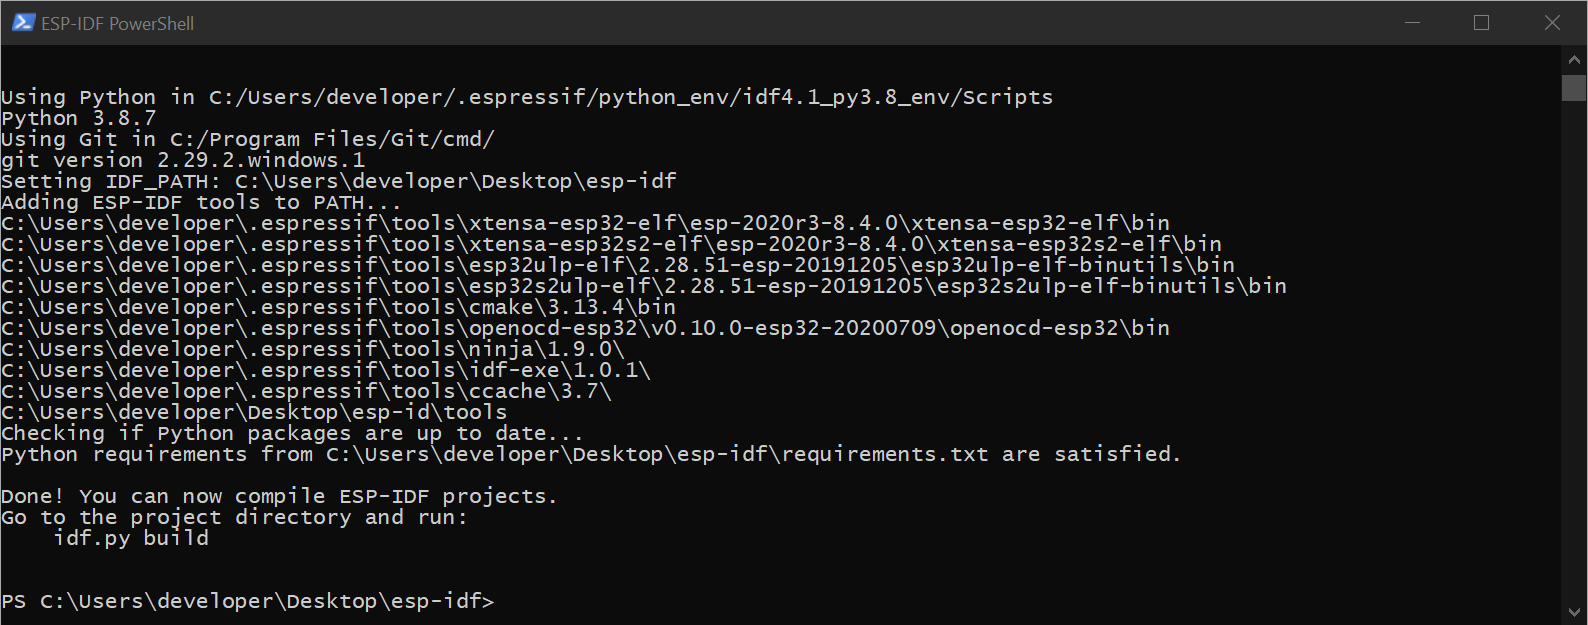
ESP-IDF PowerShell
Run ESP-IDF Command Prompt (cmd.exe):
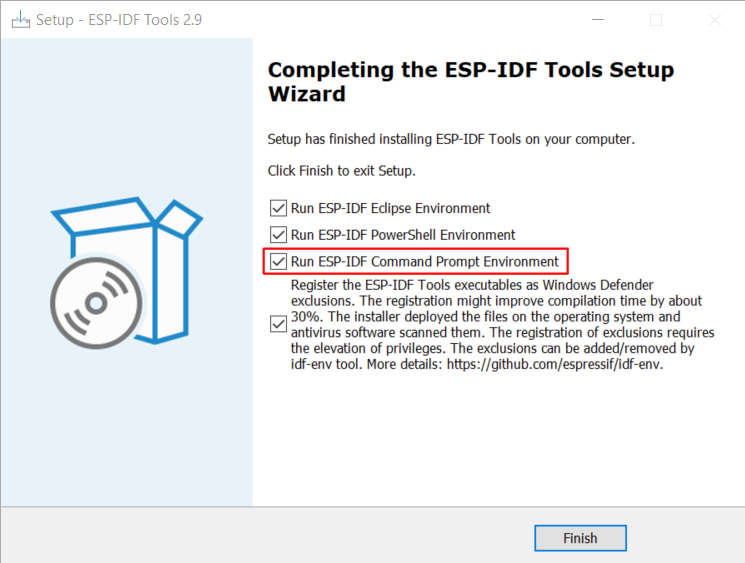
Completing the ESP-IDF Tools Setup Wizard with Run ESP-IDF Command Prompt (cmd.exe)
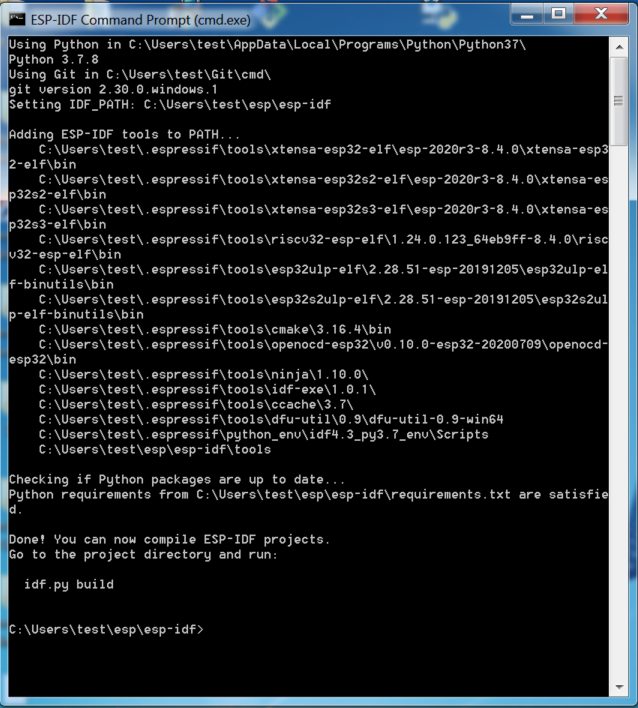
ESP-IDF Command Prompt
Using the Command Prompt
For the remaining Getting Started steps, we’re going to use the Windows Command Prompt.
ESP-IDF Tools Installer also creates a shortcut in the Start menu to launch the ESP-IDF Command Prompt. This shortcut launches the Command Prompt (cmd.exe) and runs export.bat script to set up the environment variables (PATH, IDF_PATH and others). Inside this command prompt, all the installed tools are available.
Note that this shortcut is specific to the ESP-IDF directory selected in the ESP-IDF Tools Installer. If you have multiple ESP-IDF directories on the computer (for example, to work with different versions of ESP-IDF), you have two options to use them:
Create a copy of the shortcut created by the ESP-IDF Tools Installer, and change the working directory of the new shortcut to the ESP-IDF directory you wish to use.
Alternatively, run
cmd.exe, then change to the ESP-IDF directory you wish to use, and runexport.bat. Note that unlike the previous option, this way requires Python and Git to be present inPATH. If you get errors related to Python or Git not being found, use the first option.
Next Steps
If the ESP-IDF Tools Installer has finished successfully, then the development environment setup is complete. Proceed directly to Step 5. Start a Project.