Get Started (Legacy GNU Make)
Note
Since ESP-IDF V4.0, the default build system is based on CMake. This documentation is for the legacy build system based on GNU Make. Support for this build system may be removed in future major releases.
This document is intended to help you set up the software development environment for the hardware based on Espressif ESP32.
After that, a simple example will show you how to use ESP-IDF (Espressif IoT Development Framework) for menu configuration, then for building and flashing firmware onto an ESP32 board.
Note
This is documentation for stable version v4.4 of ESP-IDF. Other ESP-IDF Versions are also available.
Introduction
ESP32 is a system on a chip that integrates the following features:
Wi-Fi (2.4 GHz band)
Bluetooth
Dual high performance cores
Ultra Low Power co-processor
Several peripherals
Powered by 40 nm technology, ESP32 provides a robust, highly integrated platform, which helps meet the continuous demands for efficient power usage, compact design, security, high performance, and reliability.
Espressif provides basic hardware and software resources to help application developers realize their ideas using the ESP32 series hardware. The software development framework by Espressif is intended for development of Internet-of-Things (IoT) applications with Wi-Fi, Bluetooth, power management and several other system features.
What You Need
Hardware:
An ESP32 board
USB cable - USB A / micro USB B
Computer running Windows, Linux, or macOS
Software:
Toolchain to build the Application for ESP32
ESP-IDF that essentially contains API (software libraries and source code) for ESP32 and scripts to operate the Toolchain
Text editor to write programs (Projects) in C, e.g., Eclipse
Development Board Overviews
If you have one of ESP32 development boards listed below, you can click on the link to learn more about its hardware.
Installation Step by Step
This is a detailed roadmap to walk you through the installation process.
Setting up Development Environment
Creating Your First Project
Step 1. Set up the Toolchain
The toolchain is a set of programs for compiling code and building applications.
The quickest way to start development with ESP32 is by installing a prebuilt toolchain. Pick up your OS below and follow the provided instructions.
|
|
|
Note
This guide uses the directory ~/esp on Linux and macOS or %userprofile%\esp on Windows as an installation folder for ESP-IDF. You can use any directory, but you will need to adjust paths for the commands respectively. Keep in mind that ESP-IDF does not support spaces in paths.
Depending on your experience and preferences, you may want to customize your environment instead of using a prebuilt toolchain. To set up the system your own way go to Section Customized Setup of Toolchain (Legacy GNU Make).
Step 2. Get ESP-IDF
Besides the toolchain, you also need ESP32-specific API (software libraries and source code). They are provided by Espressif in ESP-IDF repository.
To get a local copy of ESP-IDF, navigate to your installation directory and clone the repository with git clone.
Open Terminal, and run the following commands:
mkdir -p ~/esp
cd ~/esp
git clone -b v4.4 --recursive https://github.com/espressif/esp-idf.git
ESP-IDF will be downloaded into ~/esp/esp-idf.
Consult ESP-IDF Versions for information about which ESP-IDF version to use in a given situation.
Note
The git clone option -b v4.4 tells git to clone the tag in the ESP-IDF repository git clone corresponding to this version of the documentation.
Note
As a fallback, it is also possible to download a zip file of this stable release from the Releases page. Do not download the “Source code” zip file(s) generated automatically by GitHub, they do not work with ESP-IDF.
Note
Do not miss the --recursive option. If you have already cloned ESP-IDF without this option, run another command to get all the submodules:
cd esp-idf
git submodule update --init
Step 3. Set Environment Variables
The toolchain uses the environment variable IDF_PATH to access the ESP-IDF directory. This variable should be set up on your computer, otherwise projects will not build.
These variables can be set temporarily (per session) or permanently. Please follow the instructions specific to Windows , Linux and macOS in Section Add IDF_PATH to User Profile (Legacy GNU Make).
Step 4. Install the Required Python Packages
The python packages required by ESP-IDF are located in IDF_PATH/requirements.txt. You can install them by running:
python -m pip install --user -r $IDF_PATH/requirements.txt
Note
Please check the version of the Python interpreter that you will be using with ESP-IDF. For this, run
the command python --version and depending on the result, you might want to use python3, python3.7
or similar instead of just python, e.g.:
python3 -m pip install --user -r $IDF_PATH/requirements.txt
Step 5. Start a Project
Now you are ready to prepare your application for ESP32. You can start with get-started/hello_world project from examples directory in IDF.
Copy get-started/hello_world to the ~/esp directory:
Linux and macOS
cd ~/esp
cp -r $IDF_PATH/examples/get-started/hello_world .
Windows
cd %userprofile%\esp
xcopy /e /i %IDF_PATH%\examples\get-started\hello_world hello_world
There is a range of example projects in the examples directory in ESP-IDF. You can copy any project in the same way as presented above and run it.
It is also possible to build examples in-place, without copying them first.
Important
The esp-idf build system does not support spaces in the paths to either esp-idf or to projects.
Step 6. Connect Your Device
Now connect your ESP32 board to the computer and check under what serial port the board is visible.
Serial ports have the following patterns in their names:
Windows: names like
COM1Linux: starting with
/dev/ttymacOS: starting with
/dev/cu.
If you are not sure how to check the serial port name, please refer to Establish Serial Connection with ESP32 (Legacy GNU Make) for full details.
Note
Keep the port name handy as you will need it in the next steps.
Step 7. Configure
Navigate to your hello_world directory from Step 5. Start a Project and run the project configuration utility menuconfig.
Linux and macOS
cd ~/esp/hello_world
make menuconfig
Windows
cd %userprofile%\esp\hello_world
make menuconfig
If the previous steps have been done correctly, the following menu appears:
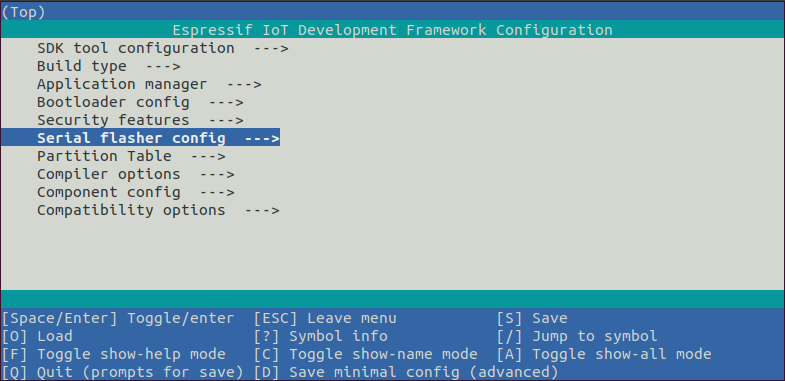
Project configuration - Home window
In the menu, navigate to Serial flasher config > Default serial port to configure the serial port, where project will be loaded to. Confirm selection by pressing enter, save configuration by selecting < Save > and then exit menuconfig by selecting < Exit >.
To navigate and use menuconfig, press the following keys:
Arrow keys for navigation
Enterto go into a submenuEscto go up one level or exit?to see a help screen. Enter key exits the help screenSpace, orYandNkeys to enable (Yes) and disable (No) configuration items with checkboxes “[*]”?while highlighting a configuration item to display help about that item/to find configuration items
Attention
If you use ESP32-DevKitC board with the ESP32-SOLO-1 module, enable single core mode (CONFIG_FREERTOS_UNICORE) in menuconfig before flashing examples.
Step 8. Build and Flash
Build and flash the project by running:
make flash
This command will compile the application and all ESP-IDF components, then it will generate the bootloader, partition table, and application binaries. After that, these binaries will be flashed onto your ESP32 board.
Encountered Issues While Flashing?
If you run the given command and see errors such as “Failed to connect”, there might be several reasons for this. One of the reasons might be issues encountered by esptool.py, the utility that is called by the build system to reset the chip, interact with the ROM bootloader, and flash firmware. One simple solution to try is manual reset described below, and if it does not help you can find more details about possible issues in Troubleshooting.
esptool.py resets ESP32 automatically by asserting DTR and RTS control lines of the USB to serial converter chip, i.e., FTDI or CP210x (for more information, see Establish Serial Connection with ESP32 (Legacy GNU Make)). The DTR and RTS control lines are in turn connected to GPIO0 and CHIP_PU (EN) pins of ESP32, thus changes in the voltage levels of DTR and RTS will boot ESP32 into Firmware Download mode. As an example, check the schematic for ESP32-DevKitC development board.
In general, you should have no problems with the official esp-idf development boards. However, esptool.py is not able to reset your hardware automatically in the following cases:
Your hardware does not have the DTR and RTS lines connected to
GPIO0andCHIP_PUThe DTR and RTS lines are configured differently
There are no such serial control lines at all
Depending on the kind of hardware you have, it may also be possible to manually put your ESP32 board into Firmware Download mode (reset).
For development boards produced by Espressif, this information can be found in the respective getting started guides or user guides. For example, to manually reset an esp-idf development board, hold down the Boot button (
GPIO0) and press the EN button (CHIP_PU).For other types of hardware, try pulling
GPIO0down.
Normal Operation
If there are no issues by the end of the flash process, you will see the output log similar to the one given below. Then the board will reboot and start up the “hello_world” application.
esptool.py v3.0-dev
Flashing binaries to serial port /dev/ttyUSB0 (app at offset 0x10000)...
esptool.py v3.0-dev
Serial port /dev/cu.SLAB_USBtoUART
Connecting........____
Chip is ESP32D0WDQ6 (revision 1)
Features: WiFi, BT, Dual Core, Coding Scheme None
Crystal is 40MHz
MAC: 30:ae:a4:15:21:b4
Uploading stub...
Running stub...
Stub running...
Configuring flash size...
Auto-detected Flash size: 4MB
Flash params set to 0x0220
Compressed 26704 bytes to 15930...
Wrote 26704 bytes (15930 compressed) at 0x00001000 in 1.4 seconds (effective 151.9 kbit/s)...
Hash of data verified.
Compressed 147984 bytes to 77738...
Wrote 147984 bytes (77738 compressed) at 0x00010000 in 6.9 seconds (effective 172.7 kbit/s)...
Hash of data verified.
Compressed 3072 bytes to 103...
Wrote 3072 bytes (103 compressed) at 0x00008000 in 0.0 seconds (effective 1607.9 kbit/s)...
Hash of data verified.

Leaving...
Hard resetting via RTS pin...
If you’d like to use the Eclipse IDE instead of running make, check out the Eclipse guide.
Step 9. Monitor
To check if “hello_world” is indeed running, type make monitor.
This command launches the IDF Monitor application:
$ make monitor
MONITOR
--- idf_monitor on /dev/ttyUSB0 115200 ---
--- Quit: Ctrl+] | Menu: Ctrl+T | Help: Ctrl+T followed by Ctrl+H ---
ets Jun  8 2016 00:22:57

rst:0x1 (POWERON_RESET),boot:0x13 (SPI_FAST_FLASH_BOOT)
ets Jun  8 2016 00:22:57
...
After startup and diagnostic logs scroll up, you should see “Hello world!” printed out by the application.
...
Hello world!
This is esp32 chip with 2 CPU cores, WiFi/BT/BLE, silicon revision 1, 4MB external flash
Restarting in 10 seconds...
Restarting in 9 seconds...
Restarting in 8 seconds...
Restarting in 7 seconds...
To exit IDF monitor use the shortcut Ctrl+].
If IDF monitor fails shortly after the upload, or if instead of the messages above you see a random garbage similar to what is given below, your board is likely using a 26MHz crystal. Most development board designs use 40MHz, so ESP-IDF uses this frequency as a default value.

If you have such a problem, do the following:
Exit the monitor.
Go back to menuconfig.
Go to Component config –> ESP32-specific –> Main XTAL frequency, then change CONFIG_ESP32_XTAL_FREQ_SEL to 26MHz.
After that, build and flash the application again.
Note
You can combine building, flashing and monitoring into one step by running:
make flash monitor
See also IDF Monitor for handy shortcuts and more details on using IDF monitor.
That’s all that you need to get started with ESP32!
Now you are ready to try some other examples, or go straight to developing your own applications.
Environment Variables
Some environment variables can be specified whilst calling make allowing users to override arguments without the need to reconfigure them using make menuconfig.
Variables |
Description & Usage |
|---|---|
|
Overrides the serial port used in Examples: |
|
Overrides the serial baud rate when flashing the ESP32. Example: |
|
Overrides the serial baud rate used when monitoring. Example: |
Note
You can export environment variables (e.g. export ESPPORT=/dev/ttyUSB1).
All subsequent calls of make within the same terminal session will use
the exported value given that the variable is not simultaneously overridden.
Updating ESP-IDF
You should update ESP-IDF from time to time, as newer versions fix bugs and provide new features. The simplest way to do the update is to delete the existing esp-idf folder and clone it again, as if performing the initial installation described in Step 2. Get ESP-IDF.
If downloading to a new path, remember to Add IDF_PATH to User Profile (Legacy GNU Make) so that the toolchain scripts can find ESP-IDF in its release specific location.
Another solution is to update only what has changed. The update procedure depends on the version of ESP-IDF you are using.