Common Git Commands Explained
Note
This document is automatically translated using AI. Please excuse any detailed errors. The official English version is still in progress.
Note
All content within square brackets ([]) in the following text should be customized by the user according to actual circumstances, and should not be directly copied from the examples.
Initial Configuration
When using Git for the first time, you need to configure the username and email to associate with commit operations:
Set username: The username will be displayed in each commit record to identify the author.
git config --global user.name “espressif” // Set the username to espressif
Note
You can set any name according to personal or team requirements, but it is best to use a real or common nickname for easy identification of the submitter during collaboration.
Set email:
git config --global user.email "xxx@espressif.com" // Set the associated email to xxx@espressif.com
Note
You should fill in a valid email to receive notifications or display the correct author information in the remote repository.
View all configurations: List all Git configurations, including username, email, etc., which can be used to confirm whether the settings have taken effect.
git config --list
Other common configurations:
Set default editor: Git will open the default editor when you need to enter multiline information (such as commit messages or merge conflict descriptions). If not set, the system editor (usually Vim) is used by default.
git config --global core.editor "nano" // Set the default editor to nano
Enable color command line output: Make Git command output clearer.
git config --global color.ui auto // auto means enable when the terminal supports color, or you can manually set it to true or false
Change the name of the main branch: When creating a new repository, the default name of the main branch is master (can be customized after Git 2.28).
git config init.defaultBranch main // Change the name of the main branch to main
Configure SSH Key
SSH key is a secure and efficient authentication method, which implements password-free remote connection when using Git through encryption technology. Configuring SSH key can effectively protect your Git account and code security. The specific operation steps in the Windows environment are as follows:
Note
The security of public and private keys is very important. Ensure that you properly keep your private key and do not expose or share it.
Generate SSH Key
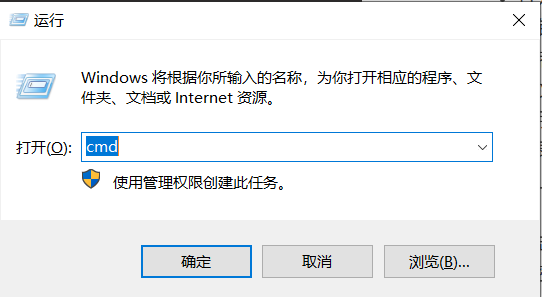
Press the
Win+Rcombination key to open the Run window.Enter
cmdand press Enter to open the Command Prompt window.
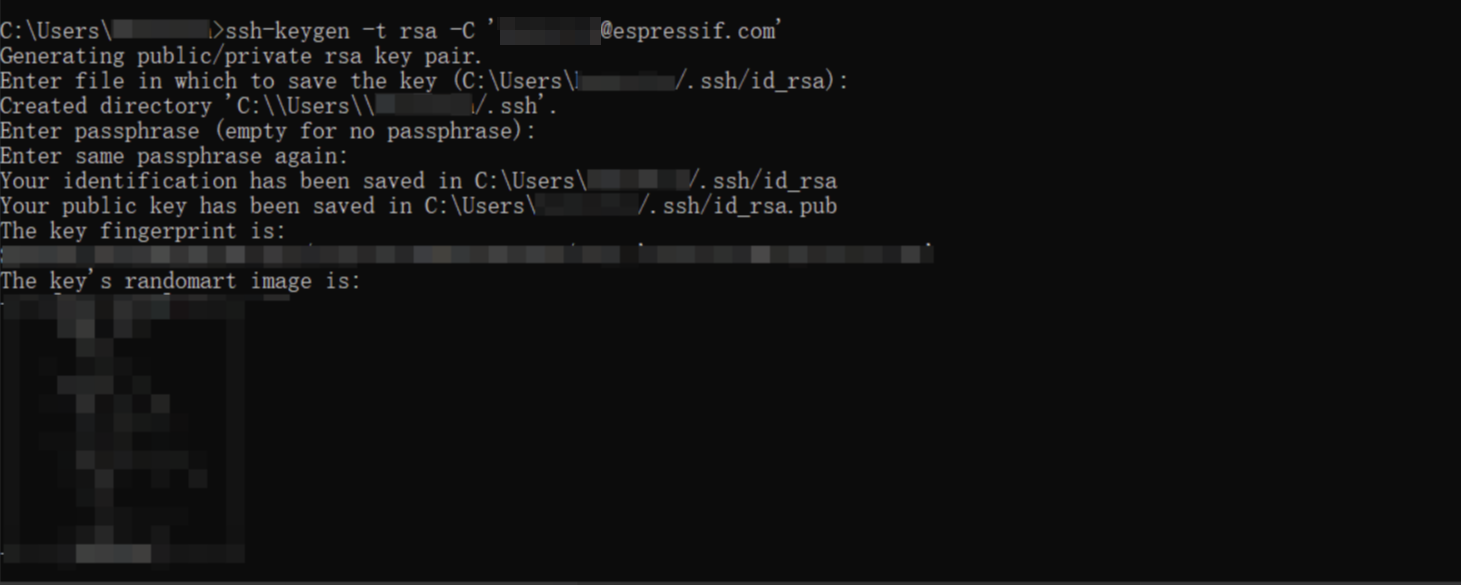
Enter the following command in the Command Prompt window and press Enter.
ssh-keygen -t rsa -C 'xxx@espressif.com' // Replace xxx@espressif.com with your real email address to mark the key ownership.
The terminal will then prompt you to enter the following related information in turn. If there are no special requirements, you can directly press Enter to use the default settings.
Key save path
Whether to set a password for the private key
Confirm private key password
After the settings are completed, the actual save path and verification information of the key file will be displayed on the terminal screen, indicating that the SSH key has been successfully created.
Find the generated SSH public key
Open the actual save path of the key file displayed on the terminal screen, where the file of type
.pubis the SSH public key.Right-click the
.pubfile, select “Open with”, and use a file editor such as “Notepad” or “VS Code” to view and copy.
Configure the public key in Github
Log in to Github, click on the avatar in the upper right corner and select
Settings>SSH and GPG keys>New SSH key.
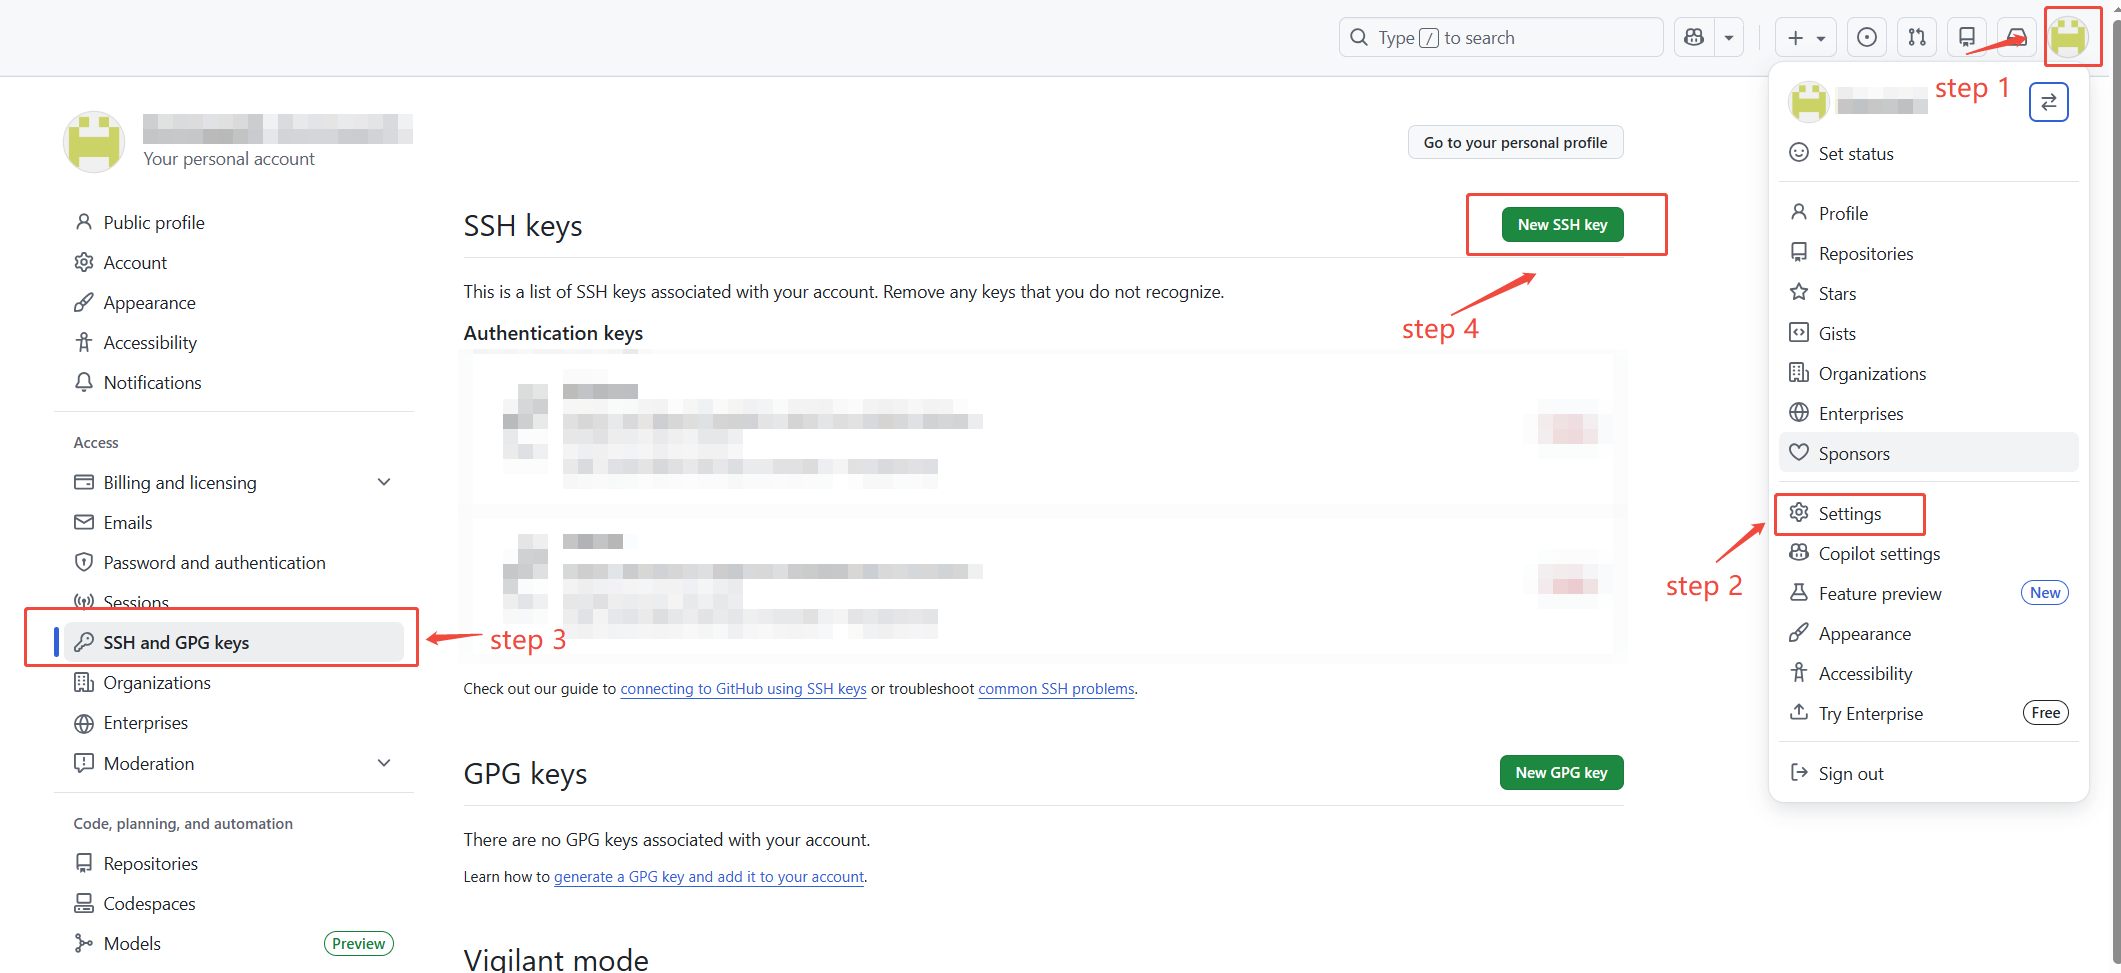
Copy and paste the SSH public key into the
Keytext box.Set a name for this SSH key in the
Titlebox.Click
Add SSH keyto complete the configuration of the SSH public key.
Check if the key pairing is successful
Enter the following command in the command prompt window:
ssh -T git@github.com
If the window displays
Hi your-username! You've successfully authenticated., it means the SSH key is configured successfully.
Create/Clone Repository
Create Repository
Before the project starts, you can create a new repository locally with the following command:
git init
Note
At this time, the repository is only local, and you need to manually add a remote repository and push it to GitHub.
Clone Remote Repository
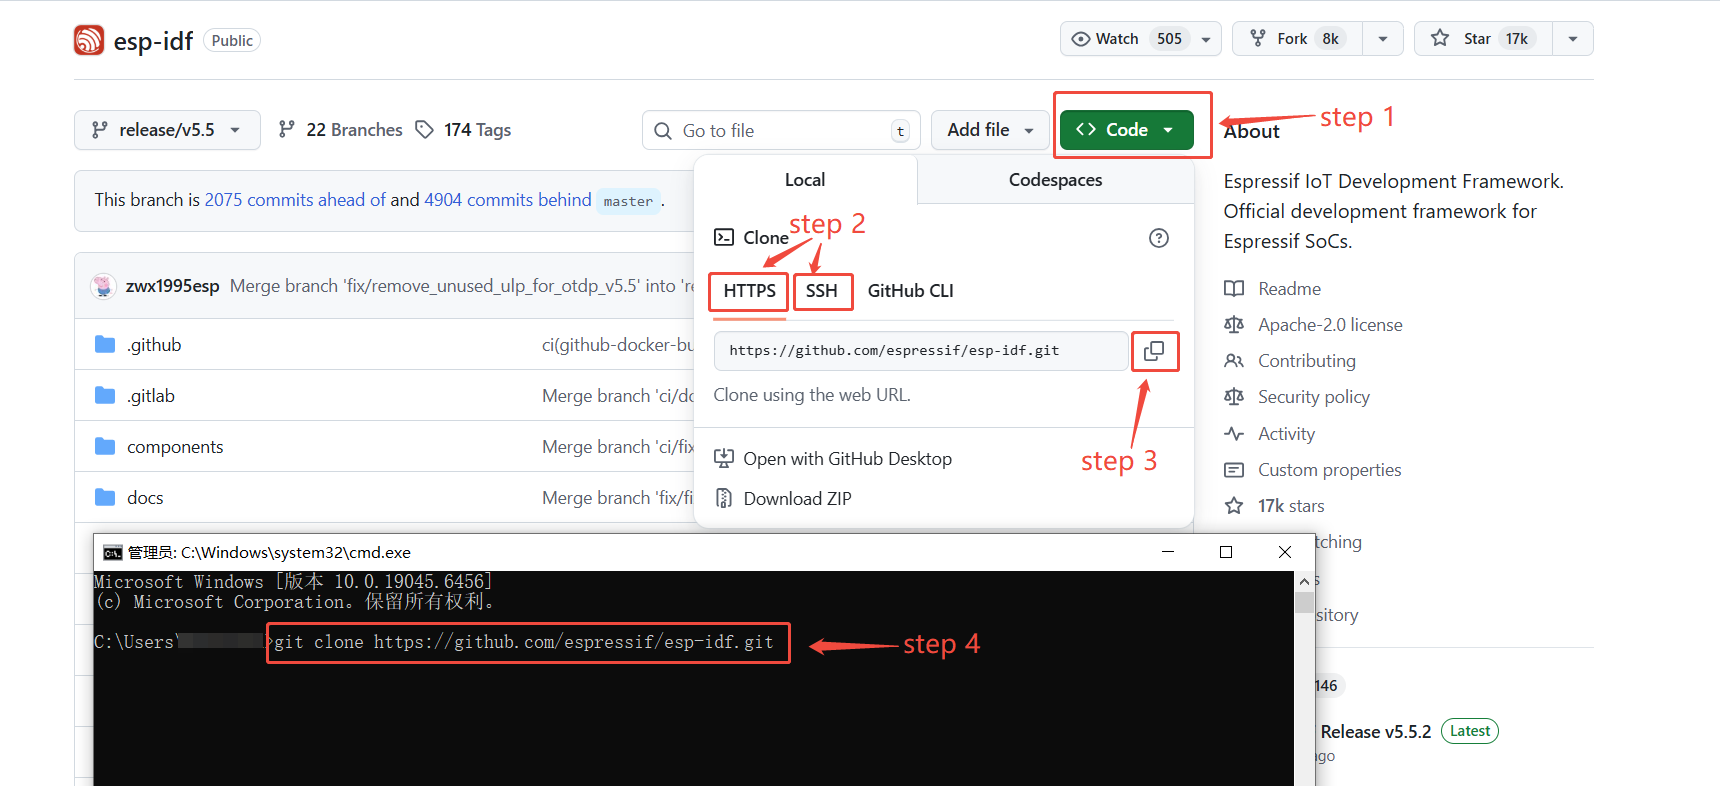
If you want to clone a remote repository, you need to log in to Github, go to the target repository page, and get the URL of the repository.
Take the esp-idf repository as an example, the specific steps are as follows:
Click the green
Codebutton in the upper right corner of the page to pop up the repository URL box.Choose the URL type, HTTPS or SSH. Note that SSH type requires Configure SSH Key in advance for password-free login.
Click the copy button or manually copy the selected URL.
Enter the following command in the terminal to copy the remote repository to the local:
// Clone the esp-idf repository to the local via HTTPS URL, if you need to clone other repositories, you need to change the URL
git clone https://github.com/espressif/esp-idf.git
Note
You can directly specify the branch or tag when cloning to avoid switching after cloning the default branch. The related commands are as follows, taking esp-idf as an example:
git clone -b release/v5.0 https://github.com/espressif/esp-idf.git   // Clone the esp-idf release/v5.0 branch to the local
git clone --branch v5.0 https://github.com/espressif/esp-idf.git     // Clone the esp-idf v5.0 version to the local
Note
Before executing the following Git commands, please enter the target repository directory first.
Branch
In Git, a branch is a mechanism for parallel development. It is an independent copy of the code development history, allowing new features to be developed, tested, and bugs fixed without disturbing the main branch.
The branch command is the main command for managing branches, which can be used to view, create, delete branches, etc.
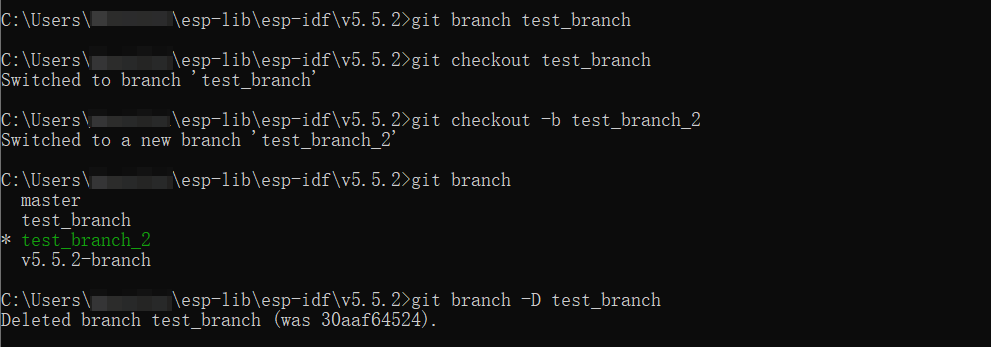
View branches
View all local branches:
git branch
Note
The asterisk * represents the current local branch.
Create/Switch branches
Create a new branch without switching:
git branch [Branch Name]Switch to a specified branch:
git checkout [Branch Name]Create a new branch and switch to it:
git checkout -b [Branch Name]
Delete a branch
Delete a branch:
git branch -D [Branch Name]
Merge branches
Merge a specified branch into the current branch:
git merge [Branch Name]Merge and keep the merge record:
git merge --no-ff [Branch Name]Abort the merge:
git merge --abort
Add changes to the staging area
The add command is used to add modified files to the Git staging area, clearly marking the content to be committed, thus achieving precise control and orderly management of version changes.
Add a specified file to the staging area:
git add [File]Add all changes to the staging area:
git add .
Note
When using the git add [File] command, make sure the current path is in the directory where the target file is located, or provide the correct path relative to the current directory.

Commit changes
The commit command is used to commit changes that have been added to the staging area to the local repository, equivalent to creating a “version snapshot”, recording the content and description of this modification.
Commit and add a description:
git commit -m "[Description]"
Note
Before using the commit command to commit, you must first use the add command to add changes to the staging area.

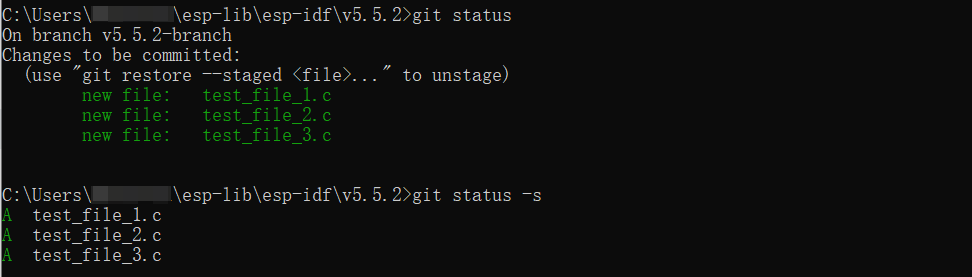
Check the status
The status command is used to check the status of the current workspace and staging area. It can display the current branch, which files have been modified or deleted, which files have been added to the staging area, and whether there are uncommitted changes or untracked files.
View detailed workspace and staging area status:
git statusView short status (abbreviated format):
git status -s
View historical commits
The log command is used to view the historical commit records of the Git repository, including the commit author, time, commit information, and hash value. It is an important tool for understanding the project’s change trajectory.
Display the complete commit history:
git logDisplay each commit in a single line:
git log --onelineGraphically display branches and merge relationships:
git log --graphView commits from a specified author:
git log --author="[Author]"View commits from a specified time to the present:
git log --since="[Time]"View the specific changes in the committed files:
git log -pView the statistics of files and lines changed in the commit:
git log --statDisplay the most recent commit records:
git log -n [Number]View the change history of a specified file:
git log [File Name]
View Changes
The diff command is used to compare the differences between stages (workspace, staging area, historical commit) in Git. It does not change anything and is only used to view the specific changes in the code.
Compare the differences between the workspace and the staging area:
git diffCompare the differences between the staging area and the last commit:
git diff --cachedorgit diff --stagedCompare all differences between the workspace and the last commit, including staged and unstaged changes:
git diff HEADCompare the differences between two commits:
git diff [commit1][commit2]Compare the differences between two branches:
git diff [branch1][branch2]View the differences of a file, default is the workspace and cache area of the file:
git diff [File Name]
Ignore Files
In Git, ignoring files refers to a category of files that Git does not track or include in version control, such as temporary files, logs, compiled objects, system caches, etc. You can create a file named .gitignore in the project root directory and write the paths of the files or folders to be ignored into this file.
Ignore all logs:
*.logIgnore all temporary files:
temp/Ignore all
.exefiles:*.exeIgnore VS Code workspace configuration:
.vscode/Ignore a certain file:
[File Name]
Remote Repository Collaboration
In Git, remote repository collaboration refers to the process where multiple developers connect to the same Git repository for distributed collaborative development.
View remote repository information:
git remote -vEstablish a connection between a local empty repository and a specified remote repository:
get remote add origin [url]Get the latest commit from the remote repository and merge:
git pull origin [Branch Name]Fetch changes from the remote repository without merging:
git fetch originPush local commits to the remote repository:
git push origin [Branch Name]