Build Your Own ESP-AT Project
This document details how to build your own ESP-AT project and flash the generated binary files into your ESP devices, including ESP32, ESP32-S2, ESP32-C3, and ESP8266. It comes in handy when the default AT Binary Lists cannot meet your needs, for example, to customize the AT port pins, Bluetooth service, partitions, and so on.
The structure of this document is as follows:
- Overview: Overview of the steps to build an ESP-AT project.
- ESP32, ESP32-S2 and ESP32-C3 Series: Details steps to build a project for ESP32, ESP32-S2, and ESP32-C3 series.
- ESP8266 Series: Details steps to build a project for ESP8266.
Overview
Before compiling an ESP-AT project, you need first get started with ESP-IDF and set up the environment for ESP-IDF, because ESP-AT is based on ESP-IDF.
After the environment is ready, install the tools and ESP-AT SDK. Then, connect your ESP device to PC. Use ./build.py menuconfig to set up some configuration for the project. Build the project and flash the generated bin files onto your ESP device.
Note
Please pay attention to possible conflicts of pins. If choosing AT through HSPI, you can get the information of the HSPI pin by ./build.py menuconfig –> Component config –> AT –> AT hspi settings.
ESP32, ESP32-S2 and ESP32-C3 Series
This section describes how to compile an ESP-AT project for ESP32, ESP32-S2 and ESP32-C3 series.
Get Started with ESP-IDF
Get started with ESP-IDF before compiling an ESP-AT project, because ESP-AT is developed based on ESP-IDF, and the supported version varies from series to series:
| Project | IDF Version | IDF Documentation Version |
|---|---|---|
| ESP32 ESP-AT | release/v4.2 | ESP-IDF Get Started Guide v4.2 |
| ESP32-S2 ESP-AT | release/v4.2 | ESP-IDF Get Started Guide v4.2 |
| ESP32-C3 ESP-AT | release/v4.3 | ESP-IDF Get Started Guide v4.3 |
First, set up the development environment for ESP-IDF according to Step 1 to 4 of ESP-IDF Get Started Guide (click the corresponding link in the table above to navigate to the documentation).
Then, start a simple project of hello_world according to Step 5 to 10 of ESP-IDF Get Started Guide to make sure your environment works and familiarize yourself with the process of starting a new project based on ESP-IDF. It is not a must, but you are strongly recommended to do so.
After finishing all the ten steps (if not, at least the first four steps), you can move onto the following steps that are ESP-AT specific.
Note
Please do not set IDF_PATH during the process, otherwise, you would encounter some unexpected issues when compiling ESP-AT projects later.
Get ESP-AT
To compile an ESP-AT project, you need the software libraries provided by Espressif in the ESP-AT repository.
To get ESP-AT, navigate to your installation directory and clone the repository with git clone, following instructions below specific to your operating system.
Linux or macOS
cd ~/esp
git clone --recursive https://github.com/espressif/esp-at.git
Windows
cd %userprofile%\esp
git clone --recursive https://github.com/espressif/esp-at.git
If you are located in China or have difficulties to access GitHub, you can also use git clone https://gitee.com/EspressifSystems/esp-at.git to get ESP-AT, which may be faster.
ESP-AT will be downloaded into ~/esp/esp-at on Linux or macOS, or %userprofile%\esp\esp-at on Windows.
Note
This guide uses the directory ~/esp on Linux or macOS, or %userprofile%\esp on Windows as an installation folder for ESP-AT. You can use any directory, but you will need to adjust paths for the commands respectively. Keep in mind that ESP-AT does not support spaces in paths.
Connect Your Device
Connect your device to the PC with a USB cable to download firmware and log output. See Hardware Connection for more information. Note that you do not need to set up the “AT command/response” connection if you do not send AT commands and receive AT responses during the compiling process. You can change default port pins referring to How to Set AT Port Pins.
Configure
In this step, you will clone the esp-idf folder into the esp-at folder, set up the development environment in the newly cloned folder, and configure your project.
- Navigate to
~/esp/esp-atdirectory. - Run the project configuration utility
menuconfigto configure.
./build.py menuconfig
- Select the following configuration options for your ESP device if it is your first time.
- Select the
Platform namefor your ESP device. For example, selectPLATFORM_ESP32for ESP32 series of products,PLATFORM_ESP32S2for ESP32-S2 series of products.Platform nameis defined in factory_param_data.csv .- Select the
Module namefor your ESP device. For example, selectWROOM-32for the ESP32-WROOM-32D module.Module nameis defined in factory_param_data.csv .- Enable or disable
silence mode. If enabled, it will remove some logs and reduce the firmware size. Generally, it should be disabled.- The above three option items will not appear if the file
build/module_info.jsonexists. So please delete it if you want to reconfigure the module information.
- Now, the
esp-idffolder is created inesp-atfolder. Thisesp-idfis different from that in Step Get Started with ESP-IDF.
If the terminal prompt an error message like the following, please proceed with the next step to set up the develop environment in the
esp-at/esp-idf.The following Python requirements are not satisfied: ... Please follow the instructions found in the "Set up the tools" section of ESP-IDF Get Started Guide.If you have compiled an ESP-AT project for an ESP series before and want to switch to another series, you must run
rm -rf esp-idfto remove the old esp/idf and then proceed with the next step.If your esp-idf is upgraded, you are recommended to proceed with the next step.
- Set up the development environment in the
esp-at/esp-idf.
Set up the tools in the folder if it is the first time you compile the ESP-AT project. See Step 3 of ESP-IDF Get Started Guide.
Set up environment variables in the folder every time you compile an ESP-AT project. See Step 4 of ESP-IDF Get Started Guide.
Install
pyyamlandxlrdpackages with pip in the folder if you have not done it.python -m pip install pyyaml xlrd
If the previous steps have been done correctly, the following menu appears after you run ./build.py menuconfig:
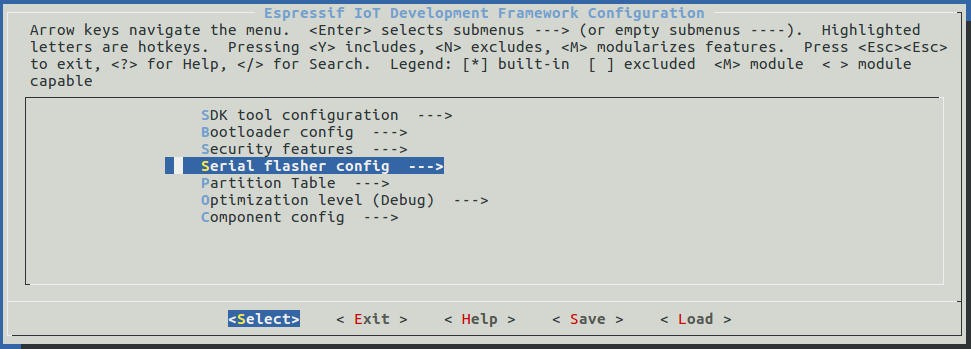
Project configuration - Home window
You are using this menu to set up project-specific configuration, e.g. changing AT port pins, enabling Classic Bluetooth function, etc. If you made no changes, it will run with the default configuration.
Build the Project
Build the project by running:
./build.py build
- If Bluetooth feature is enabled, the firmware size will be much larger. Please make sure it does not exceed the ota partition size.
- After compiled, the combined factory bin will be created in
build/factory. See How to understand the differences of each type of module for more information.
Flash onto the Device
Flash the binaries that you just built onto your ESP32 board by running:
./build.py -p (PORT) flash
- Note that you may need to replace
PORTwith your ESP device’s serial port name. - Or you can follow the printed instructions to flash the bin files into flash. Note that you may also need to replace the
PORT. - If the ESP-AT bin fails to boot and prints “ota data partition invalid”, you should run
./build.py erase_flashto erase the entire flash, and then re-flash the AT firmware.
ESP8266 Series
This section describes how to compile an ESP-AT project for ESP8266 series.
Get Started with ESP-IDF
Get started with ESP-IDF before compiling an ESP-AT project, because ESP-AT is developed based on ESP-IDF:
First, set up the development environment according to ESP8266 RTOS SDK Get Started Guide v3.4.
Then, start a simple project of hello_world according to the Guide to make sure your environment works and familiarize yourself with the process of starting a new project based on ESP-IDF. It is not a must, but you are strongly recommended to do so.
After setting up the development environment and starting a simple project, you can move onto the following steps that are ESP-AT specific.
Note
Please do not set IDF_PATH during the process, otherwise, you would encounter some unexpected issues when compiling ESP-AT projects later.
Get ESP-AT
To compile an ESP-AT project, you need the software libraries provided by Espressif in the ESP-AT repository.
To get ESP-AT, navigate to your installation directory and clone the repository with git clone, following instructions below specific to your operating system.
Linux or macOS
cd ~/esp
git clone --recursive https://github.com/espressif/esp-at.git
Windows
cd %userprofile%\esp
git clone --recursive https://github.com/espressif/esp-at.git
If you are located in China or have difficulties to access GitHub, you can also use git clone https://gitee.com/EspressifSystems/esp-at.git to get ESP-AT, which may be faster.
ESP-AT will be downloaded into ~/esp/esp-at on Linux or macOS, or %userprofile%\esp\esp-at on Windows.
Note
This guide uses the directory ~/esp on Linux and macOS or %userprofile%\esp on Windows as an installation folder for ESP-AT. You can use any directory, but you will need to adjust paths for the commands respectively. Keep in mind that ESP-AT does not support spaces in paths.
Connect Your Device
Connect your device to the PC with a USB cable to download firmware and log output. See Hardware Connection for more information. Note that you do not need to set up the “AT command/response” connection if you do not send AT commands and receive AT responses during the compiling process. You can change default port pins referring to How to Set AT Port Pins.
Configure
In this step, you will clone the esp-idf folder into the esp-at folder, set up the development environment in the newly cloned folder, and configure your project.
- Navigate back to your
~/esp/esp-atdirectory. - Run the project configuration utility
menuconfigto configure.
./build.py menuconfig
- Select the following configuration options for your ESP device if it is the first time you build the ESP-AT project.
- Select the
Platform namefor your ESP device, i.e., selectPLATFORM_ESP8266for your ESP8266 device.Platform nameis defined in factory_param_data.csv .- Select the
Module namefor your ESP device. For example, selectWROOM-02for the ESP-WROOM-02D module.Module nameis defined in factory_param_data.csv .- Enable or disable
silence mode. If enabled, it will remove some logs and reduce the firmware size. Generally, it should be disabled.- The above three option items will not appear if the file
build/module_info.jsonexists. So please delete it if you want to reconfigure the module information.
- Now, the
esp-idffolder is created inesp-atfolder. Thisesp-idfis different from that in Step Get Started with ESP-IDF.
If the terminal prompt an error message like the following, please proceed with the next step to set up the develop environment in the
esp-at/esp-idf.The following Python requirements are not satisfied: ... Please follow the instructions found in the "Set up the tools" section of ESP-IDF Get Started Guide.If you have compiled an ESP-AT project for an ESP series before and want to switch to another series, you must run
rm -rf esp-idfto remove the old esp/idf and then proceed with the next step.If your esp-idf is upgraded, you are recommended to proceed with the next step.
- Set up the development environment in the
esp-at/esp-idf.
Set up the tools in the folder if it is the first time you compile an ESP-AT project. See ESP8266 RTOS SDK Get Started Guide v3.4 for more information.
Set up environment variables in the folder every time you compile an ESP-AT project. See ESP8266 RTOS SDK Get Started Guide v3.4 for more information.
Install
pyyamlandxlrdpackages with pip in the folder if you have not done it.python -m pip install pyyaml xlrd
If the previous steps have been done correctly, the following menu appears after you run ./build.py menuconfig:
Project configuration - Home window
You are using this menu to set up project-specific configuration, e.g. changing AT port pins, enabling Classic Bluetooth function, etc. If you made no changes, it will run with the default configuration.
Build the Project
Build the project by running:
./build.py build
- After compiled, the combined factory bin will be created in
build/factory. By default, the factory bin is 2 MB flash size, DIO flash mode and 80 MHz flash speed. See How to understand the differences of each type of module for more information.
Flash onto the Device
Flash the binaries that you just built onto your ESP8266 board by running:
./build.py -p (PORT) flash
- Note that you may need to replace
PORTwith your ESP device’s serial port name. - Or you can follow the printed instructions to flash the bin files into flash. Note that you may also need to replace the
PORT. - If the ESP-AT bin fails to boot and prints “ota data partition invalid”, you should run
./build.py erase_flashto erase the entire flash, and then re-flash the AT firmware.