ESP32-S2-Touch-Devkit-1

ESP32-S2-Touch-Devkit-1 Board-set
Overview
ESP32-S2-Touch-Devkit-1 is a development kit that is aimed at helping evaluate and develop capacitive touch sensor applications on ESP32-S2. It is made up of Motherboard-Subboard structure. The motherboard of ESP32-S2-Touch-Devkit-1 integrates ESP32-S2-MINI-1 controller module and several useful little components such as buzzer, digital tube, RGB light, and so on. There are several kinds of subboards in ESP32-S2-Touch-Devkit-1 with different kinds of capacitive touch sensor pads, developers can choose one of them and connect it with motherboard so that they could develop different kinds of capacitive touch sensor applications. The motherboard and subboard use the pin header/female pin header as the socket connector which makes it plug in and plug out smoothly.
Motherboard

Motherboard
Subboards
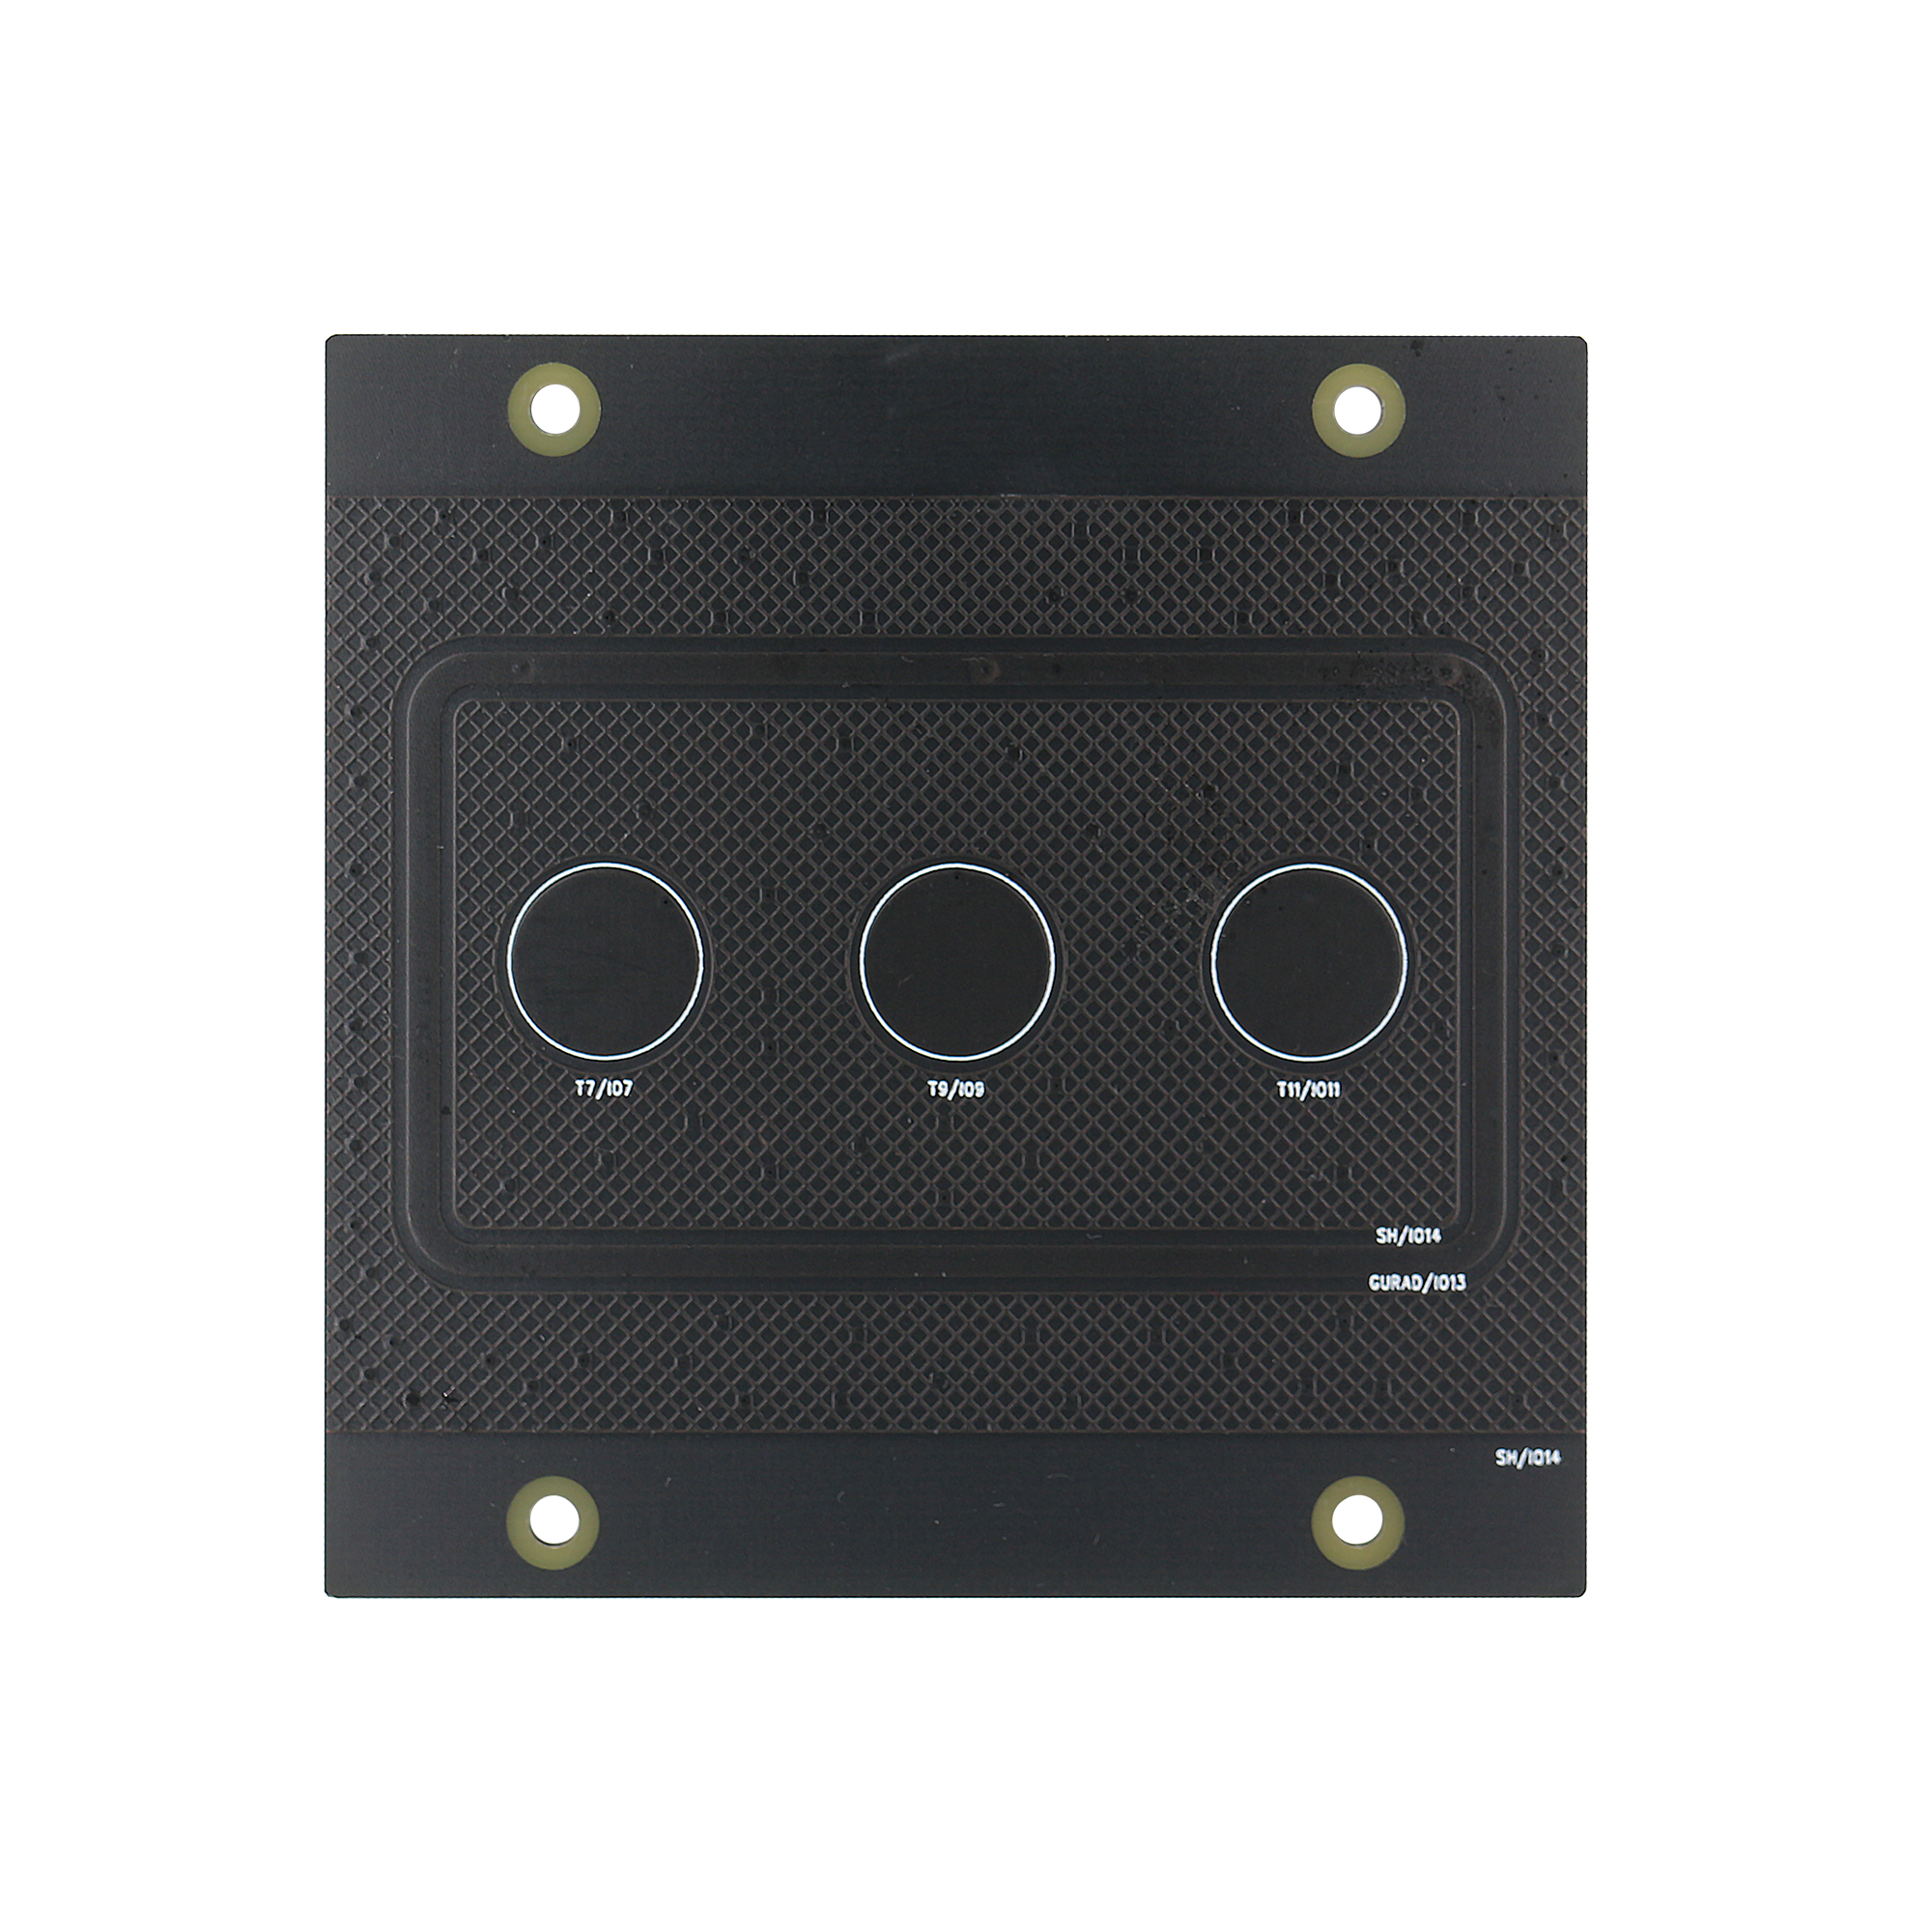
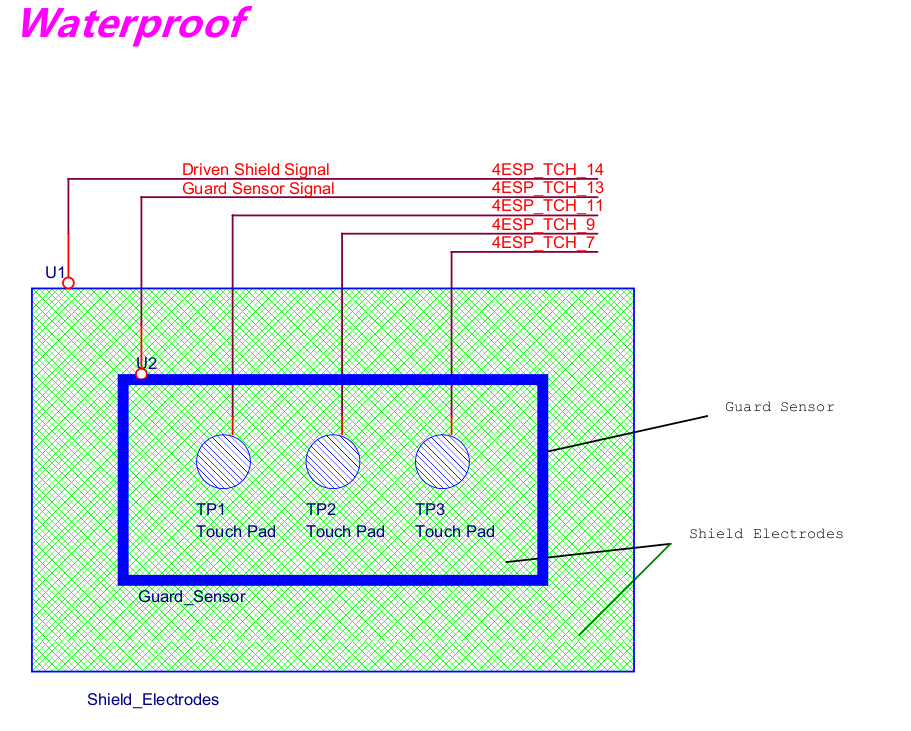
Button-board: Three capacitive touch buttons with waterproof sensor.
|
|
Button-board Water-proof sensor |
|
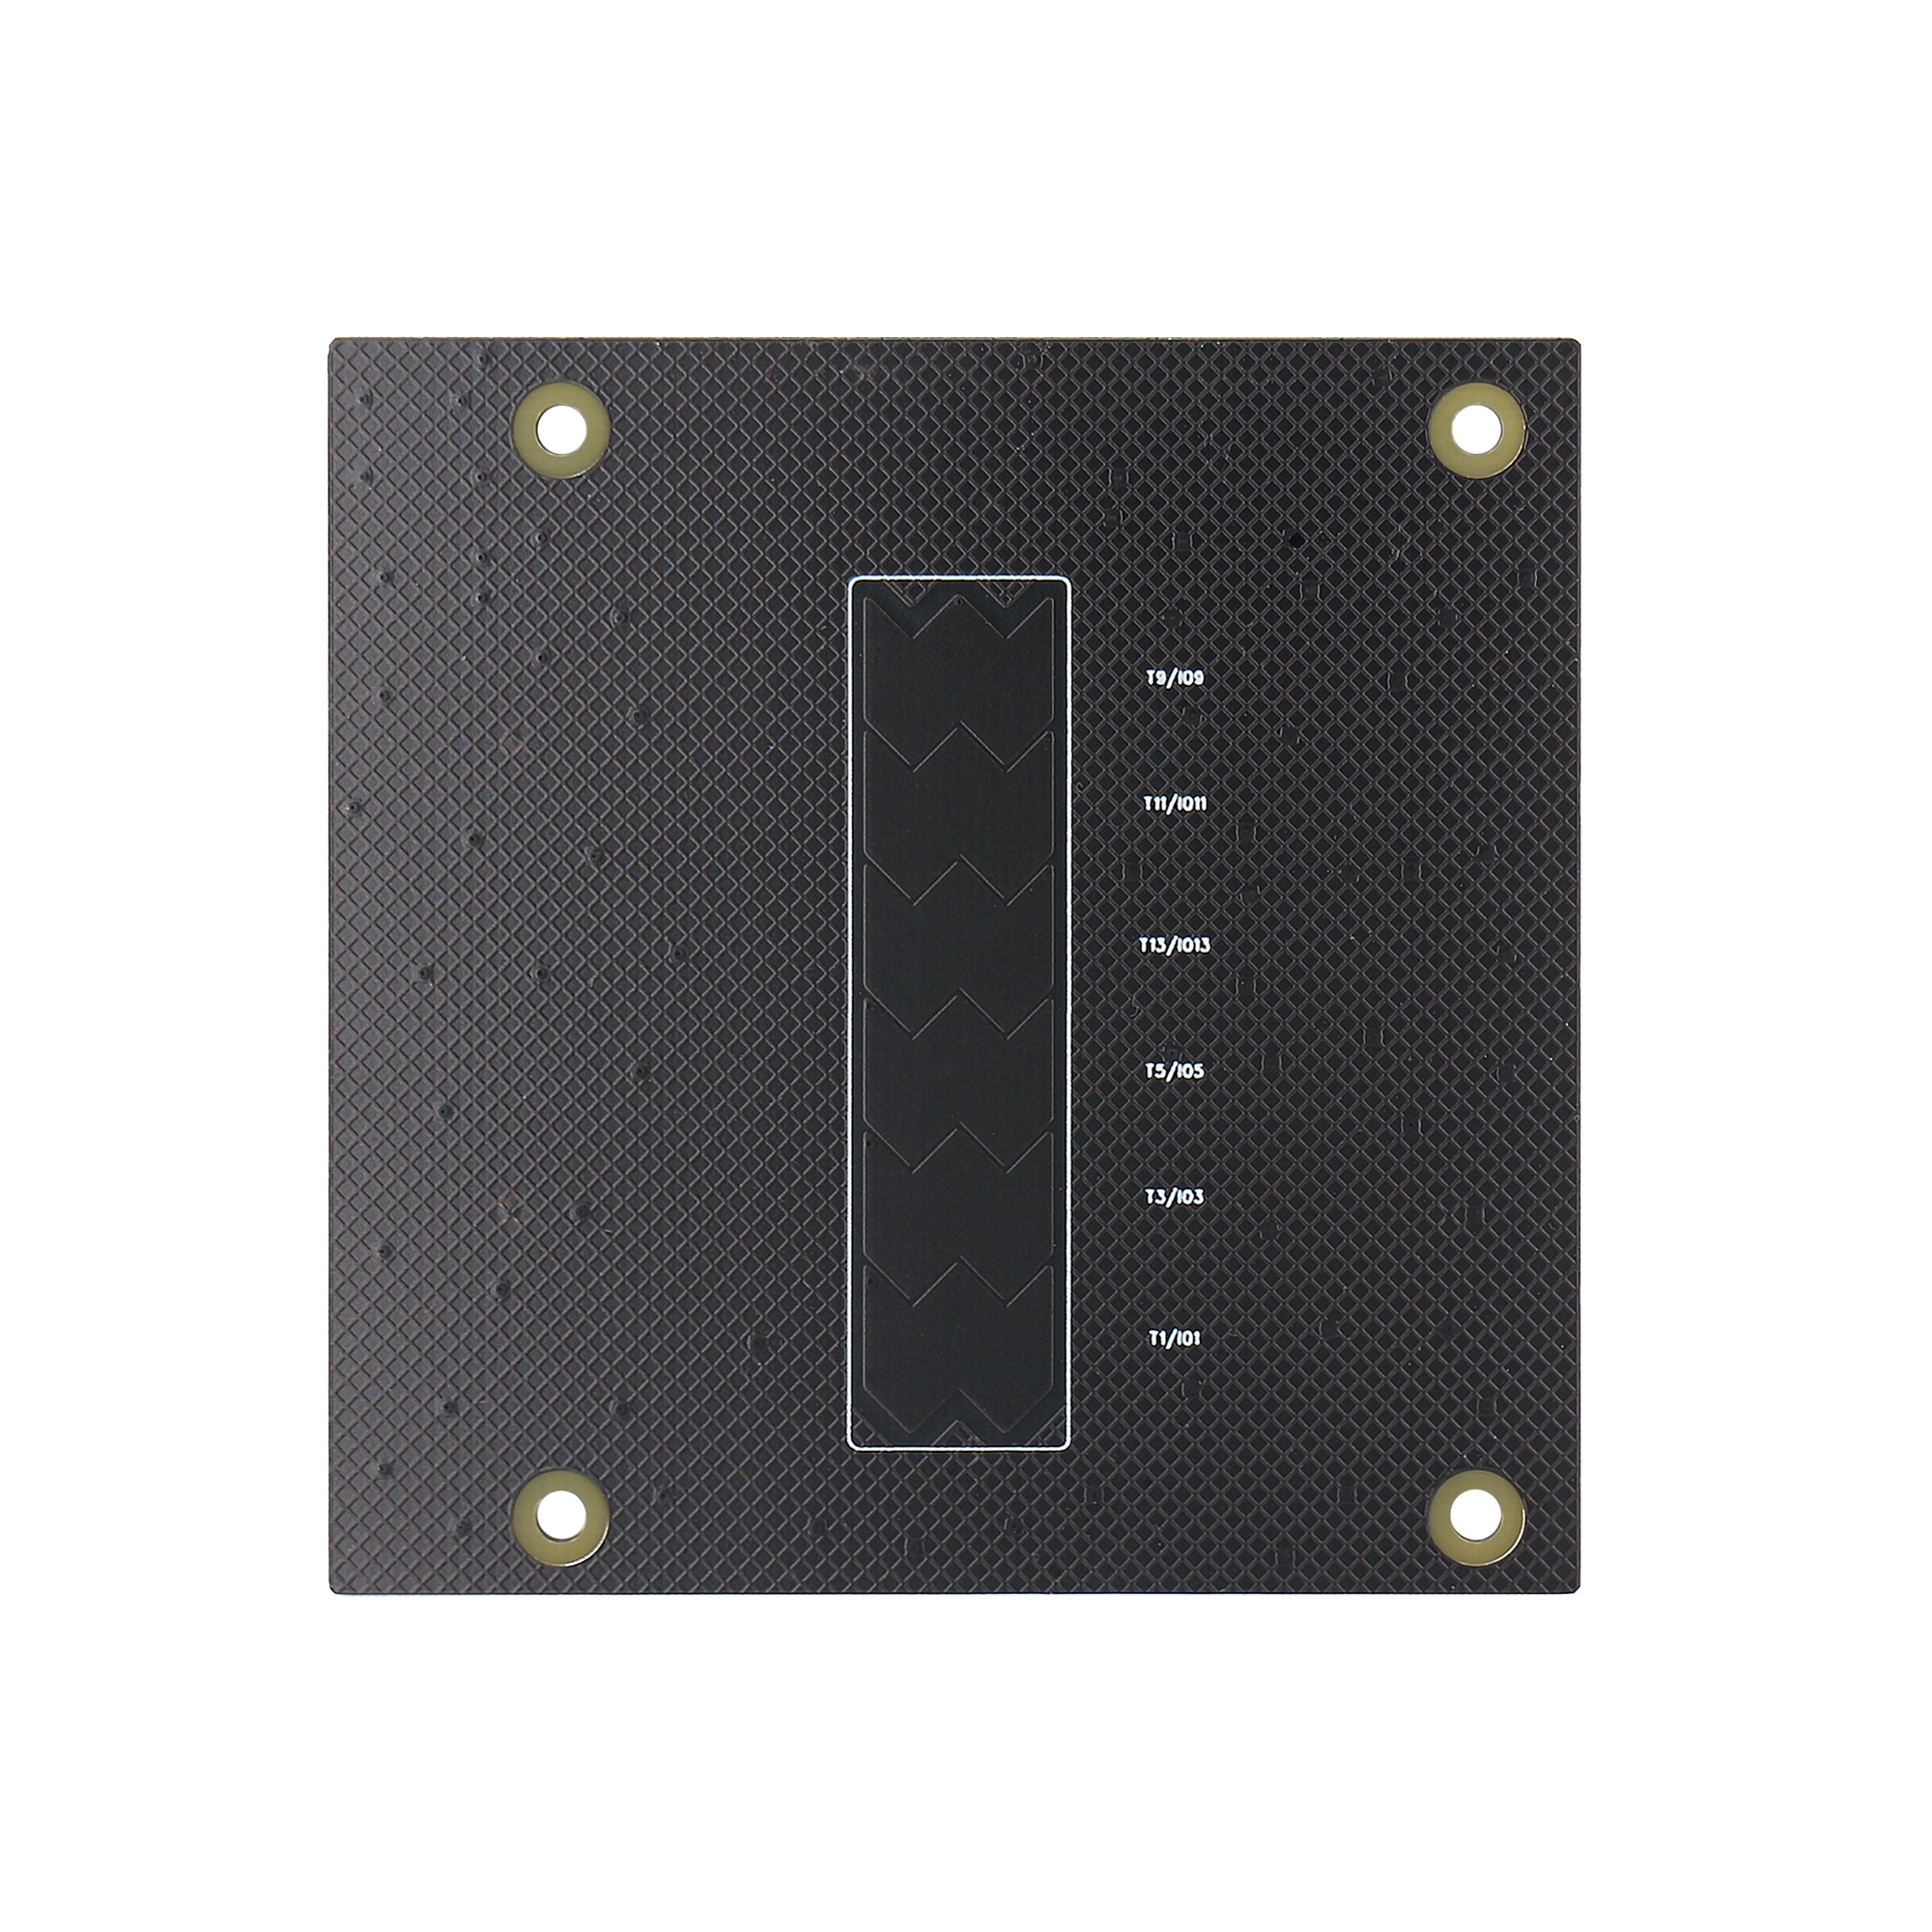
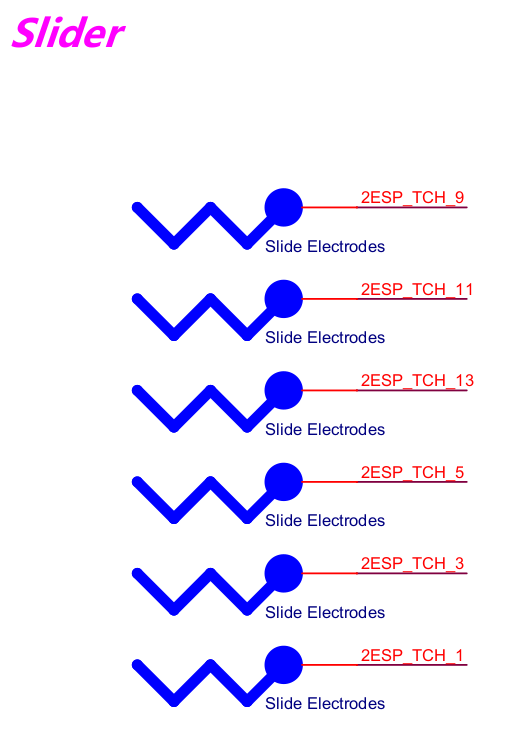
Slider-board: Capacitive touch linear slider, the relative distance of slider has up to 8-bit precision.
|
|
Slider-board Slider |
|
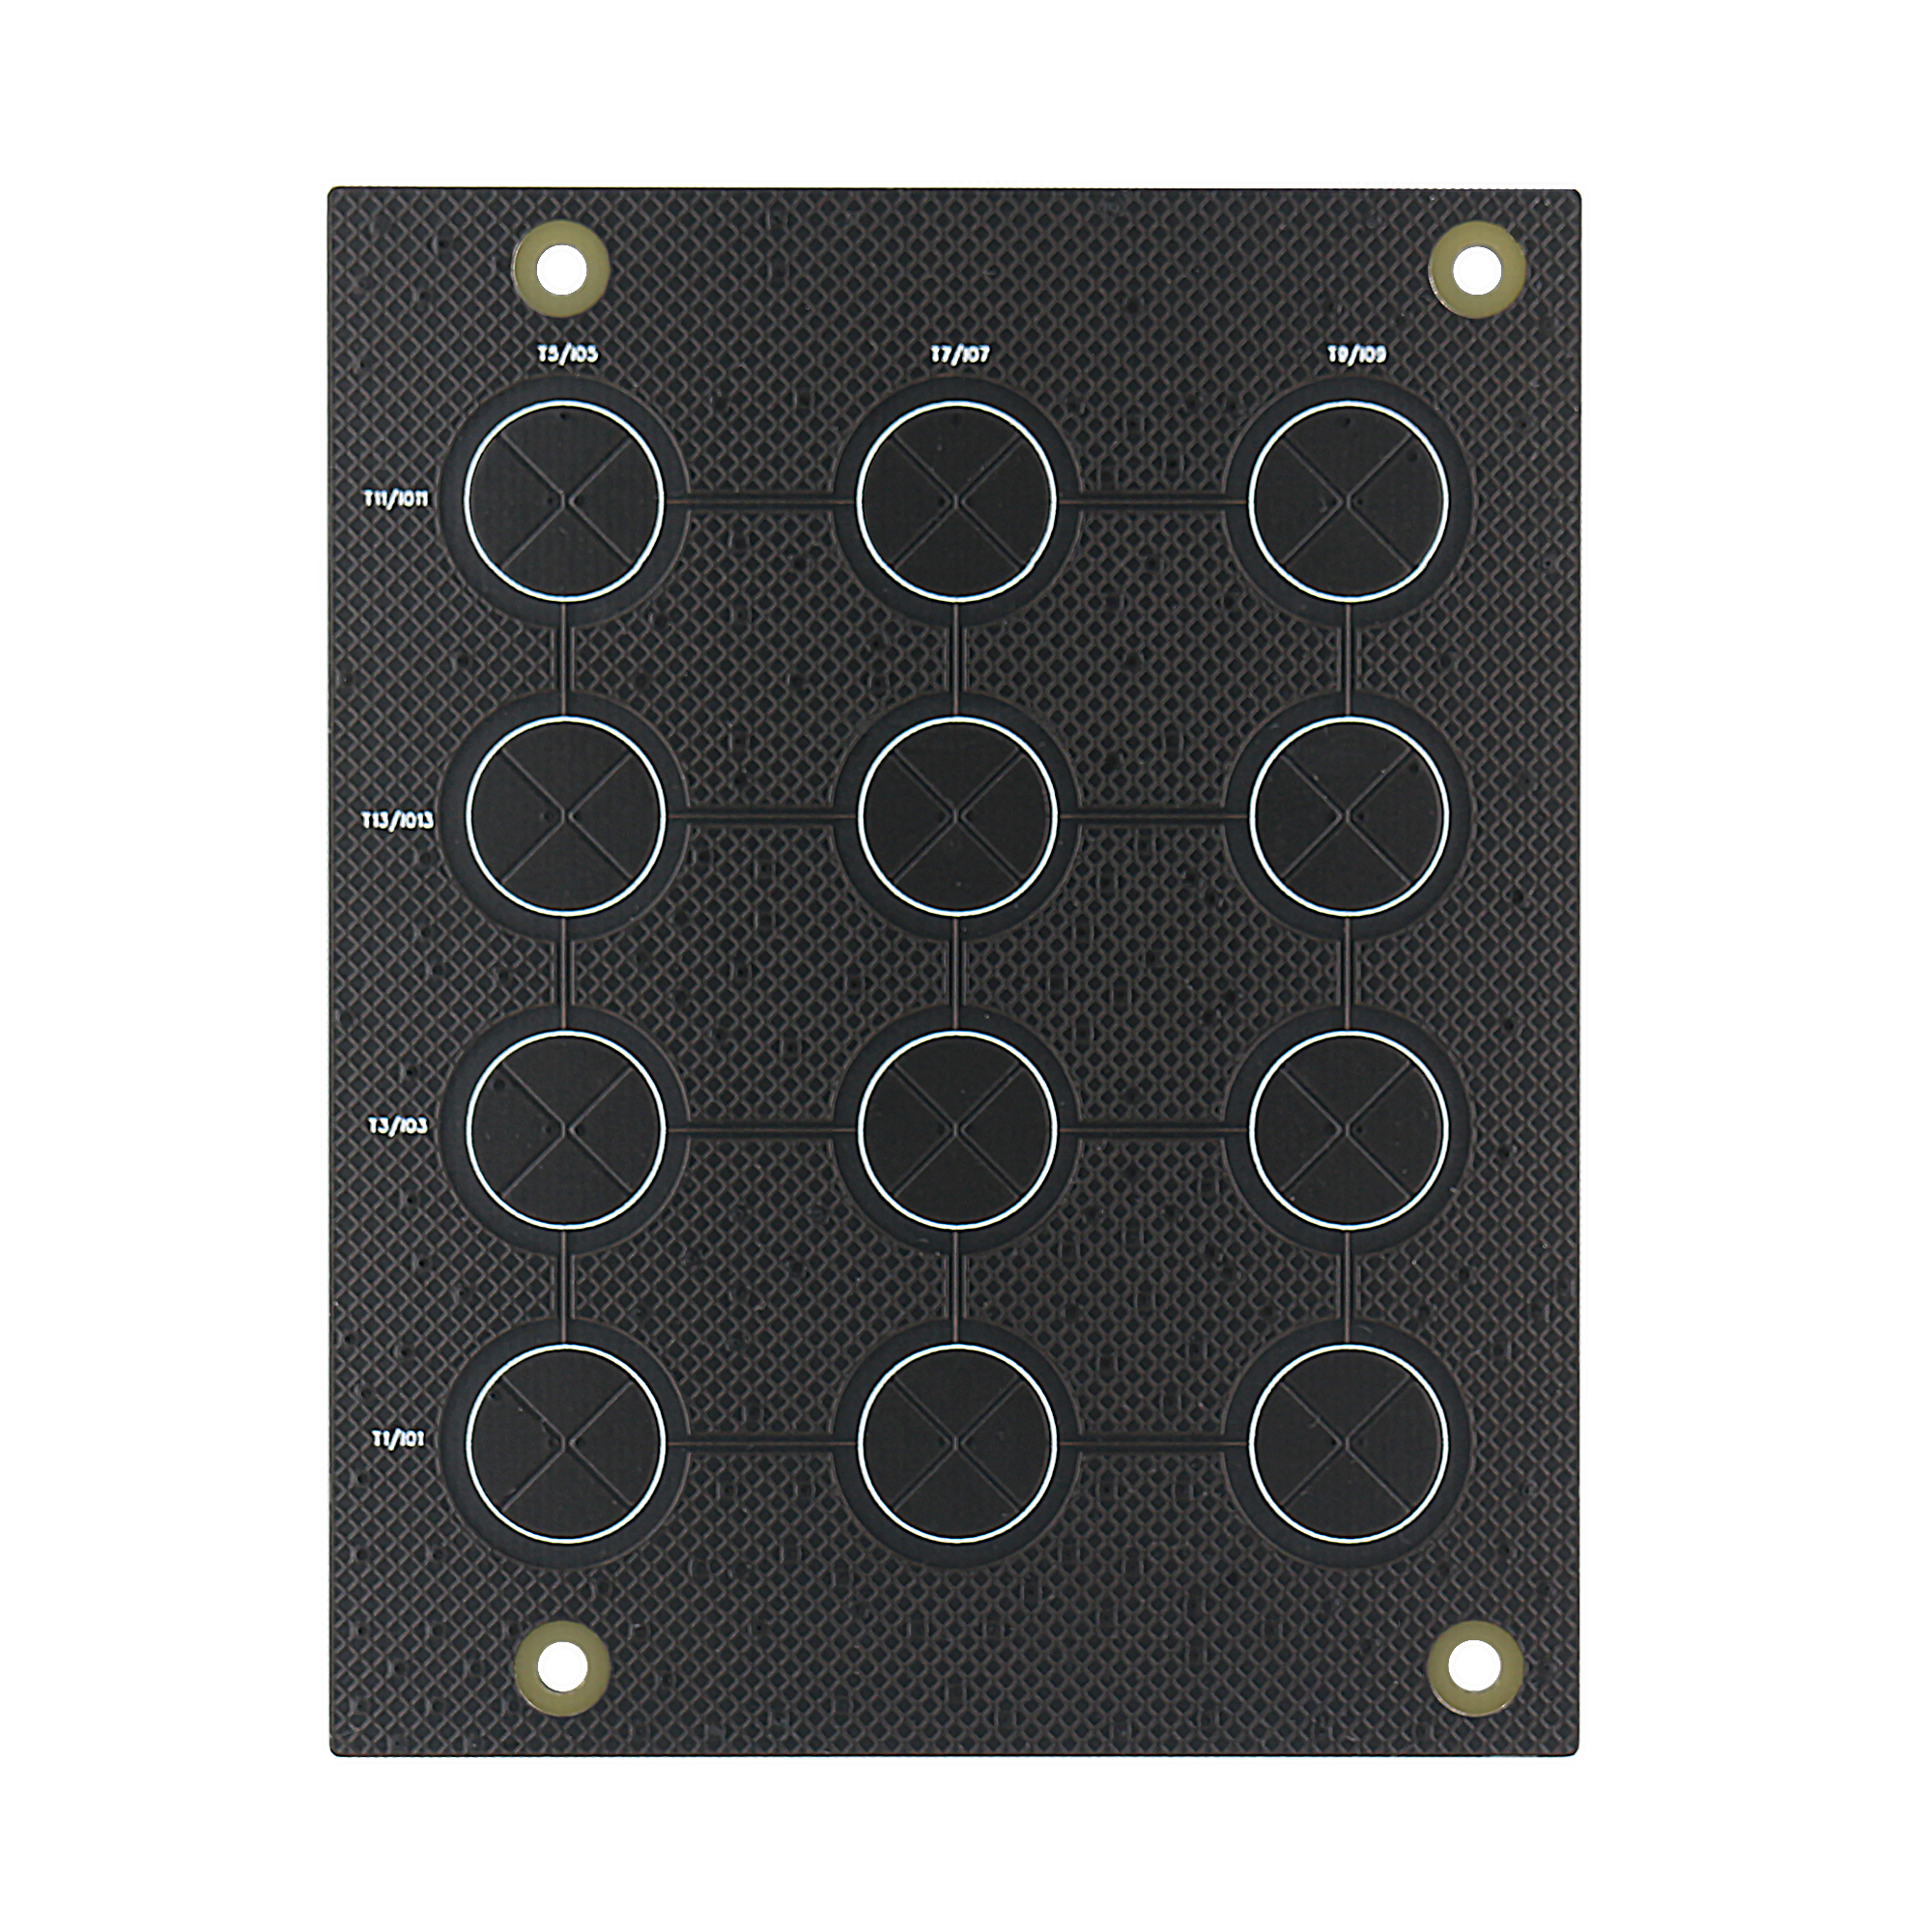
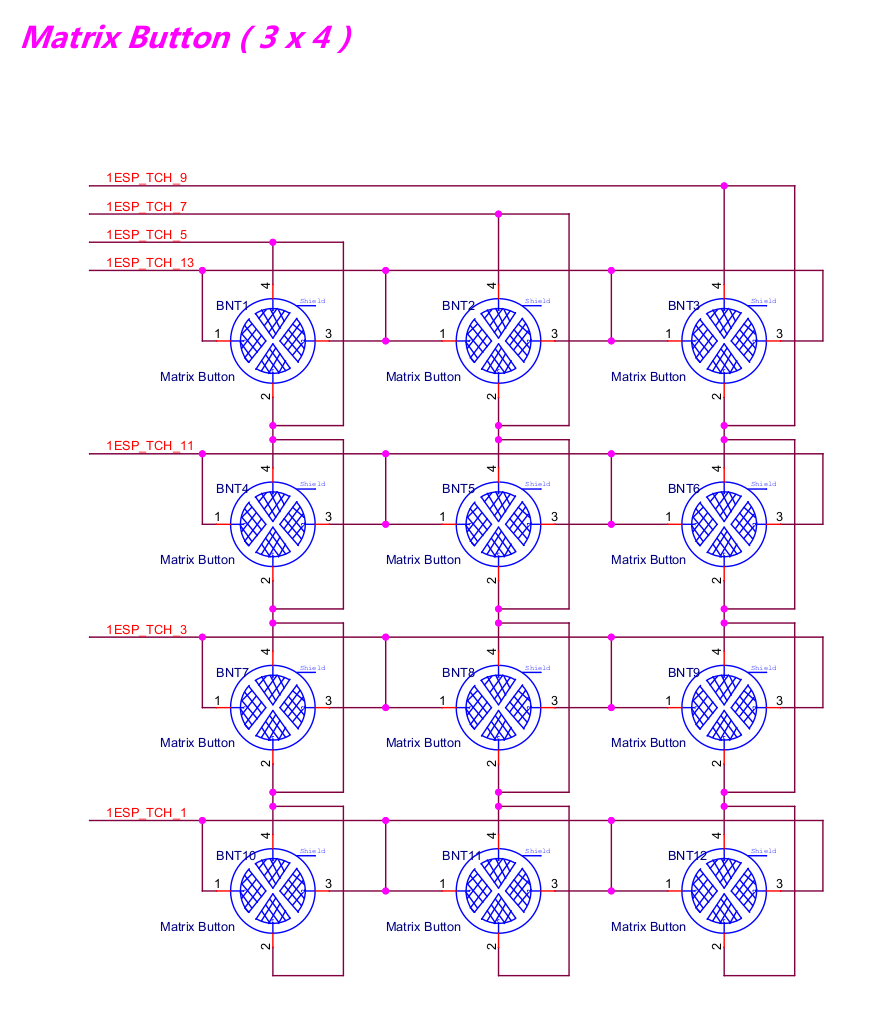
Matrix-board: 3 x 4 capacitive touch matrix button, 7 channels of touch sensor make up of 12 capacitive touch buttons.
|
|
Matrix-board Matrix button |
|
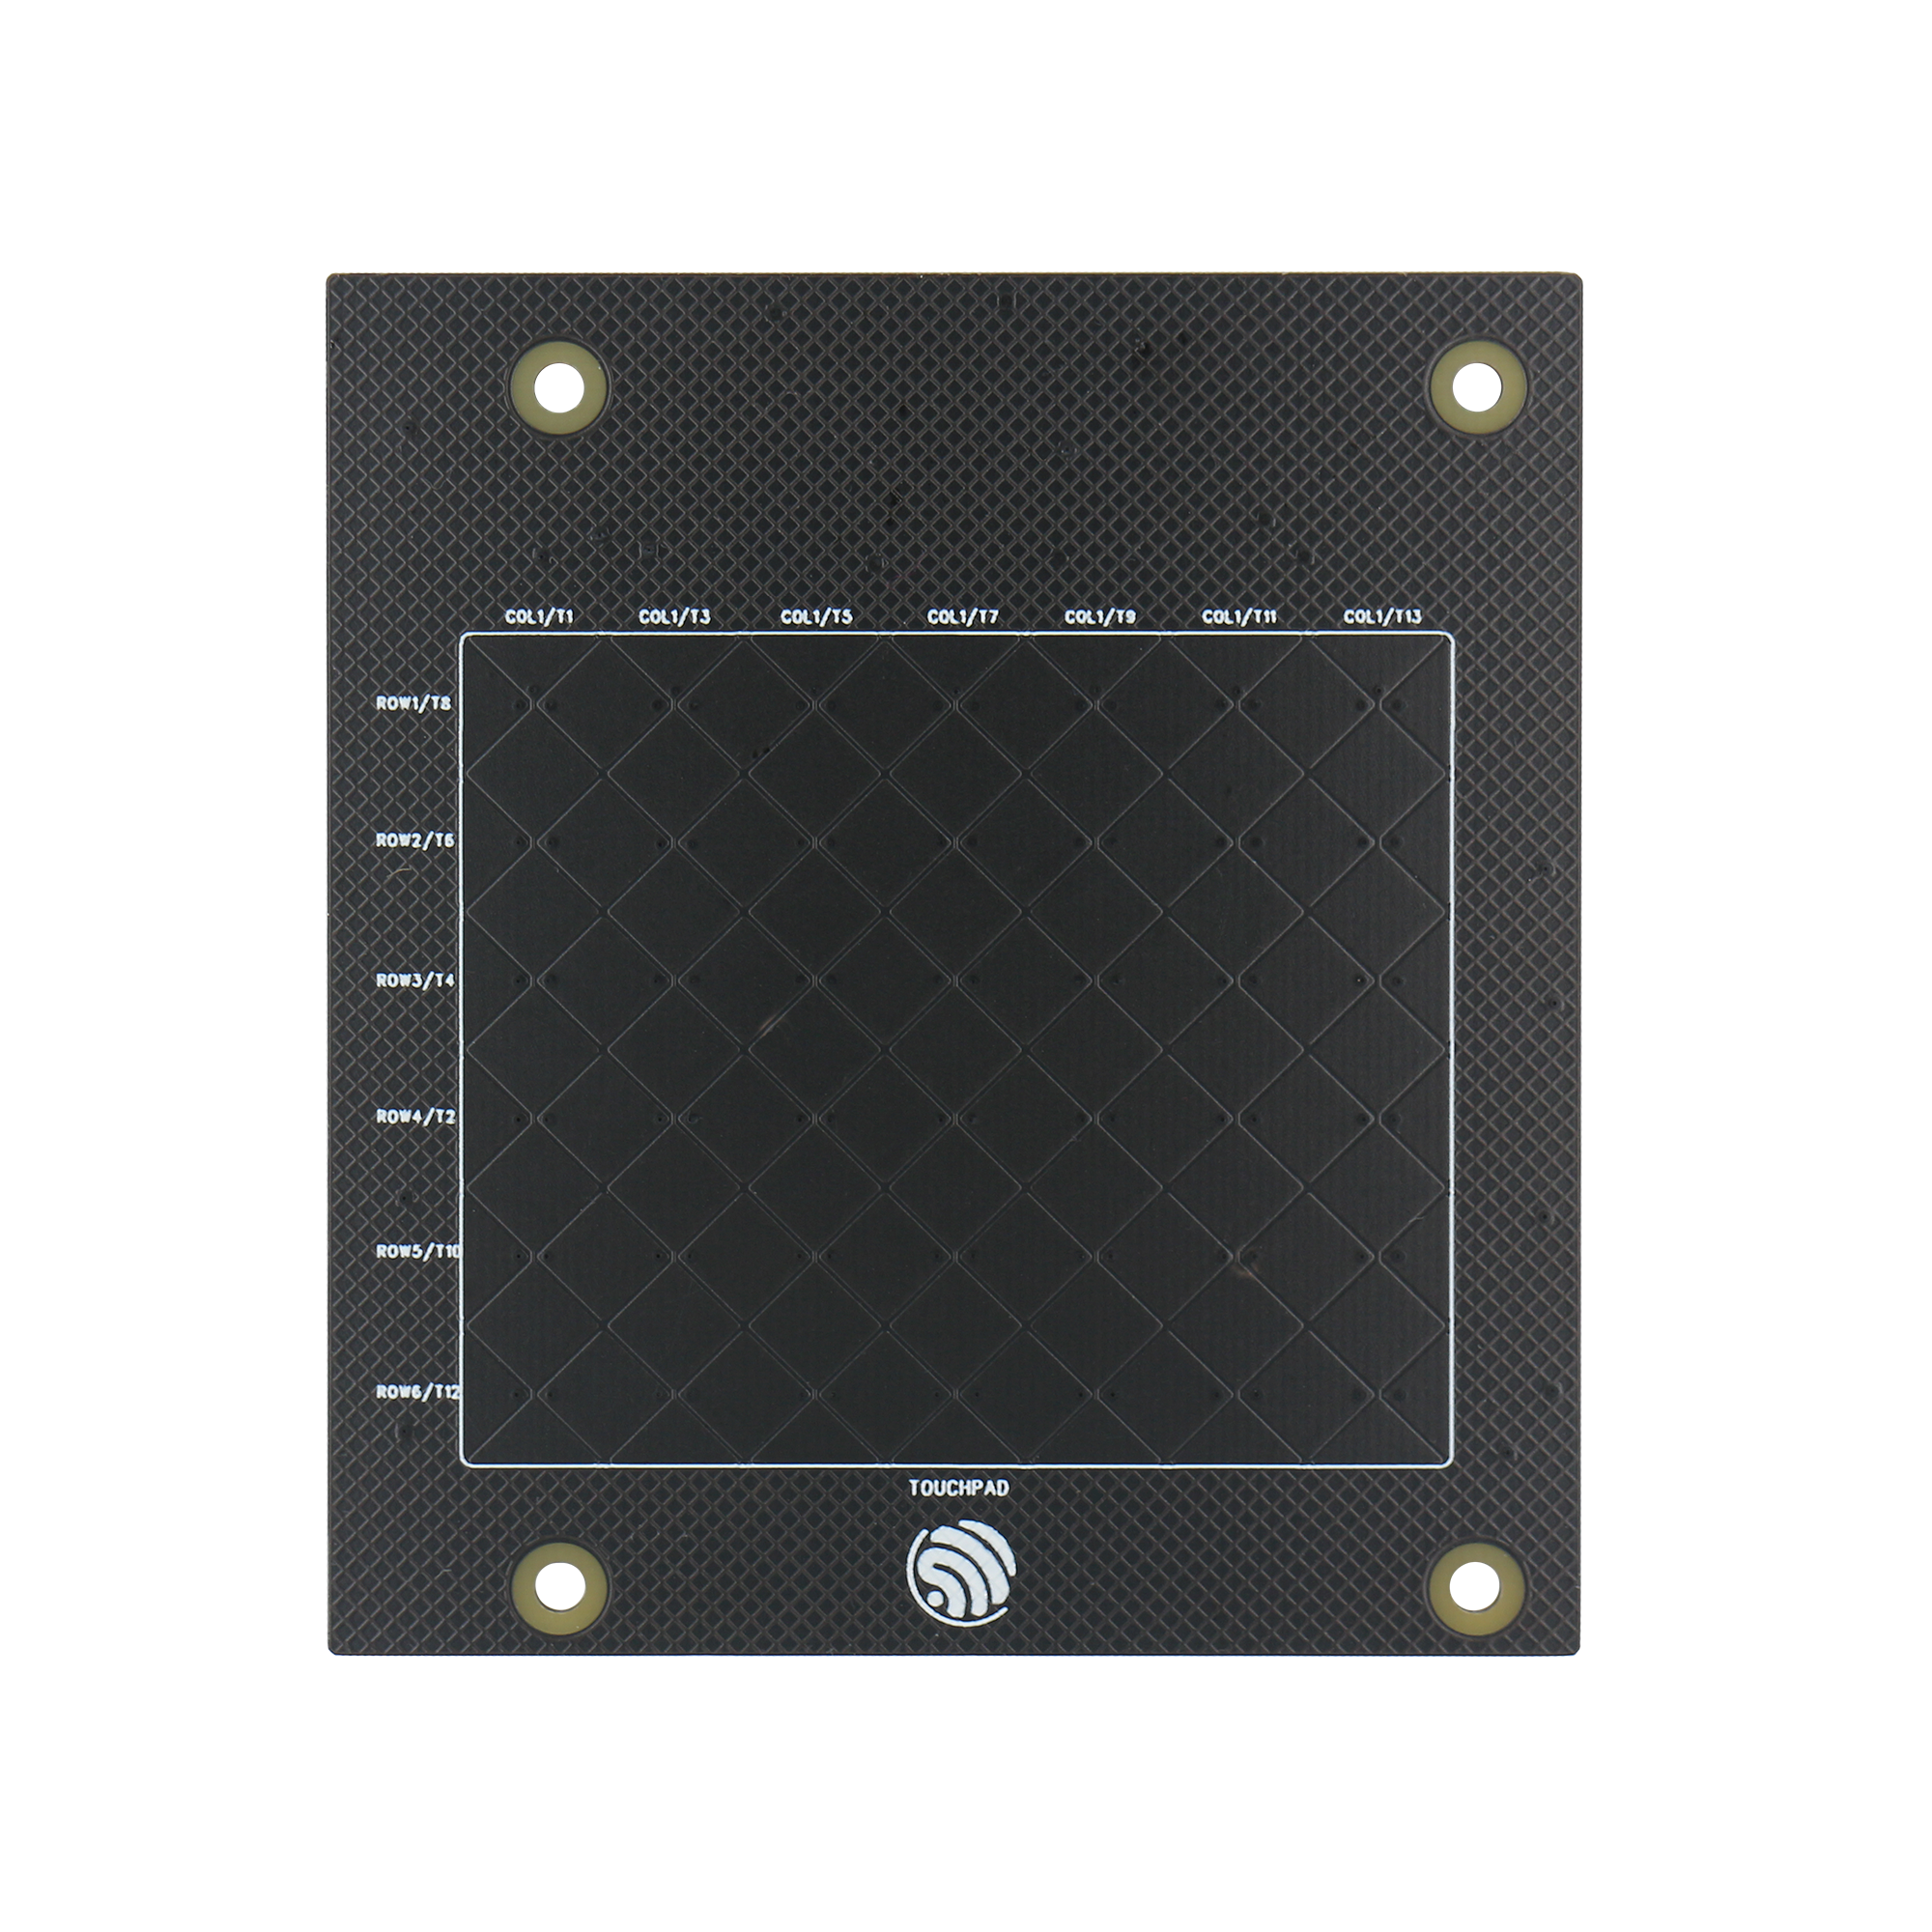
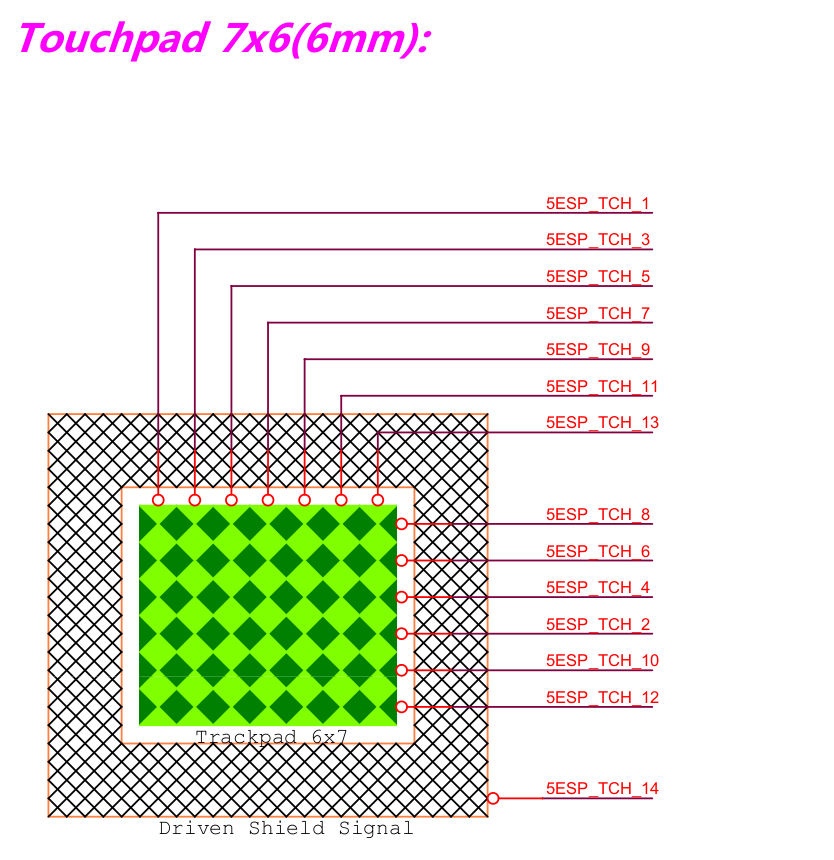
Touchpad-board: 7 x 6 two-dimension capacitive touchpad.
|
|
Touchpad-board Touchpad |
|
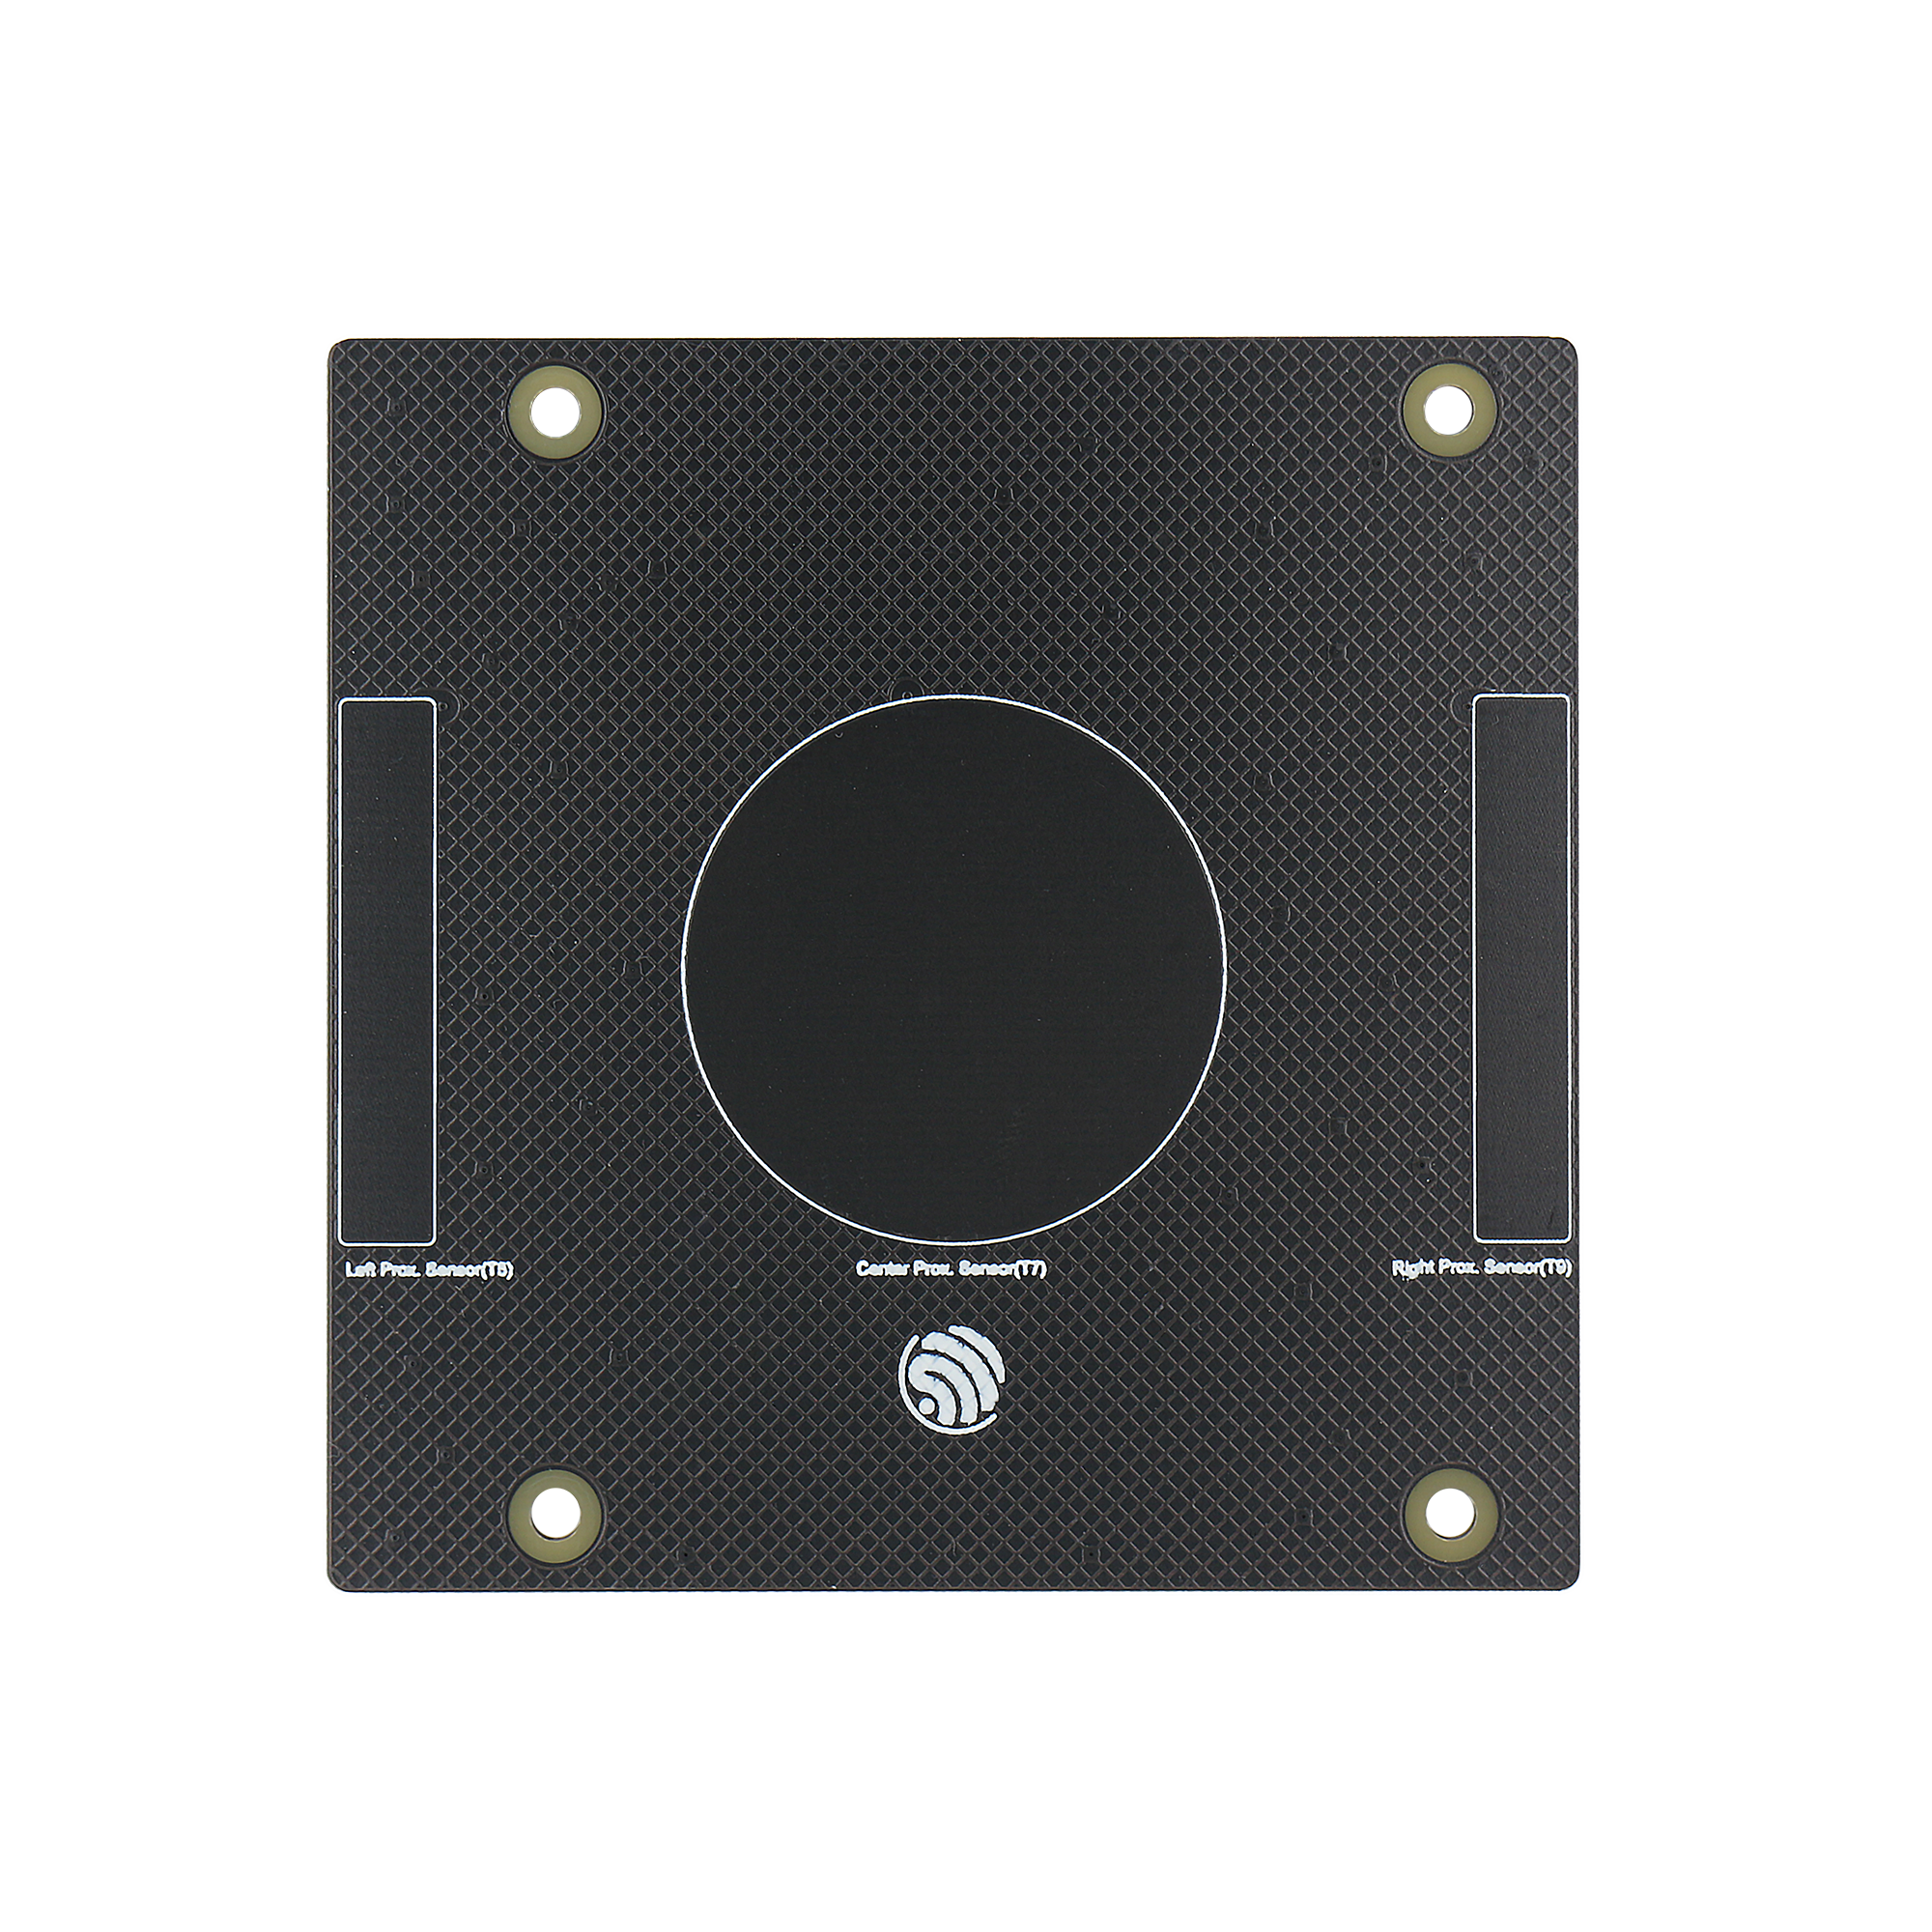
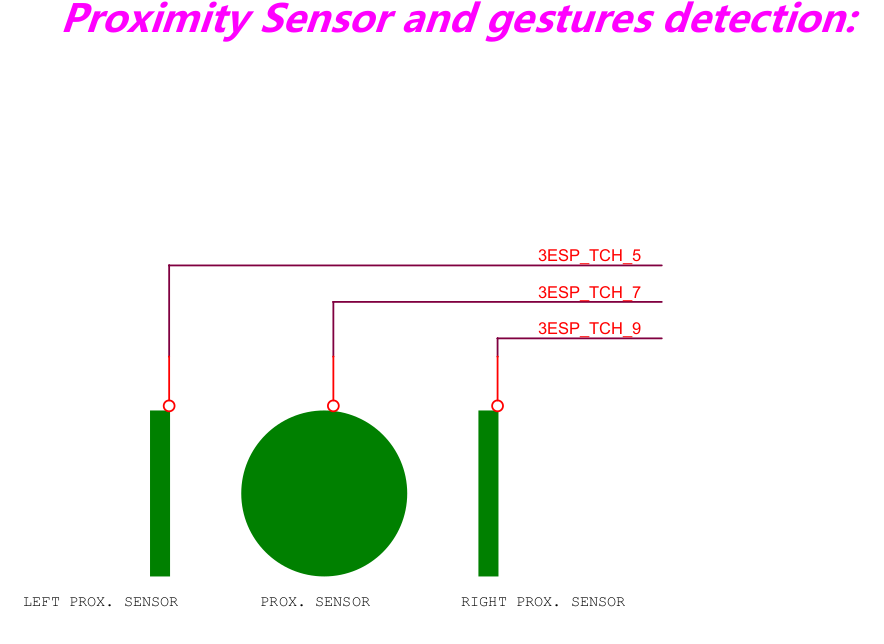
Proximity-board: Three capacitive touch proximity sensors.
|
|
Proximity-board Sensor |
|
Get Started
Install SDK and it’s dependencies:
Install ESP-IDF, please refer to ESP-IDF Programming Guide.
Use the release-4.3 version of ESP-IDF.
cd esp-idf #Enter esp-idf folder
git checkout release/v4.3 #Checkout release-v4.3 version of ESP-IDF
git submodule update #Maybe is needed
Get ESP32-S2-Touch-Devkit-1 project:
Clone esp-dev-kits repo.
git clone https://github.com/espressif/esp-dev-kits.git
Enter ESP32-S2-Touch-Devkit-1 project folder.
cd esp-dev-kits/esp32-s2-touch-devkit-1
The project’s structure is shown as followed:
├── CMakeLists.txt
├── components              #components' driver
│   ├── board_detect    #subboard detector
│   ├── buzzer              #buzzer driver
│   ├── digital_tube    #digital tube controller driver
│   ├── rgb_light       #RGB light driver(ws2812)
│   ├── subboards       #Subboards' application source file
│   └── touch_element       #Touch element library
├── main        #Main application demo logic
│   ├── CMakeLists.txt
│   └── main.c
Build & Flash ESP32-S2-Touch-Devkit-1 demo project:
Enable ESP-IDF environment variable.
cd esp-idf
. ./export.sh
Build & Flash.
cd esp-dev-kits/esp32-s2-touch-devkit-1
idf.py set-target esp32s2 #Enable esp32s2 platform
idf.py build flash
Monitor log output.
idf.py monitorExample output:
I (2880) Touch Demo: Slider sub-board plug in
I (22480) Touch Demo: Slider sub-board plug out
I (22480) Touch Demo: Nothing detected
I (41540) Touch Demo: Touchpad sub-board plug in
I (47700) Touchpad Board: Touchpad pressed, position: [0, 5]
I (47710) Touchpad Board: Position: [0, 5]
I (47720) Touchpad Board: Position: [0, 5]
I (47730) Touchpad Board: Position: [0, 6]
I (47740) Touchpad Board: Position: [0, 6]
I (47750) Touchpad Board: Position: [0, 6]
I (47760) Touchpad Board: Position: [0, 6]
I (47770) Touchpad Board: Position: [0, 7]
I (47780) Touchpad Board: Position: [0, 8]
I (47790) Touchpad Board: Position: [0, 9]
I (47800) Touchpad Board: Position: [0, 9]
I (47810) Touchpad Board: Position: [1, 10]
I (47820) Touchpad Board: Position: [2, 11]
I (47830) Touchpad Board: Position: [2, 12]
I (47840) Touchpad Board: Position: [3, 13]
I (47850) Touchpad Board: Position: [4, 14]
I (47860) Touchpad Board: Position: [5, 15]
I (47870) Touchpad Board: Position: [6, 16]
I (47880) Touchpad Board: Position: [7, 16]
I (47890) Touchpad Board: Position: [9, 17]
I (47900) Touchpad Board: Position: [10, 18]
I (47910) Touchpad Board: Position: [11, 18]
I (47920) Touchpad Board: Position: [11, 19]
I (47930) Touchpad Board: Position: [12, 20]
I (47940) Touchpad Board: Position: [13, 21]
I (47950) Touchpad Board: Position: [14, 21]
I (47960) Touchpad Board: Position: [14, 22]
I (47970) Touchpad Board: Position: [15, 23]
I (47980) Touchpad Board: Position: [15, 23]
I (47990) Touchpad Board: Position: [15, 24]
I (48000) Touchpad Board: Position: [15, 24]
I (48010) Touchpad Board: Position: [15, 24]
I (48020) Touchpad Board: Position: [16, 24]
I (48030) Touchpad Board: Position: [16, 24]
I (48040) Touchpad Board: Position: [16, 24]
I (48050) Touchpad Board: Position: [16, 23]
I (48060) Touchpad Board: Position: [16, 23]
I (48070) Touchpad Board: Position: [16, 22]
I (48080) Touchpad Board: Position: [16, 22]
I (48090) Touchpad Board: Position: [16, 21]
I (48100) Touchpad Board: Touchpad released, position: [16, 21]
Notes
Some new Touch Sensor features (Touchpad, Touch proximity) are not supported in ESP-IDF Touch Element library, so we copy Touch Element from ESP-IDF components into this demo project’s components’ folder and add the necessary features. They will appear in the future version of ESP-IDF.
Troubleshooting
Q1: Why Proximity-board is connected with Motherboard, they don’t work or work abnormally?
A1: Though all of those subboards are hot-swappable theoretically, the Proximity-board needs to startup in an ideal environment(Far away from your hands). If it goes wrong, you can reset it mandatorily by releasing the power-switch.