TCP/IP AT Examples
This document provides detailed command examples to illustrate how to utilize TCP/IP AT Commands on ESP32.
ESP32 as a TCP client in single connection
Set the Wi-Fi mode to station.
Command:
AT+CWMODE=1
Response:
OK
Connect to the router.
Command:
AT+CWJAP="espressif","1234567890"
Response:
WIFI CONNECTED
WIFI GOT IP

OK
Note:
The SSID and password you entered may be different from those in the above command. Please replace the SSID and password with those of your router settings.
Query the device’s IP address.
Command:
AT+CIPSTA?
Response:
+CIPSTA:ip:"192.168.3.112"
+CIPSTA:gateway:"192.168.3.1"
+CIPSTA:netmask:"255.255.255.0"

OK
Note:
The query results you obtained may be different from those in the above response.
Connect the PC to the same router which ESP32 is connected to.
Use a network tool on the PC to create a TCP server. For example, the TCP server on PC is
192.168.3.102, and the port is8080.Connect ESP32 to the TCP server as a client over TCP. The server’s IP address is
192.168.3.102, and the port is8080.Command:
AT+CIPSTART="TCP","192.168.3.102",8080
Response:
CONNECT

OK
Send 4 bytes of data.
Command:
AT+CIPSEND=4
Response:
OK

>
Input 4 bytes, for example,
test, then AT will respond the following message.Recv 4 bytes SEND OK
Note:
If the number of bytes inputted are more than the length (n) set by
AT+CIPSEND, the system will replybusy p..., and send the first n bytes. And after sending the first n bytes, the system will replySEND OK.
Receive 4 bytes of data.
Assume that the TCP server sends 4 bytes of data (data is
test), the system will prompt:+IPD,4:test
ESP32 as a TCP server in multiple connections
When ESP32 works as a TCP server, multiple connections should be enabled by AT+CIPMUX=1 command, because in most cases more than one client needs to be connected to the ESP32 server.
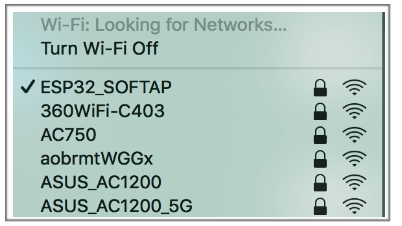
Below is an example showing how a TCP server is established when ESP32 works in the softAP mode. If ESP32 works as a station, you can set up a server in the same way mentioned above after connecting ESP32 to the router.
Set the Wi-Fi mode to softAP.
Command:
AT+CWMODE=2
Response:
OK
Enable multiple connections.
Command:
AT+CIPMUX=1
Response:
OK
Set softAP.
Command:
AT+CWSAP="ESP32_softAP","1234567890",5,3
Response:
OK
Query softAP information.
Command:
AT+CIPAP?
Response:
AT+CIPAP?
+CIPAP:ip:"192.168.4.1"
+CIPAP:gateway:"192.168.4.1"
+CIPAP:netmask:"255.255.255.0"

OK
Note:
The address you obtained may be different from that in the above response.
Set up a TCP server, the default port is
333.Command:
AT+CIPSERVER=1
Response:
OK
Connect the PC to the ESP32 softAP.
Use a network tool on PC to create a TCP client and connect it to the TCP server that ESP32 has created.
Send 4 bytes of data to connection link 0.
Command:
AT+CIPSEND=0,4
Response:
OK

>
Input 4 bytes, for example,
test, then AT will respond the following messages.Recv 4 bytes SEND OK
Note:
If the number of bytes inputted are more than the length (n) set by
AT+CIPSEND, the system will replybusy p..., and send the first n bytes. And after sending the first n bytes, the system will replySEND OK.
Receive 4 bytes of data from connection link 0.
Assume that the TCP server sends 4 bytes of data (data is
test), the system will prompt:+IPD,0,4:test
Close TCP connection.
Command:
AT+CIPCLOSE=0
Response:
0,CLOSED

OK
UDP transmission with fixed remote IP address and port
Set the Wi-Fi mode to station.
Command:
AT+CWMODE=1
Response:
OK
Connect to the router.
Command:
AT+CWJAP="espressif","1234567890"
Response:
WIFI CONNECTED
WIFI GOT IP

OK
Note:
The SSID and password you entered may be different from those in the above command. Please replace the SSID and password with those of your router settings.
Query the device’s IP address.
Command:
AT+CIPSTA?
Response:
+CIPSTA:ip:"192.168.3.112"
+CIPSTA:gateway:"192.168.3.1"
+CIPSTA:netmask:"255.255.255.0"

OK
Note:
The query results you obtained may be different from those in the above response.
Connect the PC to the same router which ESP32 is connected to.
Use a network tool on the PC to create UDP transmission. For example, the PC’s IP address is
192.168.3.102, and the port is8080.Enable multiple connections.
Command:
AT+CIPMUX=1
Response:
OK
Create a UDP transmission. The connection link is 4, the remote host’s IP address is
192.168.3.102, the remote port is8080, the local port is1112, and the mode is0.Important
In UDP transmission, whether the remote IP address and port are fixed or not is determined by the
modeparameter of AT+CIPSTART. If the parameter is 0, a specific connection link ID will be given to ensure that the remote IP address and port are fixed and the data sender and receiver will not be replaced by other devices.Command:
AT+CIPSTART=4,"UDP","192.168.3.102",8080,1112,0
Response:
4,CONNECT

OK
Note:
"192.168.3.102"and8080are the remote IP address and port of UDP transmission on the remote side, i.e., the UDP configuration set by PC.1112is the local port number of ESP32. You can define this port number, or else, a random port will be used.0means that the remote IP address and port are fixed and cannot be changed. For example, when there is another PC creating a UDP entity and sending data to ESP32 port 1112, ESP32 will still receive the data from UDP port 1112, and if the AT commandAT+CIPSEND=4,Xis used, the data will still be sent to the first PC end. However, if the parameter is not set as0, the data will be sent to the new PC.
Send 7 bytes of data to connection link 4.
Command:
AT+CIPSEND=4,7
Response:
OK

>
Input 7 bytes, for example,
abcdefg, then AT will respond the following messages.Recv 7 bytes SEND OK
Note:
If the number of bytes inputted are more than the length (n) set by
AT+CIPSEND, the system will replybusy p..., and send the first n bytes. And after sending the first n bytes, the system will replySEND OK.
Receive 4 bytes of data from connection link 4.
Assume that the PC sends 4 bytes of data (data is
test), the system will prompt:+IPD,4,4:test
Close UDP connection link 4.
Command:
AT+CIPCLOSE=4
Response:
4,CLOSED

OK
UDP transmission with changeable remote IP address and port
Set the Wi-Fi mode to station.
Command:
AT+CWMODE=1
Response:
OK
Connect to the router.
Command:
AT+CWJAP="espressif","1234567890"
Response:
WIFI CONNECTED
WIFI GOT IP

OK
Note:
The SSID and password you entered may be different from those in the above command. Please replace the SSID and password with those of your router settings.
Query the device’s IP address.
Command:
AT+CIPSTA?
Response:
+CIPSTA:ip:"192.168.3.112"
+CIPSTA:gateway:"192.168.3.1"
+CIPSTA:netmask:"255.255.255.0"

OK
Note:
The query results you obtained may be different from those in the above response.
Connect the PC to the same router which ESP32 is connected to.
Use a network tool on the PC to create UDP transmission. For example, the PC’s IP address is
192.168.3.102, and the port is8080.Enable single connections.
Command:
AT+CIPMUX=0
Response:
OK
Create a UDP transmission. The remote host’s IP address is
192.168.3.102, the remote port is8080, the local port is1112, and the mode is2.Command:
AT+CIPSTART="UDP","192.168.3.102",8080,1112,2
Response:
CONNECT

OK
Note:
"192.168.3.102"and 8080 are the remote IP address and port of UDP transmission on the remote side, i.e., the UDP configuration set by PC.1112is the local port number of ESP32. You can define this port number, or else, a random port will be used.2means the opposite terminal of UDP transmission can be changed. The remote IP address and port will be automatically changed to those of the last UDP connection to ESP32.
Send 4 bytes of data.
Command:
AT+CIPSEND=4
Response:
OK

>
Input 4 bytes, for example,
test, then AT will respond the following messages.Recv 4 bytes SEND OK
Note:
If the number of bytes inputted are more than the length (n) set by
AT+CIPSEND, the system will replybusy p..., and send the first n bytes. And after sending the first n bytes, the system will replySEND OK.
Send data to any other UDP terminal. For example, you can send 4 bytes of data with the remote host’s IP address as
192.168.3.103and the remote port as1000.If you want to send data to any other UDP terminal, please designate the IP address and port of the target terminal in the command.
Command:
AT+CIPSEND=4,"192.168.3.103",1000
Response:
OK

>
Input 4 bytes, for example,
test, then AT will respond the following messages.Recv 4 bytes SEND OK
Receive 4 bytes of data.
Assume that the PC sends 4 bytes of data (data is
test), the system will prompt:+IPD,4:test
Close UDP connection.
Command:
AT+CIPCLOSE
Response:
CLOSED

OK
ESP32 as an SSL client in single connection
Set the Wi-Fi mode to station.
Command:
AT+CWMODE=1
Response:
OK
Connect to the router.
Command:
AT+CWJAP="espressif","1234567890"
Response:
WIFI CONNECTED
WIFI GOT IP

OK
Note:
The SSID and password you entered may be different from those in the above command. Please replace the SSID and password with those of your router settings.
Query the device’s IP address.
Command:
AT+CIPSTA?
Response:
+CIPSTA:ip:"192.168.3.112"
+CIPSTA:gateway:"192.168.3.1"
+CIPSTA:netmask:"255.255.255.0"

OK
Note:
The query results you obtained may be different from those in the above response.
Connect the PC to the same router which ESP32 is connected to.
Use the OpenSSL command on the PC to create an SSL server. For example, the SSL server on PC is
192.168.3.102, and the port is8070.Command:
openssl s_server -cert /home/esp-at/components/customized_partitions/raw_data/server_cert/server_cert.crt -key /home/esp-at/components/customized_partitions/raw_data/server_key/server.key -port 8070
Response:
ACCEPT
Connect the ESP32 to the SSL server as a client over SSL. The server’s IP address is
192.168.3.102, and the port is8070.Command:
AT+CIPSTART="SSL","192.168.3.102",8070
Response:
CONNECT

OK
Send 4 bytes of data.
Command:
AT+CIPSEND=4
Response:
OK

>
Input 4 bytes, for example,
test, then AT will respond the following message.Recv 4 bytes SEND OK
Note:
If the number of bytes inputted are more than the length (n) set by
AT+CIPSEND, the system will replybusy p..., and send the first n bytes. And after sending the first n bytes, the system will replySEND OK.
Receive 4 bytes of data.
Assume that the SSL server sends 4 bytes of data (data is
test), the system will prompt:+IPD,4:test
ESP32 as an SSL server in multiple connections
When ESP32 works as an SSL server, multiple connections should be enabled by AT+CIPMUX=1 command, because in most cases more than one client needs to be connected to the ESP32 server.
Below is an example showing how an SSL server is established when ESP32 works in the softAP mode. If ESP32 works as a station, after connecting to the router, follow the steps for establishing a connection to an SSL server in this example.
Set the Wi-Fi mode to softAP.
Command:
AT+CWMODE=2
Response:
OK
Enable multiple connections.
Command:
AT+CIPMUX=1
Response:
OK
Configure the ESP32 softAP.
Command:
AT+CWSAP="ESP32_softAP","1234567890",5,3
Response:
OK
Query softAP information.
Command:
AT+CIPAP?
Response:
AT+CIPAP?
+CIPAP:ip:"192.168.4.1"
+CIPAP:gateway:"192.168.4.1"
+CIPAP:netmask:"255.255.255.0"

OK
Note:
The address you obtained may be different from that in the above response.
Set up an SSL server.
Command:
AT+CIPSERVER=1,8070,"SSL"
Response:
OK
Connect the PC to the ESP32 softAP.
Use the OpenSSL command on PC to create an SSL client and connect it to the SSL server that ESP32 has created.
Command:
openssl s_client -host 192.168.4.1 -port 8070
Response on the ESP32:
CONNECT
Send 4 bytes of data to connection link 0.
Command:
AT+CIPSEND=0,4
Response:
OK

>
Input 4 bytes, for example,
test, then AT will respond the following messages.Recv 4 bytes SEND OK
Note:
If the number of bytes inputted are more than the length (n) set by
AT+CIPSEND, the system will replybusy p..., and send the first n bytes. And after sending the first n bytes, the system will replySEND OK.
Receive 4 bytes of data from connection link 0.
Assume that the SSL server sends 4 bytes of data (data is
test), the system will prompt:+IPD,0,4:test
Close SSL connection.
Command:
AT+CIPCLOSE=0
Response:
0,CLOSED

OK
ESP32 as an SSL client to create a single connection with mutual authentication
In this example, the certificate used is the default certificate in esp-at. You can also use your own certificate:
To use your own SSL client certificate, you can either update it at runtime using the AT+SYSMFG command (refer to PKI Configuration in AT+SYSMFG command examples), or replace the default certificate by recompiling the firmware (refer to How to Update PKI Configuration).
To use your own SSL server certificate, replace the SSL server certificate path below with your own certificate path.
Set the Wi-Fi mode to station.
Command:
AT+CWMODE=1
Response:
OK
Connect to the router.
Command:
AT+CWJAP="espressif","1234567890"
Response:
WIFI CONNECTED
WIFI GOT IP

OK
Note:
The SSID and password you entered may be different from those in the above command. Please replace the SSID and password with those of your router settings.
Set the SNTP server.
Command:
AT+CIPSNTPCFG=1,8,"cn.ntp.org.cn","ntp.sjtu.edu.cn"
Response:
OK
Note:
You can set the SNTP server according to your country’s time zone.
Query the SNTP time.
Command:
AT+CIPSNTPTIME?
Response:
+CIPSNTPTIME:Mon Oct 18 20:12:27 2021
OK
Note:
You can check whether the SNTP time matches the real-time time to determine whether the SNTP server you set takes effect.
Query the device’s IP address.
Command:
AT+CIPSTA?
Response:
+CIPSTA:ip:"192.168.3.112"
+CIPSTA:gateway:"192.168.3.1"
+CIPSTA:netmask:"255.255.255.0"

OK
Note:
The query results you obtained may be different from those in the above response.
Connect the PC to the same router which ESP32 is connected to.
Use the OpenSSL command on the PC to create an SSL server. For example, the SSL server on PC is
192.168.3.102, and the port is8070.Command:
openssl s_server -CAfile /home/esp-at/components/customized_partitions/raw_data/server_ca/server_ca.crt -cert /home/esp-at/components/customized_partitions/raw_data/server_cert/server_cert.crt -key /home/esp-at/components/customized_partitions/raw_data/server_key/server.key -port 8070 -verify_return_error -verify_depth 1 -Verify 1
Response on the ESP32:
CONNECT
Note:
The certificate path in the command can be adjusted according to the location of your certificate.
The ESP32 sets up the SSL client mutual authentication configuration.
Command:
AT+CIPSSLCCONF=3,0,0
Response:
OK
Connect the ESP32 to the SSL server as a client over SSL. The server’s IP address is
192.168.3.102, and the port is8070.Command:
AT+CIPSTART="SSL","192.168.3.102",8070
Response:
CONNECT

OK
Send 4 bytes of data.
Command:
AT+CIPSEND=4
Response:
OK

>
Input 4 bytes, for example,
test, then AT will respond the following message.Recv 4 bytes SEND OK
Note:
If the number of bytes inputted are more than the length (n) set by
AT+CIPSEND, the system will replybusy p..., and send the first n bytes. And after sending the first n bytes, the system will replySEND OK.
Receive 4 bytes of data.
Assume that the SSL server sends 4 bytes of data (data is
test), the system will prompt:+IPD,4:test
ESP32 as an SSL server to create multiple connections with mutual authentication
When ESP32 works as an SSL server, multiple connections should be enabled by AT+CIPMUX=1 command, because in most cases more than one client needs to be connected to the ESP32 server.
Below is an example showing how an SSL server is established when ESP32 works in the station mode. If ESP32 works as a softAP, refer to the example of ESP32 as an SSL server in multiple connections.
Set the Wi-Fi mode to station.
Command:
AT+CWMODE=1
Response:
OK
Connect to the router.
Command:
AT+CWJAP="espressif","1234567890"
Response:
WIFI CONNECTED
WIFI GOT IP

OK
Note:
The SSID and password you entered may be different from those in the above command. Please replace the SSID and password with those of your router settings.
Query the device’s IP address.
Command:
AT+CIPSTA?
Response:
+CIPSTA:ip:"192.168.3.112"
+CIPSTA:gateway:"192.168.3.1"
+CIPSTA:netmask:"255.255.255.0"

OK
Note:
The query results you obtained may be different from those in the above response.
Enable multiple connections.
Command:
AT+CIPMUX=1
Response:
OK
Set up an SSL server.
Command:
AT+CIPSERVER=1,8070,"SSL",1
Response:
OK
Connect the PC to the ESP32 softAP.
Use the OpenSSL command on PC to create an SSL client and connect it to the SSL server that ESP32 has created.
Command:
openssl s_client -CAfile /home/esp-at/components/customized_partitions/raw_data/client_ca/client_ca_00.crt -cert /home/esp-at/components/customized_partitions/raw_data/client_cert/client_cert_00.crt -key /home/esp-at/components/customized_partitions/raw_data/client_key/client_key_00.key -host 192.168.3.112 -port 8070
Response on the ESP32:
0,CONNECT
Send 4 bytes of data to connection link 0.
Command:
AT+CIPSEND=0,4
Response:
OK

>
Input 4 bytes, for example,
test, then AT will respond the following messages.Recv 4 bytes SEND OK
Note:
If the number of bytes inputted are more than the length (n) set by
AT+CIPSEND, the system will replybusy p..., and send the first n bytes. And after sending the first n bytes, the system will replySEND OK.
Receive 4 bytes of data from connection link 0.
Assume that the SSL server sends 4 bytes of data (data is
test), the system will prompt:+IPD,0,4:test
Close SSL connection.
Command:
AT+CIPCLOSE=0
Response:
0,CLOSED

OK
Close SSL server.
Command:
AT+CIPSERVER=0
Response:
OK
Network passthrough transmission when the ESP32 works as a TCP client in single connection
Set the Wi-Fi mode to station.
Command:
AT+CWMODE=1
Response:
OK
Connect to the router.
Command:
AT+CWJAP="espressif","1234567890"
Response:
WIFI CONNECTED
WIFI GOT IP

OK
Note:
The SSID and password you entered may be different from those in the above command. Please replace the SSID and password with those of your router settings.
Query the device’s IP address.
Command:
AT+CIPSTA?
Response:
+CIPSTA:ip:"192.168.3.112"
+CIPSTA:gateway:"192.168.3.1"
+CIPSTA:netmask:"255.255.255.0"

OK
Note:
The query results you obtained may be different from those in the above response.
Connect the PC to the same router which ESP32 is connected to.
Use a network tool on the PC to create a TCP server. For example, the TCP server on PC is
192.168.3.102, and the port is8080.Connect the ESP32 to the TCP server as a TCP client over TCP. The server’s IP address is
192.168.3.102, and the port is8080.Command:
AT+CIPSTART="TCP","192.168.3.102",8080
Response:
CONNECT

OK
Enable the Network Passthrough Receiving Mode.
Command:
AT+CIPMODE=1
Response:
OK
Enter the Network Passthrough Mode and send data.
Command:
AT+CIPSEND
Response:
OK

>
Stop sending data.
When receiving a packet that contains only
+++, the Network passthrough transmission process will be stopped. Then please wait at least 1 second before sending the next AT command. Please note that if you input+++directly by typing, the+++may not be recognized as three consecutive+because of the prolonged typing duration. For more details, please refer to [Passthrough Mode Only] +++.Important
The aim of ending the packet with
+++is to exit Passthrough Mode and to accept normal AT commands, while TCP still remains connected. However, you can also use commandAT+CIPSENDto go back into Passthrough Mode.Exit the Network Passthrough Receiving Mode.
Command:
AT+CIPMODE=0
Response:
OK
Close TCP connection.
Command:
AT+CIPCLOSE
Response:
CLOSED

OK
Network passthrough transmission when the ESP32 works as a TCP server
Set the Wi-Fi mode to station.
Command:
AT+CWMODE=1
Response:
OK
Connect to the router.
Command:
AT+CWJAP="espressif","1234567890"
Response:
WIFI CONNECTED
WIFI GOT IP

OK
Note:
The SSID and password you entered may be different from those in the above command. Please replace the SSID and password with those of your router settings.
Enable multiple connections.
Command:
AT+CIPMUX=1
Response:
OK
Note:
TCP server can be created only in multiple connections.
Set the maximum number of TCP server connections to 1.
Command:
AT+CIPSERVERMAXCONN=1
Response:
OK
Note:
The passthrough mode is point-to-point, so the maximum number of connections to the TCP server can only be 1.
Create TCP server.
Command:
AT+CIPSERVER=1,8080
Response:
OK
Note:
Set the TCP server port to 8080. You can also set it to other port.
Query the device’s IP address.
Command:
AT+CIPSTA?
Response:
+CIPSTA:ip:"192.168.3.112"
+CIPSTA:gateway:"192.168.3.1"
+CIPSTA:netmask:"255.255.255.0"

OK
Note:
The query results you obtained may be different from those in the above response.
Connect the PC to the ESP32 TCP server
Connect the PC to the same router which ESP32 is connected to.
Use a network tool on the PC to create a TCP client and connect to the ESP32 TCP server. The remote address is
192.168.3.112, and the port is8080.AT Response:
0,CONNECT
Enable the Network Passthrough Receiving Mode.
Command:
AT+CIPMODE=1
Response:
OK
Enter the Network Passthrough Mode and send data.
Command:
AT+CIPSEND
Response:
OK

>
Stop sending data.
When receiving a packet that contains only
+++, the Network passthrough transmission process will be stopped. Then please wait at least 1 second before sending the next AT command. Please note that if you input+++directly by typing, the+++may not be recognized as three consecutive+because of the prolonged typing duration. For more details, please refer to [Passthrough Mode Only] +++.Important
The aim of ending the packet with
+++is to exit Passthrough Mode and to accept normal AT commands, while TCP still remains connected. However, you can also use commandAT+CIPSENDto go back into Passthrough Mode.Exit the Network Passthrough Receiving Mode.
Command:
AT+CIPMODE=0
Response:
OK
Close TCP connection.
Command:
AT+CIPCLOSE
Response:
CLOSED

OK
Network passthrough transmission when the ESP32 works as a softAP in UDP transparent transmission
Set the Wi-Fi mode to softAP.
Command:
AT+CWMODE=2
Response:
OK
Set softAP.
Command:
AT+CWSAP="ESP32_softAP","1234567890",5,3
Response:
OK
Connect the PC to the ESP32 softAP.
Create a UDP endpoint.
Use a network tool on PC to create a UDP endpoint. For example, the PC’s IP address is
192.168.4.2and the port is8080.Create a UDP transmission between ESP32 and the PC with a fixed remote IP address and port. The remote host’s IP address is
192.168.4.2, the remote port is8080, the local port is2233, and the mode is0.Command:
AT+CIPSTART="UDP","192.168.4.2",8080,2233,0
Response:
CONNECT

OK
Enter the Network Passthrough Receiving Mode.
Command:
AT+CIPMODE=1
Response:
OK
Enter the Network Passthrough Mode and send data.
Command:
AT+CIPSEND
Response:
OK

>
Stop sending data.
When receiving a packet that contains only
+++, the Network passthrough transmission process will be stopped. Then please wait at least 1 second before sending the next AT command. Please note that if you input+++directly by typing, the+++may not be recognized as three consecutive+because of the prolonged typing duration. For more details, please refer to [Passthrough Mode Only] +++.Important
The aim of ending the packet with
+++is to exit Passthrough Mode and to accept normal AT commands, while TCP still remains connected. However, you can also use commandAT+CIPSENDto go back into Passthrough Mode.Exit the Network Passthrough Receiving Mode.
Command:
AT+CIPMODE=0
Response:
OK
Close TCP connection.
Command:
AT+CIPCLOSE
Response:
CLOSED

OK
ESP32 obtains socket data in passive receiving mode
When a large amount of network data is expected to be received and the MCU cannot process it timely, you can refer to this example and use the passive receive data mode.
Set the Wi-Fi mode to station.
Command:
AT+CWMODE=1
Response:
OK
Connect to the router.
Command:
AT+CWJAP="espressif","1234567890"
Response:
WIFI CONNECTED
WIFI GOT IP

OK
Note:
The SSID and password you entered may be different from those in the above command. Please replace the SSID and password with those of your router settings.
Query the device’s IP address.
Command:
AT+CIPSTA?
Response:
+CIPSTA:ip:"192.168.3.112"
+CIPSTA:gateway:"192.168.3.1"
+CIPSTA:netmask:"255.255.255.0"

OK
Note:
The query results you obtained may be different from those in the above response.
Connect the PC to the same router which ESP32 is connected to.
Use a network tool on the PC to create a TCP server. For example, the TCP server on PC is
192.168.3.102, and the port is8080.Connect ESP32 to the TCP server as a client over TCP. The server’s IP address is
192.168.3.102, and the port is8080.Command:
AT+CIPSTART="TCP","192.168.3.102",8080
Response:
CONNECT

OK
ESP32 sets the socket receiving mode to passive mode.
Command:
AT+CIPRECVTYPE=1
Response:
OK
The TCP server sends 4 bytes of data (data is
test).Note:
The device replies with
+IPD,4. If it receives server data again later, please refer to the note section of AT+CIPRECVTYPE for whether it will reply with+IPD,.
ESP32 obtains socket data length in passive receiving mode.
Command:
AT+CIPRECVLEN?
Response:
+CIPRECVLEN:4
OK
ESP32 obtains socket data in passive receiving mode.
Command:
AT+CIPRECVDATA=4
Response:
+CIPRECVDATA:4,test
OK
ESP32 enables mDNS service, PC connects to the device’s TCP server using a domain name
Set the Wi-Fi mode to station.
Command:
AT+CWMODE=1
Response:
OK
Connect to the router.
Command:
AT+CWJAP="espressif","1234567890"
Response:
WIFI CONNECTED
WIFI GOT IP

OK
Note:
The SSID and password you entered may be different from those in the above command. Please replace the SSID and password with those of your router settings.
Connect the PC to the same router which ESP32 is connected to.
PC can discover the ESP32 device only when they are in the same LAN.
Use an mDNS tool on the PC to enable service discovery. For example, use avahi-browse on linux (use Bonjour on macOS or Windows).
Command:
sudo avahi-browse -a -r
ESP32 device enables mDNS service.
Command:
AT+MDNS=1,"espressif","_printer",35,"my_instance","_tcp",2,"product","my_printer","firmware_version","AT-V3.4.1.0"
Response:
OK
Note:
This command enables mDNS service and specifies the device instance name as
my_instance, service type as_printer, port as35, product asmy_printer, and firmware version asAT-V3.4.1.0.
(Optional) PC discovers the ESP32 device.
The PC’s
avahi-browsetool will display:... + enx000ec6dd4ebf IPv4 my_instance UNIX Printer local = enx000ec6dd4ebf IPv4 my_instance UNIX Printer local hostname = [espressif.local] address = [192.168.200.90] port = [35] txt = ["product=my_printer" "firmware_version=AT-V3.4.1.0"]
Note:
This step is not necessary, it is just to verify the mDNS function of the ESP32 device.
ESP32 device enables multiple connections.
Command:
AT+CIPMUX=1
Response:
OK
ESP32 device runs a TCP server on port
35.Command:
AT+CIPSERVER=1,35
Response:
OK
Use a TCP tool (For example, use nc on Linux or macOS, use ncat on Windows) on the PC to connect to ESP32 device’s TCP server using the domain name.
Command:
nc espressif.local 35
ESP32 device responds:
0,CONNECT
Note:
After the connection is established, data transmission can immediately take place between PC and ESP32 device.
ESP32 device disables mDNS function.
Command:
AT+MDNS=0
Response:
OK
Note:
Disabling mDNS function can reduce the device’s power consumption to some extent.