RainMaker AT Examples
This document provides an introduction and detailed command examples to illustrate how to utilize RainMaker AT Command Set on ESP32-C3.
Introduction
Espressif provides an official application Nova Home to interact with the devices. You can download it through the Google Play (Android) or App Store (iOS). The examples in the document use Nova Home (version: 1.6.2) as the client application by default.
Connect to the RainMaker cloud for simple communications in normal transmission transmode
Initialize the node.
ESP32-C3 initializes the node:
Command:
AT+RMNODEINIT
Response:
OK
Note:
After the command is executed successfully, the node configuration will be saved internally. The node configuration that has been initialized is as follows.
{
    "node_id":"xxxxxxxxxxxx",
    "config_version":"2020-03-20",
    "info":{
        "name":"ESP RainMaker AT Node",
        "fw_version":"2.4.0(esp32c3_MINI-1_4b42408):Sep 20 2022 11:58:48",
        "type":"AT Node",
        "model":"esp-at",
        "project_name":"esp-at",
        "platform":"esp32c3"
    },
    "devices":[

    ],
    "services":[
        {
            "name":"System",
            "type":"esp.service.system",
            "params":[
                {
                    "name":"Reboot",
                    "type":"esp.param.reboot",
                    "data_type":"bool",
                    "properties":[
                        "read",
                        "write"
                    ]
                },
                {
                    "name":"Factory-Reset",
                    "type":"esp.param.factory-reset",
                    "data_type":"bool",
                    "properties":[
                        "read",
                        "write"
                    ]
                },
                {
                    "name":"Wi-Fi-Reset",
                    "type":"esp.param.wifi-reset",
                    "data_type":"bool",
                    "properties":[
                        "read",
                        "write"
                    ]
                }
            ]
        },
        {
            "name":"Time",
            "type":"esp.service.time",
            "params":[
                {
                    "name":"TZ",
                    "type":"esp.param.tz",
                    "data_type":"string",
                    "properties":[
                        "read",
                        "write"
                    ]
                },
                {
                    "name":"TZ-POSIX",
                    "type":"esp.param.tz_posix",
                    "data_type":"string",
                    "properties":[
                        "read",
                        "write"
                    ]
                }
            ]
        },
        {
            "name":"Schedule",
            "type":"esp.service.schedule",
            "params":[
                {
                    "name":"Schedules",
                    "type":"esp.param.schedules",
                    "data_type":"array",
                    "properties":[
                        "read",
                        "write"
                    ],
                    "bounds":{
                        "max":10
                    }
                }
            ]
        }
    ]
}
Attributes operations. (optional)
For example, ESP32-C3 adds metadata with name “serial_num” and value “123abc” to the node.
Command:
AT+RMNODEATTR="serial_num","123abc"
Response:
OK
Note:
After the command is executed successfully, the new attributes are added to the node configuration.
{
    "node_id":"xxxxxxxxxxxx",
    "config_version":"2020-03-20",
    "info":Object{...},
    "attributes":[
        {
            "name":"serial_num",
            "value":"123abc"
        }
    ],
    "devices":[

    ],
    "services":Array[3]
}
Add a device.
For example, ESP32-C3 adds a device with the unique name “Light” and device name “Light”, and the device type is “esp.device.light”.
Command:
AT+RMDEV=0,"Light","Light","esp.device.light"
Response:
OK
Note:
After the command is executed successfully, the device is added to the node configuration.
{
    "node_id":"xxxxxxxxxxxx",
    "config_version":"2020-03-20",
    "info":Object{...},
    "attributes":Array[1],
    "devices":[
        {
            "name":"Light",
            "type":"esp.device.light",
            "params":[
                {
                    "name":"Name",
                    "type":"esp.param.name",
                    "data_type":"string",
                    "properties":[
                        "read",
                        "write"
                    ]
                }
            ]
        }
    ],
    "services":Array[3]
}
Add parameters to the device.
For example, ESP32-C3 adds the “Power” and “Brightness” parameters to the “Light” device.
The parameter name is “Power”, parameter type is “esp.param.power”, data type is boolean, properties are read and write, UI type is “esp.ui.toggle”, and default value is false (“0”).
Command:
AT+RMPARAM="Light","Power","esp.param.power",1,3,"esp.ui.toggle","0"
Response:
OK
The parameter name is “Brightness”, parameter type is “esp.param.brightness”, data type is integer, properties are read and write, UI type is “esp.ui.slider”, and default value is “50”.
Command:
AT+RMPARAM="Light","Brightness","esp.param.brightness",2,3,"esp.ui.slider","50"
Response:
OK
Note:
After the above two commands are executed successfully, “Power” and “Brightness” parameters are added to the device.
{
    "node_id":"XXXXXXXXXXXX",
    "config_version":"2020-03-20",
    "info":Object{...},
    "attributes":Array[1],
    "devices":[
        {
            "name":"Light",
            "type":"esp.device.light",
            "params":[
                {
                    "name":"Name",
                    "type":"esp.param.name",
                    "data_type":"string",
                    "properties":[
                        "read",
                        "write"
                    ]
                },
                {
                    "name":"Brightness",
                    "type":"esp.param.brightness",
                    "data_type":"int",
                    "properties":[
                        "read",
                        "write"
                    ],
                    "ui_type":"esp.ui.slider"
                },
                {
                    "name":"Power",
                    "type":"esp.param.power",
                    "data_type":"bool",
                    "properties":[
                        "read",
                        "write"
                    ],
                    "ui_type":"esp.ui.toggle"
                }
            ]
        }
    ],
    "services":Array[3]
}
Perform provisioning and user-node mapping.
The Nova Home app is used as the client.
Command:
AT+RMPROV=0
Response:
WIFI DISCONNECT

OK
If ESP32-C3 has been connected to an AP before, it will be disconnected first. Then, in the upper right corner of the app, you can tap the “+” button >
Add Device, and then the app scans via Bluetooth LE and displays the found devices.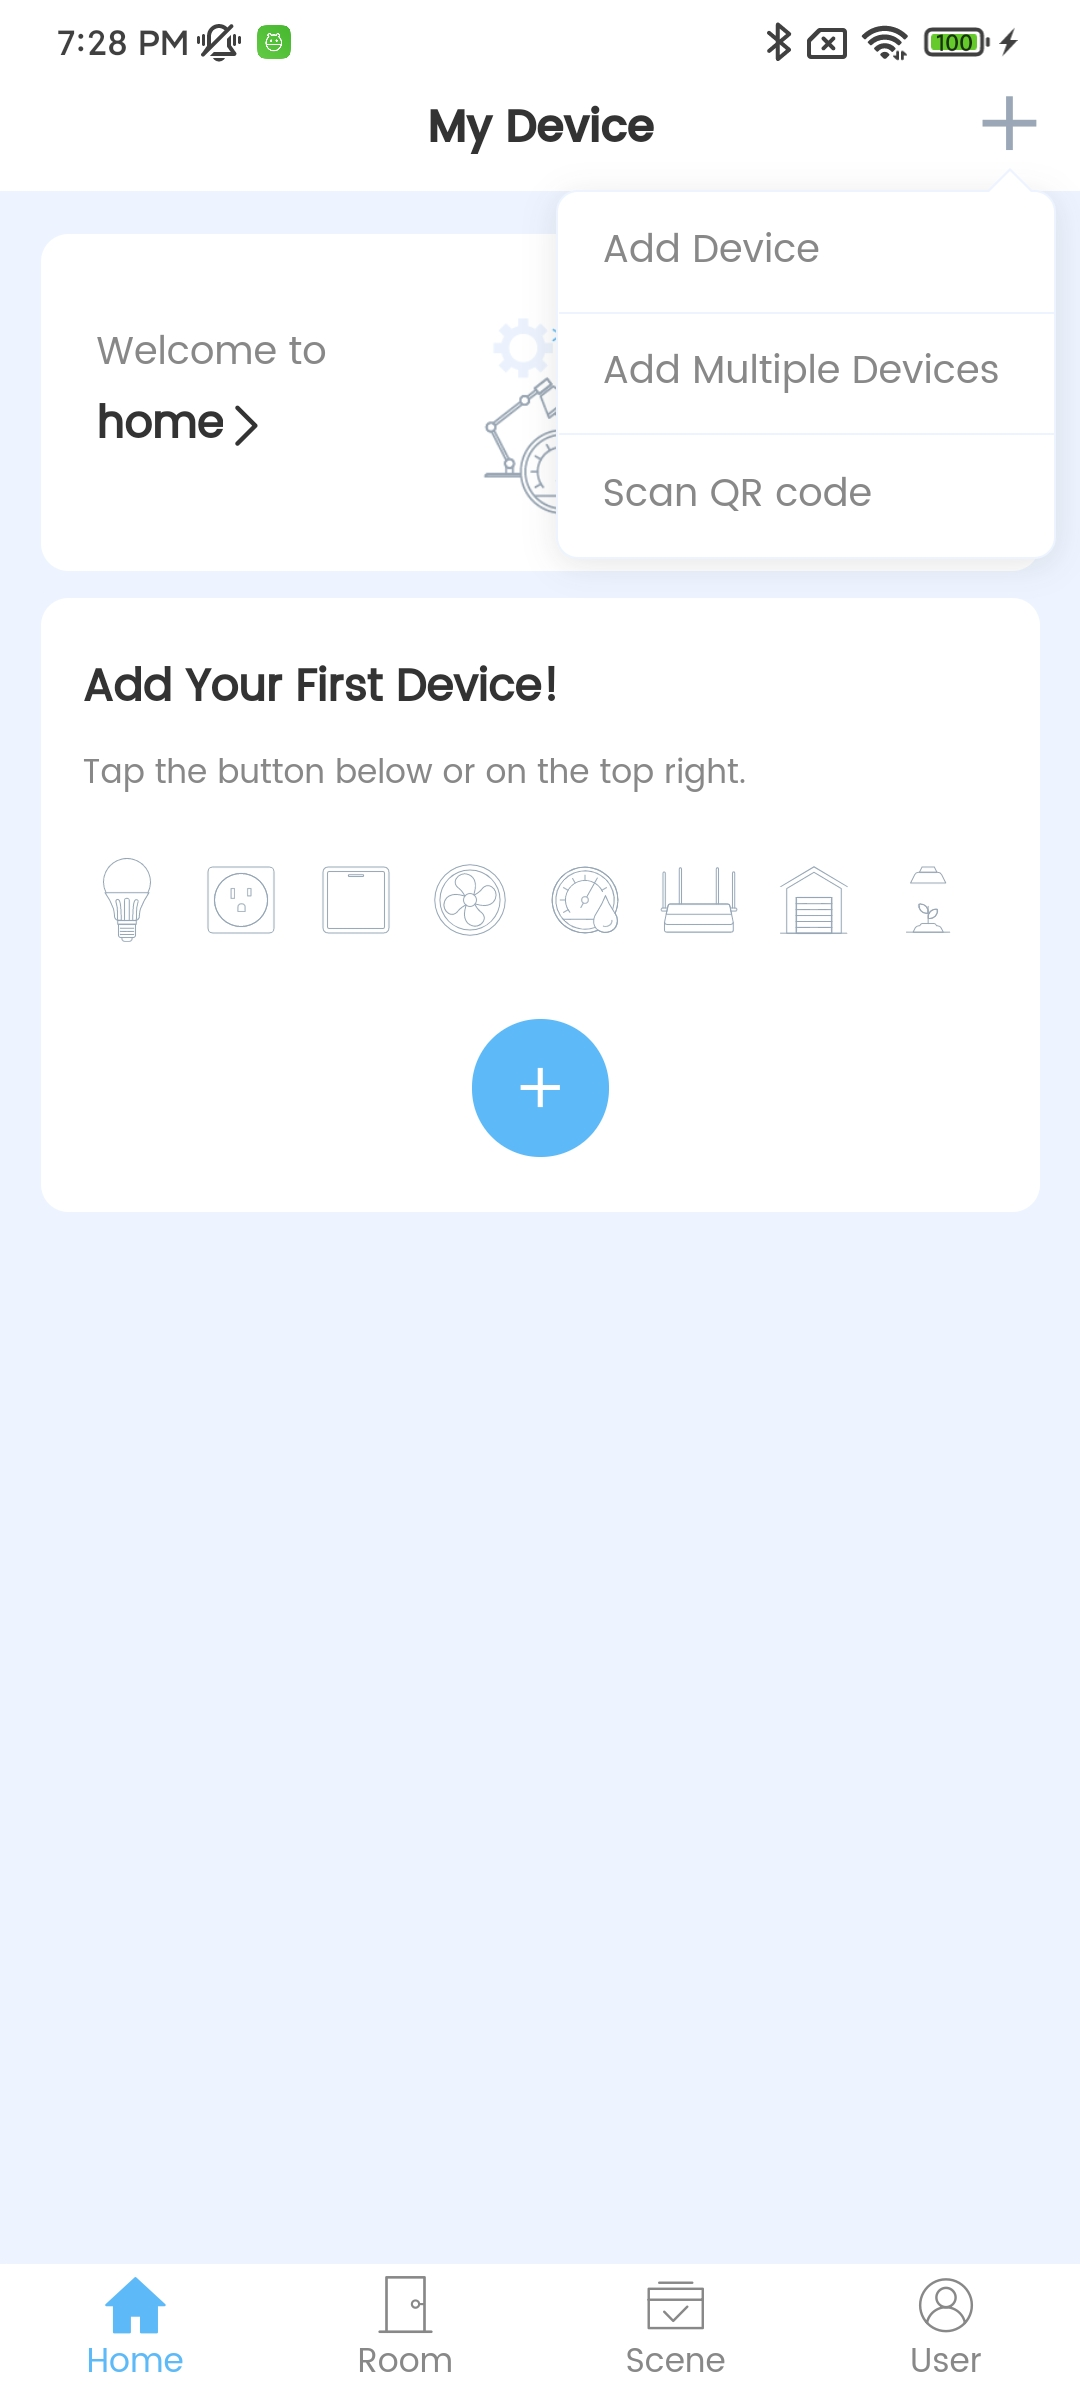
Nova Home Adds Device
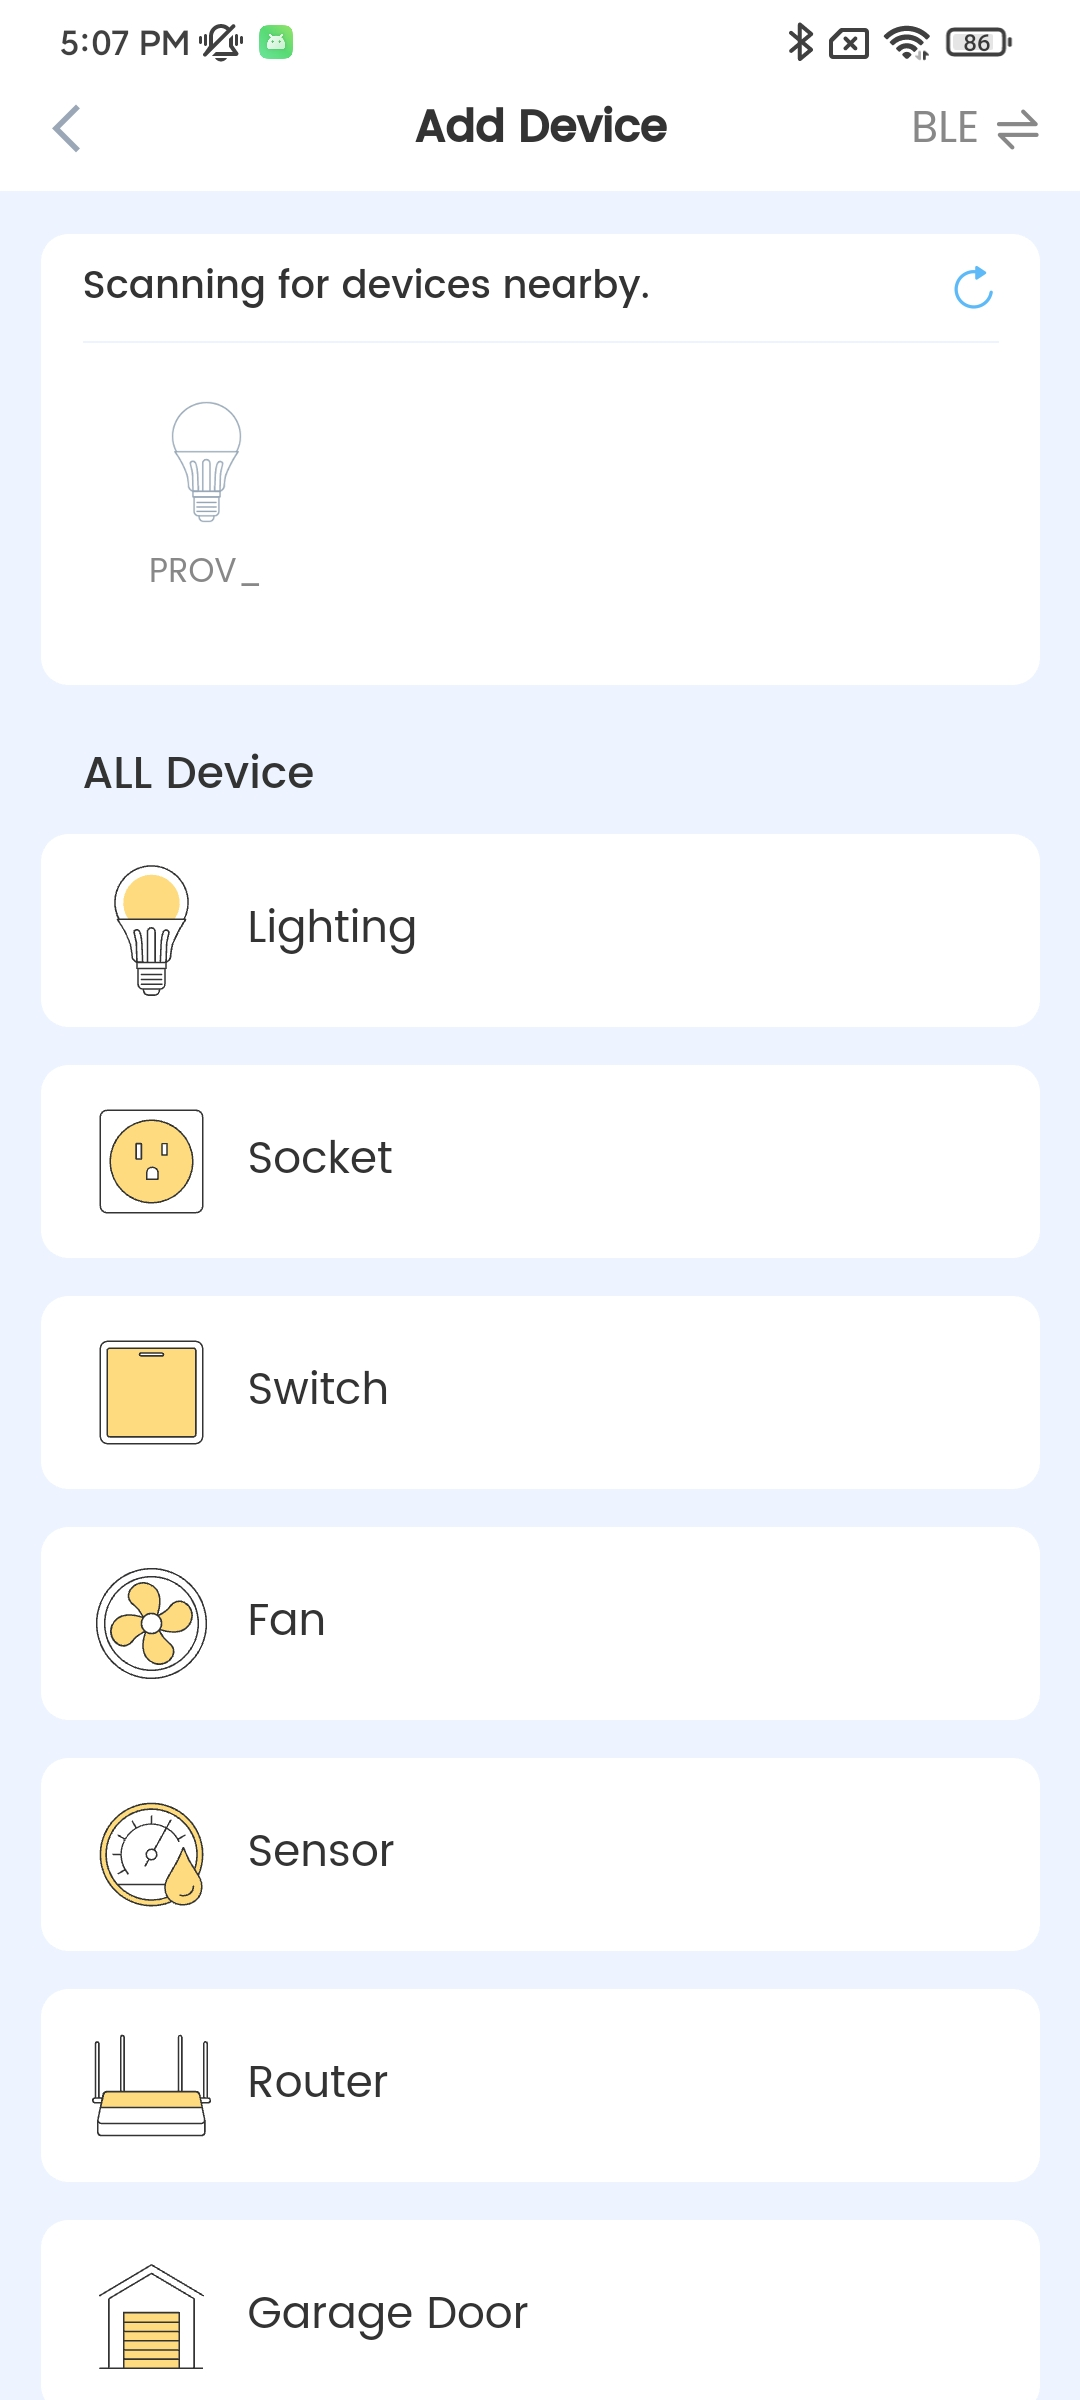
Nova Home Found Devices
Tap the device for Bluetooth LE provisioning, and enter the SSID and PASSWORD in the
Connecting Devicescreen. Then, provisioning starts.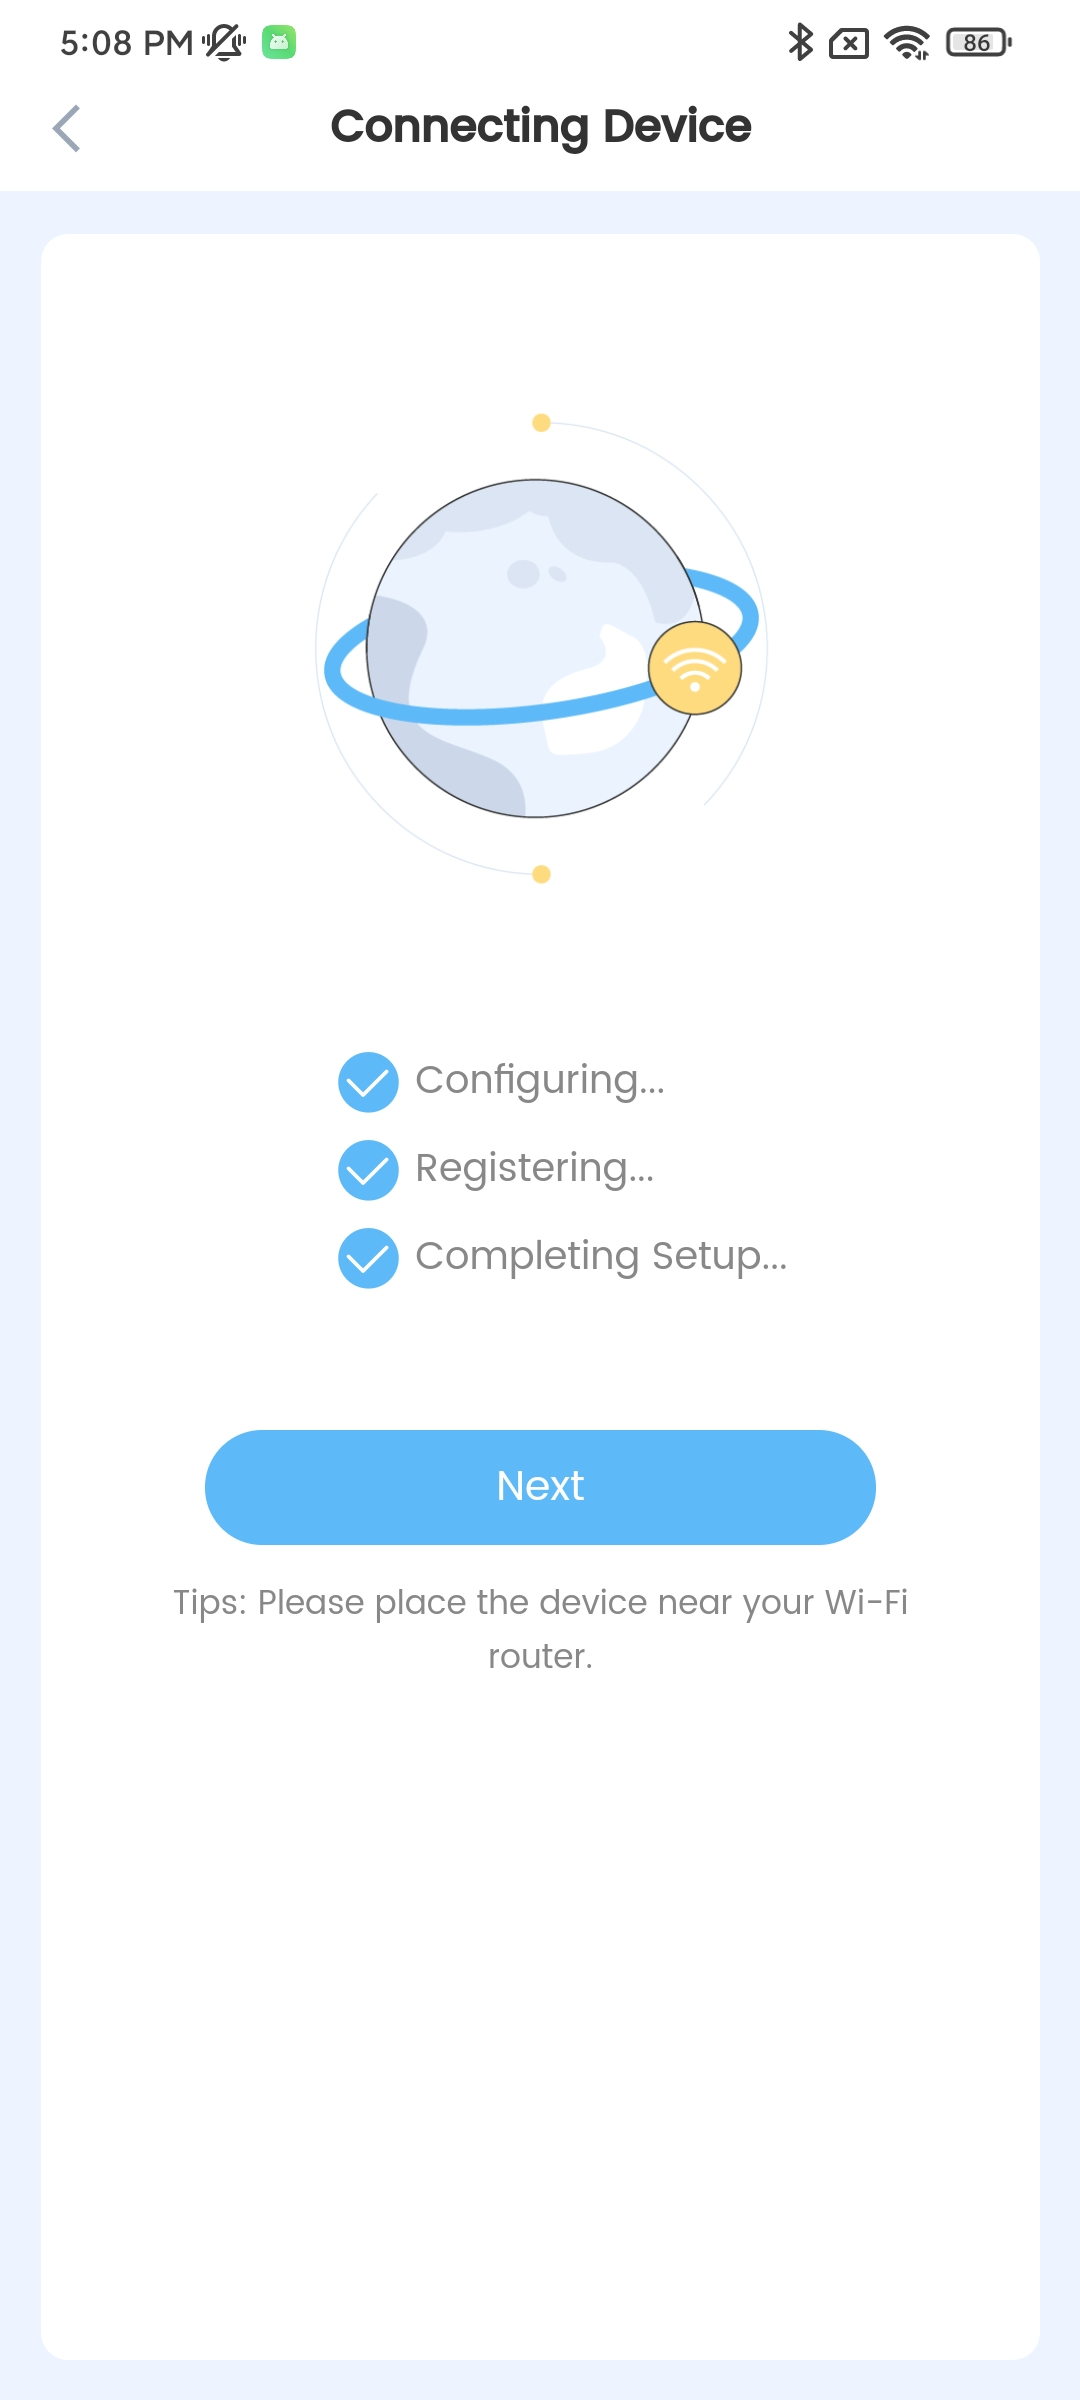
Nova Home Starts Provisioning
In the provisioning process and after the provisioning is successful, the system will prompts:
WIFI CONNECTED
WIFI GOT IP

+RMCONNECTED
+RMMAPPINGDONE
After that, you can set the name and room of the device displayed on the app. After completing the above operations, you can see the added device on the app.
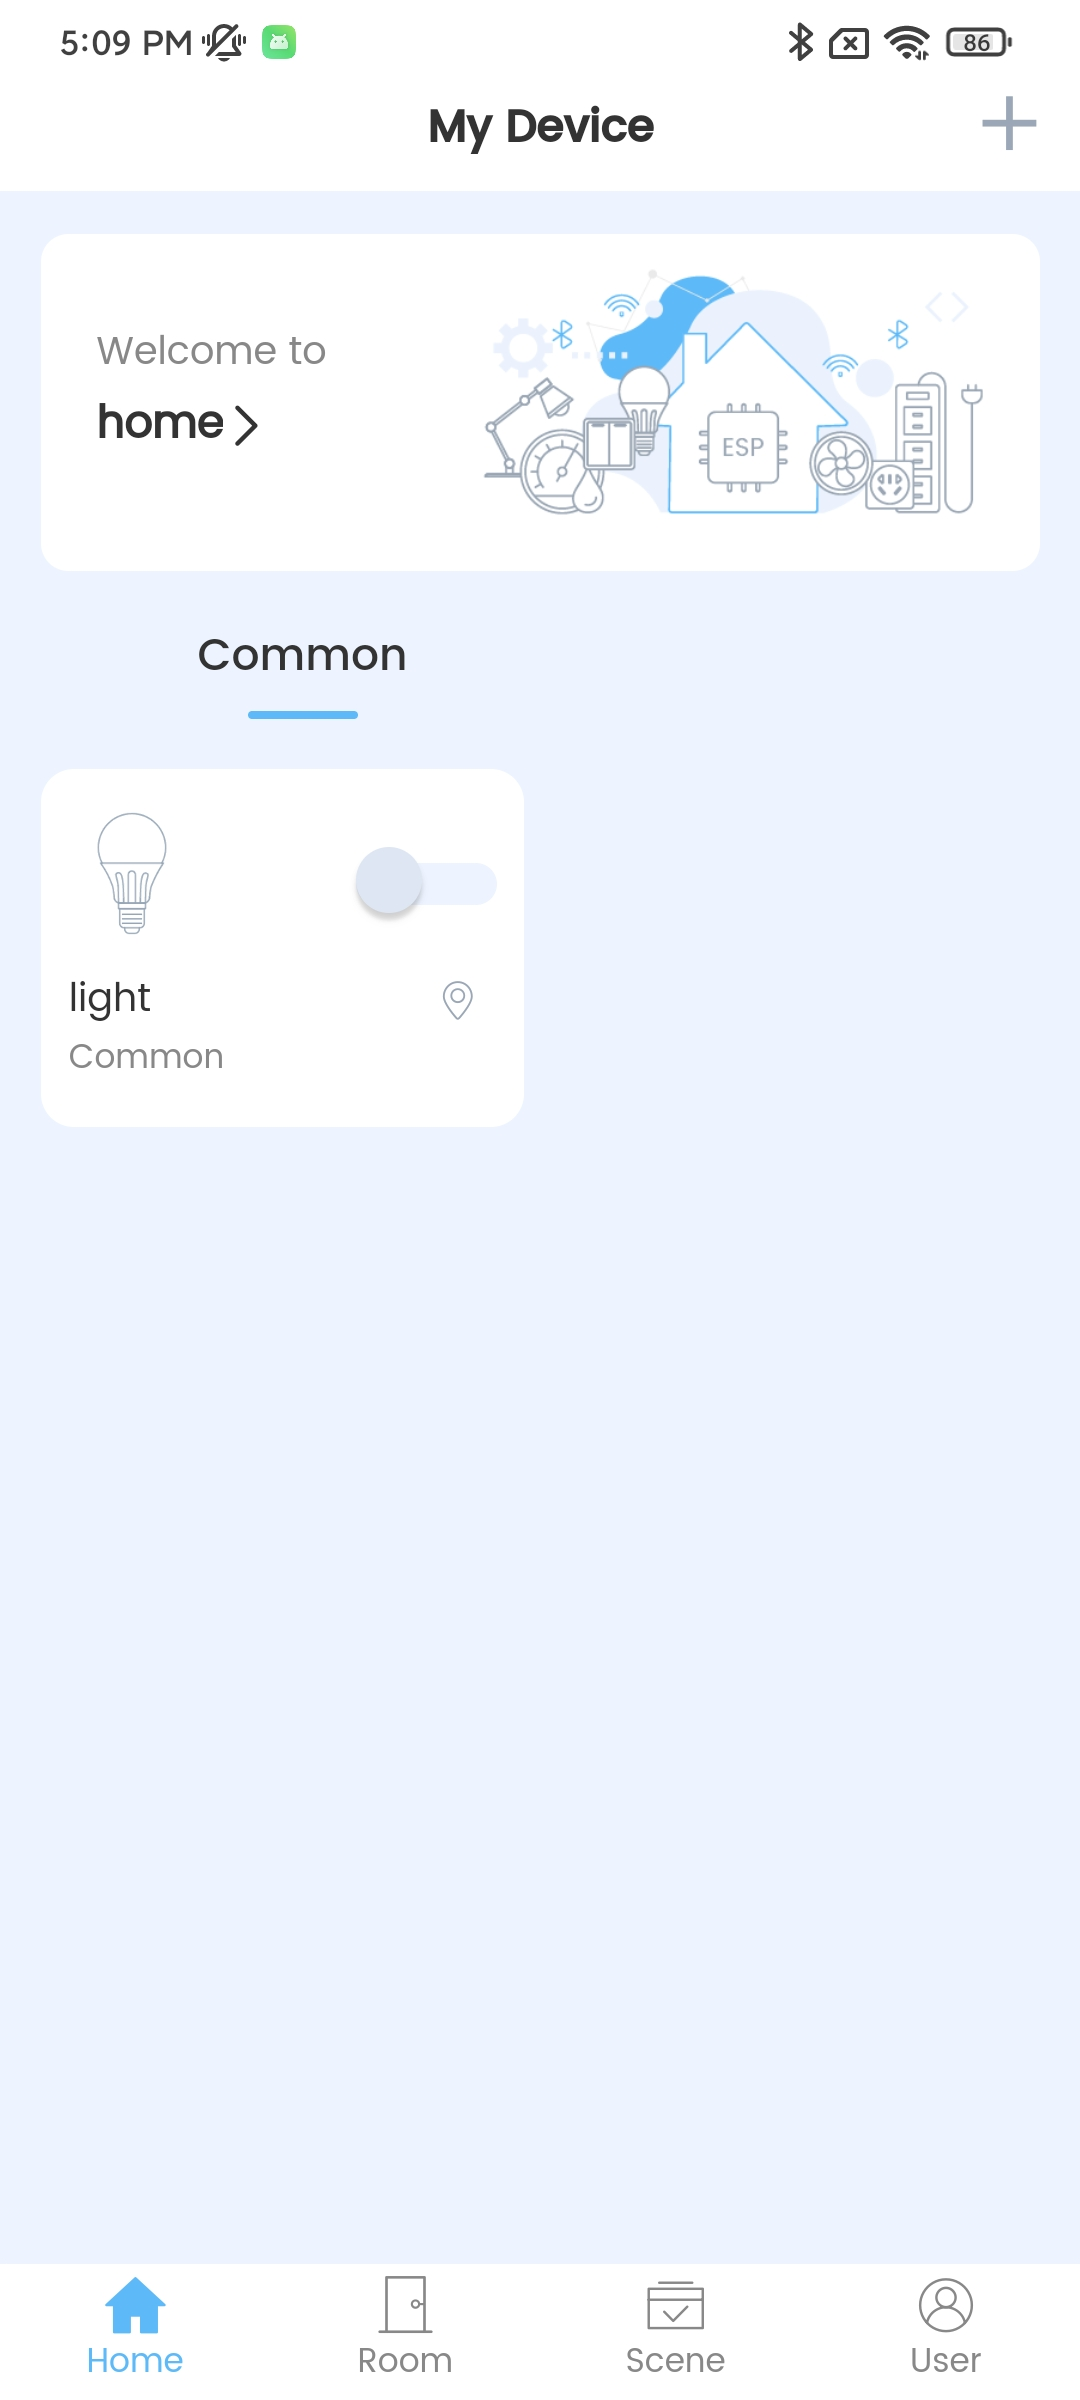
Nova Home Device
Update parameters.
The light displayed on the app is OFF. Modify the value of the “Power” parameter to true (“1”).
Command:
AT+RMPARAMUPDATE="Light","Power","1"
Response:
OK
After that, you can see that the status of the light on the app is switched from OFF to ON.
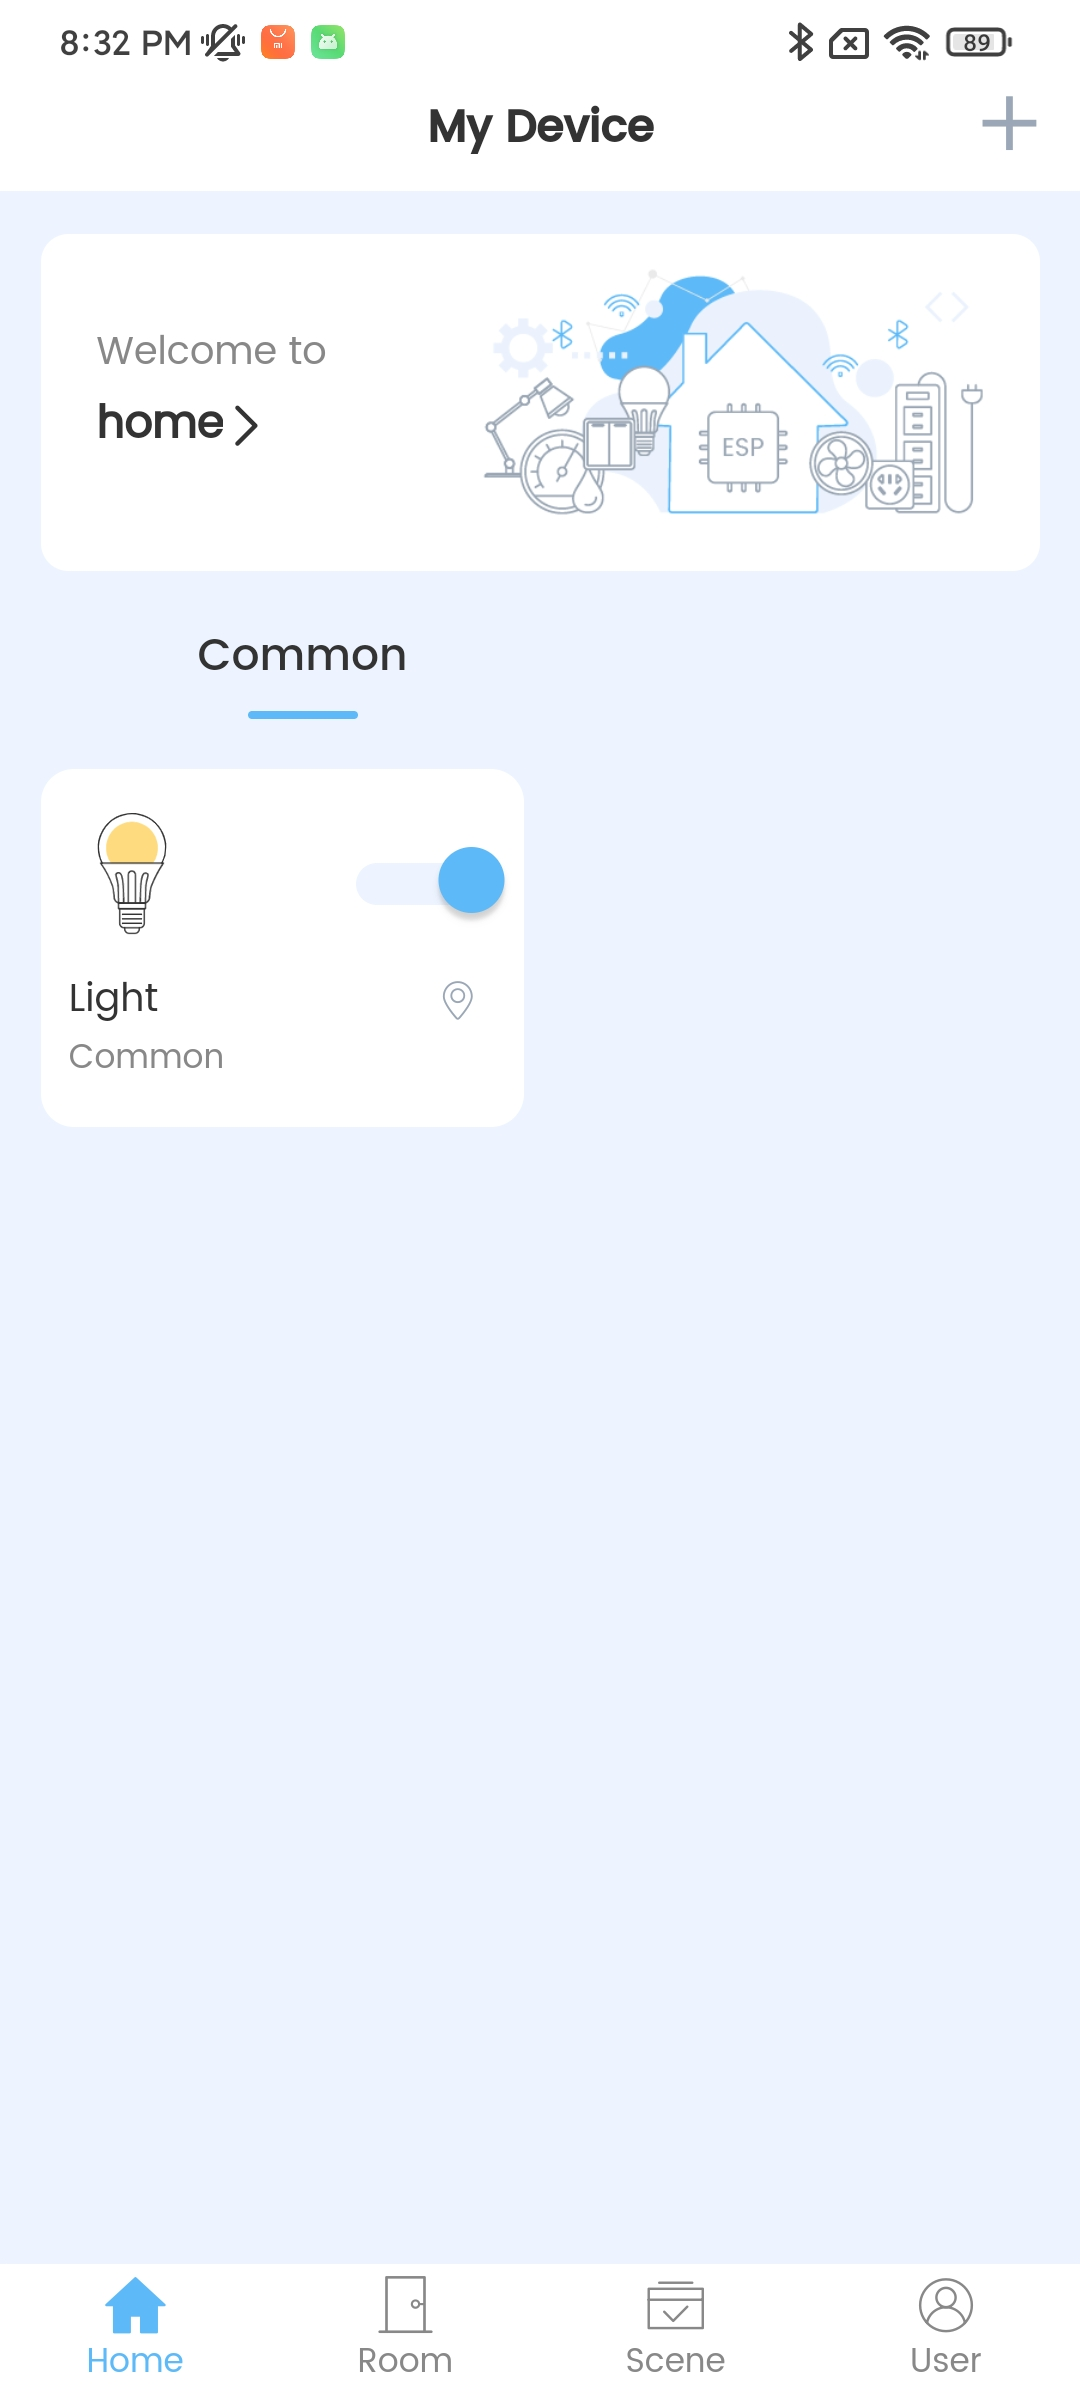
Nova Home Changes Light Status
Control the device remotely.
You can control the device with the app. For example, you can change the status of the light from ON to OFF. When ESP32-C3 receives a control message, the system will prompts:
+RMRECV:Local,Light,Power:0
Actively disconnect from ESP RainMaker cloud.
Command:
AT+RMCLOSE
Response:
OK
Connect to the RainMaker cloud for simple communications in passthrough mode
Initialize the node.
Please refer to Initialize the node in the example Connect to the RainMaker cloud for simple communications in normal transmission transmode.
Attributes operations. (optional)
Please refer to Attributes operations (optional) in the example Connect to the RainMaker cloud for simple communications in normal transmission transmode.
Add a device.
Please refer to Add a device in the example Connect to the RainMaker cloud for simple communications in normal transmission transmode.
Add parameters to the device.
In the RainMaker Passthrough Mode, only one parameter is allowed in the devices (the default parameter created by the AT+RMDEV command is not included). If there are multiple parameters, the device cannot enter the RainMaker Passthrough Mode.
For example, ESP32-C3 adds the “Power” parameter to the “Light” device. The parameter name is “Power”, parameter type is “esp.param.power”, data type is bool, properties are read and write, UI type is “esp.ui.toggle”, and default value is false (“0”).
Command:
AT+RMPARAM="Light","Power","esp.param.power",1,3,"esp.ui.toggle","0"
Response:
OK
Note:
After the command is executed successfully, the “Power” parameter is added to the device.
{
    "node_id":"XXXXXXXXXXXX",
    "config_version":"2020-03-20",
    "info":Object{...},
    "attributes":Array[1],
    "devices":[
        {
            "name":"Light",
            "type":"esp.device.light",
            "params":[
                {
                    "name":"Name",
                    "type":"esp.param.name",
                    "data_type":"string",
                    "properties":[
                        "read",
                        "write"
                    ]
                },
                {
                    "name":"Power",
                    "type":"esp.param.power",
                    "data_type":"bool",
                    "properties":[
                        "read",
                        "write"
                    ],
                    "ui_type":"esp.ui.toggle"
                }
            ]
        }
    ],
    "services":Array[3]
}
Perform provisioning and user-node mapping.
Please refer to Perform provisioning and user-node mapping in the example Connect to the RainMaker cloud for simple communications in normal transmission transmode.
Enter passthrough mode.
Command:
AT+RMMODE=1
Response:
OK
Send data.
Command:
AT+RMSEND
Response:
OK

>
Then you can directly enter the data, enter
1to switch the light to ON, and0to switch the light to OFF.Stop sending data.
When AT receives a packet that contains only
+++, the RainMaker Passthrough Mode will be stopped. Then please wait at least one second before sending the next AT command. Please note that if you input+++directly by typing, the+++may not be recognized as three consecutive+because of the prolonged typing duration.Important
The aim of ending the packet with +++ is to exit RainMaker Passthrough Mode and to accept normal AT commands. However, you can also use command
AT+RMSENDto go back into RainMaker Passthrough Mode.Actively disconnect from ESP RainMaker cloud.
Please refer to Actively disconnect from ESP RainMaker cloud in the example Connect to the RainMaker cloud for simple communications in normal transmission transmode.
Perform user-node mapping.
Set the Wi-Fi mode to station.
Command:
AT+CWMODE=1
Response:
OK
Connect to the router.
Command:
AT+CWJAP="espressif","1234567890"
Response:
WIFI CONNECTED
WIFI GOT IP

OK
Note:
The SSID and password you entered may be different from those in the above command. Please replace the SSID and password with those of your router settings.
Initialize the node.
Please refer to Initialize the node in the example Connect to the RainMaker cloud for simple communications in normal transmission transmode.
Attributes Operations. (optional)
Please refer to Attributes operations (optional) in the example Connect to the RainMaker cloud for simple communications in normal transmission transmode.
Add a device.
Please refer to Add a device in the example Connect to the RainMaker cloud for simple communications in normal transmission transmode.
Add parameters to the device.
Please refer to Add parameters to the device in the example Connect to the RainMaker cloud for simple communications in normal transmission transmode.
Connect to ESP RainMaker cloud.
Command:
AT+RMCONN
Response:
OK
If the device connects to the cloud successfully, the system returns:
+RMCONNECTED
Start user-node mapping.
Espressif provides REST APIs for RainMaker backend service.
Firstly, you can enter
user_nameandpasswordthrough API /{version}/login to getaccesstoken. Then, you can click theAuthorizebutton to enter the obtainedaccesstoken.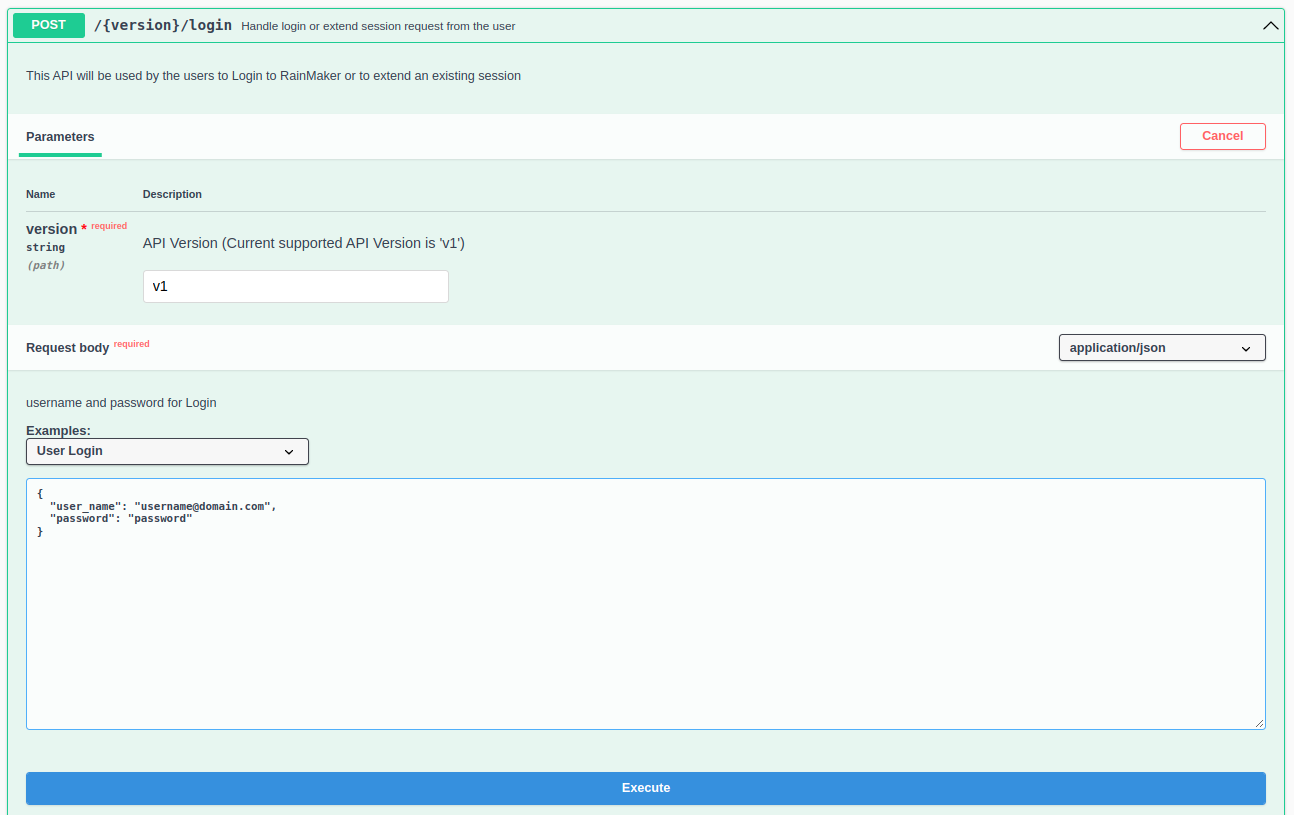
REST API Login
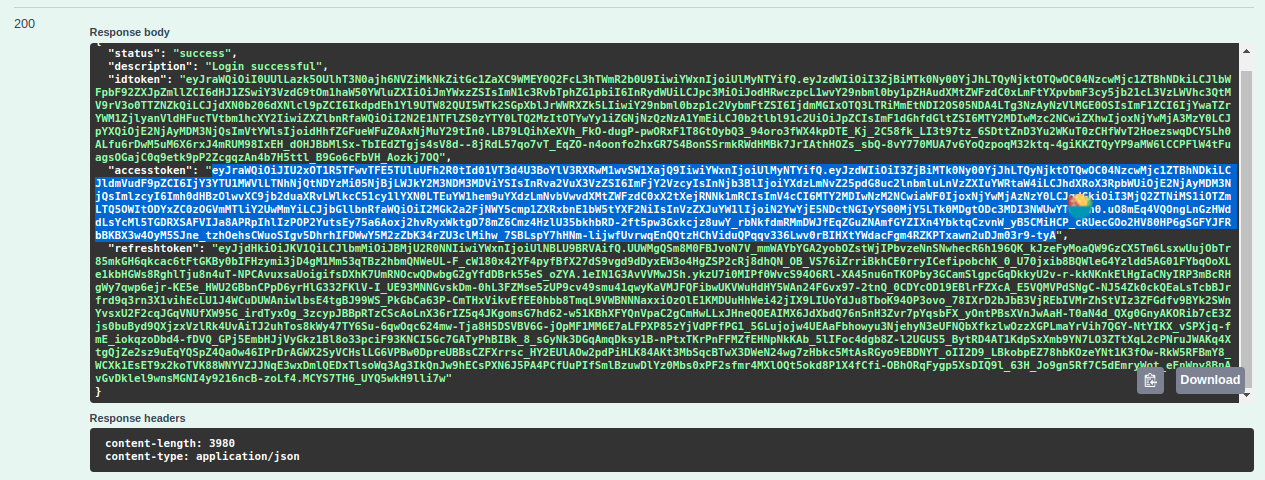
REST API Login Accesstoken
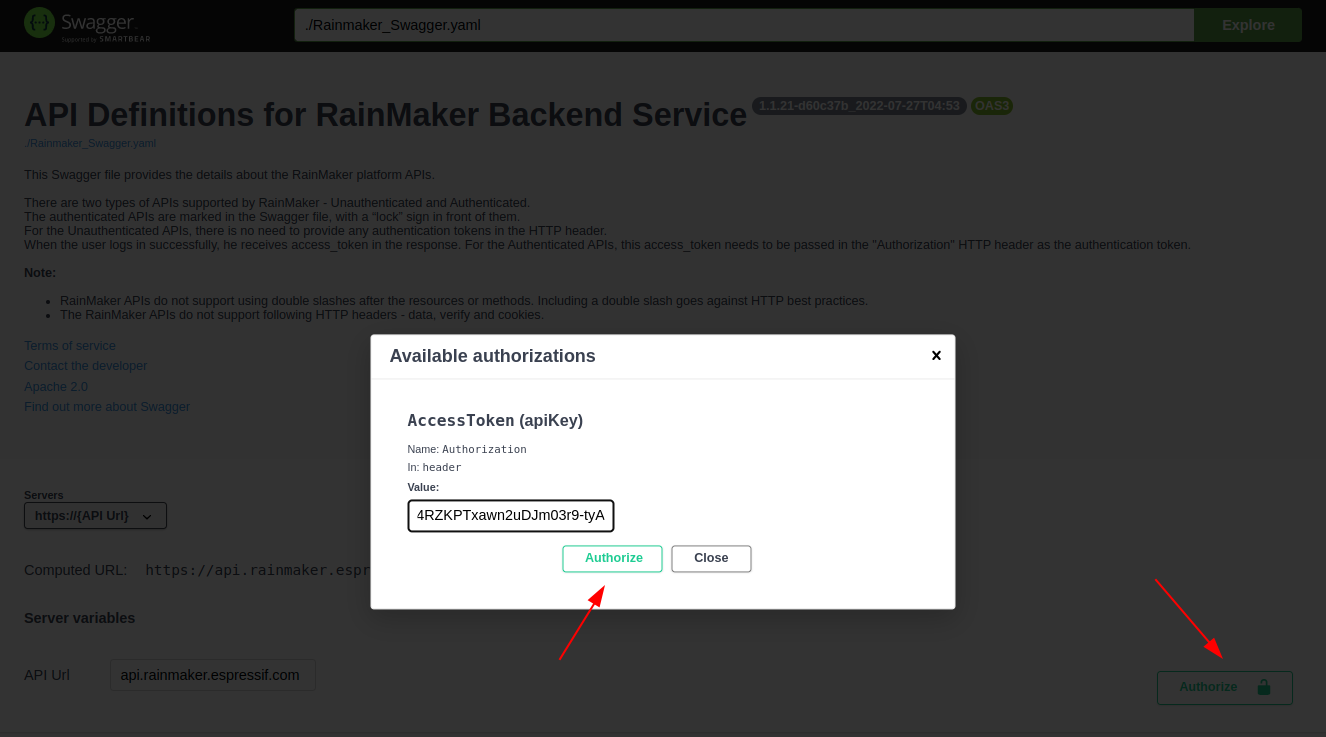
REST API Login Authorize
Secondly, use API /{version}/user to get
user_id.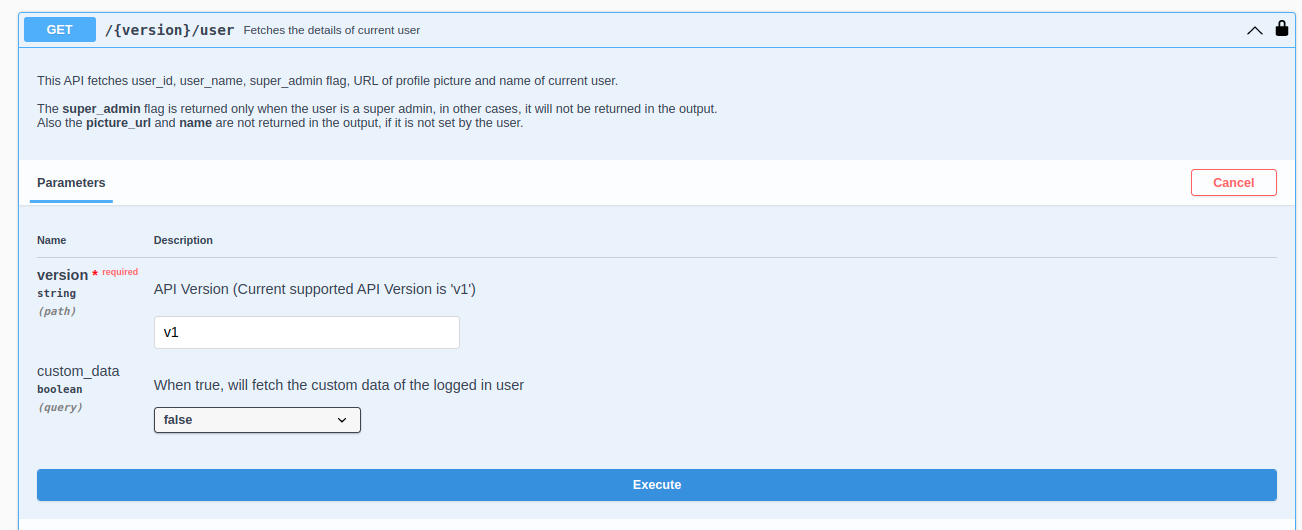
REST API Get User Details
Thirdly, enter
node_idandsecret_keythrough API /{version}/user/nodes/mapping to getrequest_id. As shown in the figure below, ESP32-C3 adds “84F70308E0E8” asnode_idand “test” assecret_key.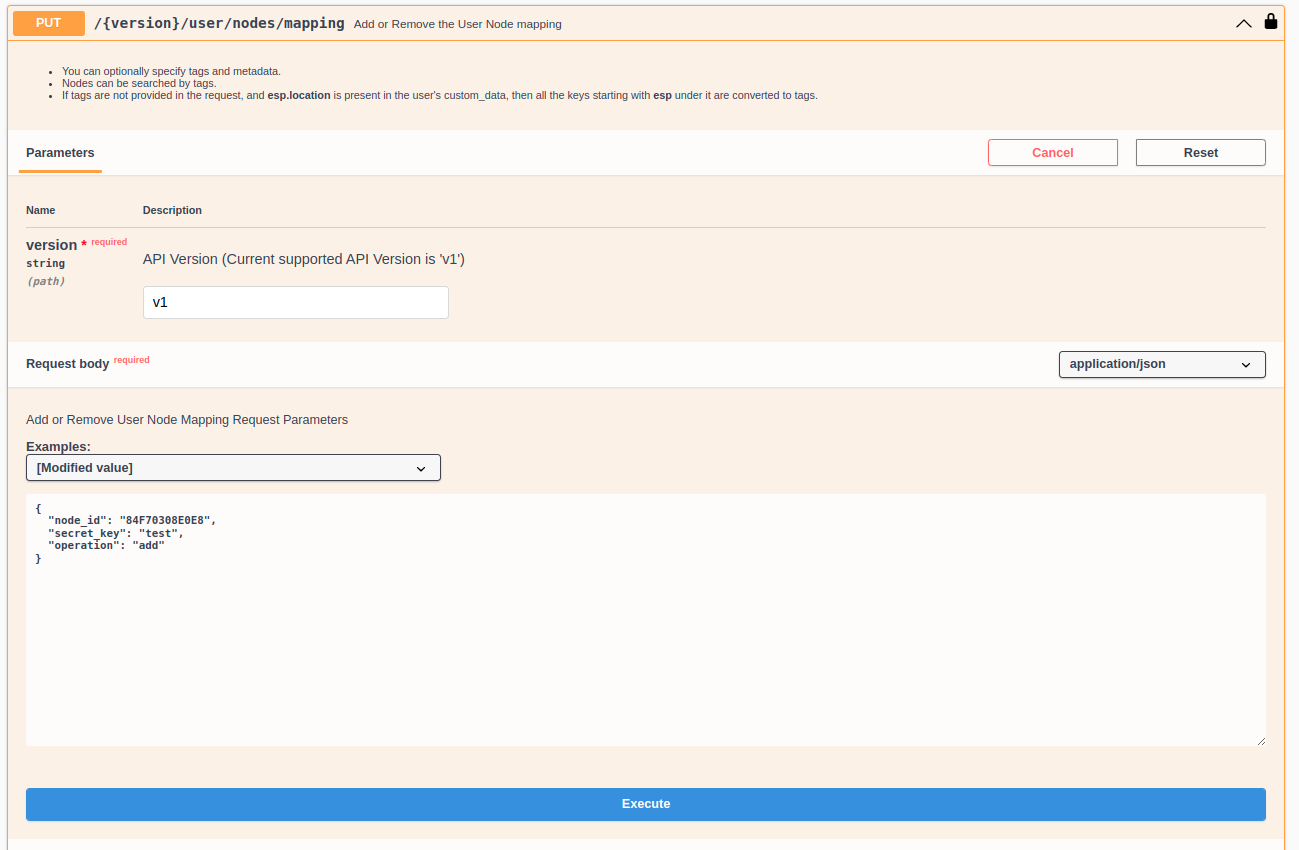
REST API Get request id
Finally, use AT+RMUSERMAPPING to start user-node mapping.
Command:
AT+RMUSERMAPPING="GitHub_xxxxxxxxxxxxxxxxxxxxxx","test"
Response:
OK
If the mapping completes, the system returns:
+RMMAPPINGDONE
Then, refresh the app and you should see the newly added device.
Note:
This command does not guarantee success of the actual mapping. The mapping status needs to be checked separately by the clients (Phone app/CLI).
Clear user-node mapping. (optional)
Command:
AT+RMUSERUNMAPPING
Response:
OK