Compile ESP-AT Project on the GitHub Webpage

[中文]

This document provides a detailed guide on how to compile the ESP-AT project through a web page. When the default officially released firmware does not satisfy your requirements, for example, you want to enable WebSocket functionality and disable mDNS functionality, you will need to compile the ESP-AT project. Usually we recommend you to Compile ESP-AT Project Locally. However, if you have difficulties building the project locally, please refer to this document to compile the ESP-AT project through the webpage.

Attention

The AT firmware compiled from webpages needs to be tested and verified for functionality based on your own product.

Please save the firmware and download link, for possible issue debugging in the future.
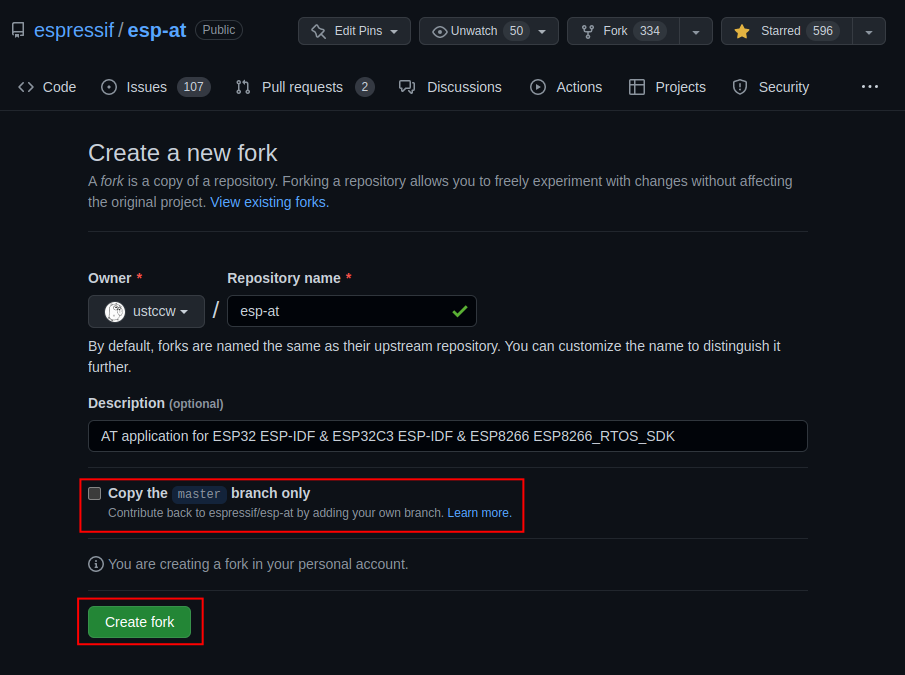
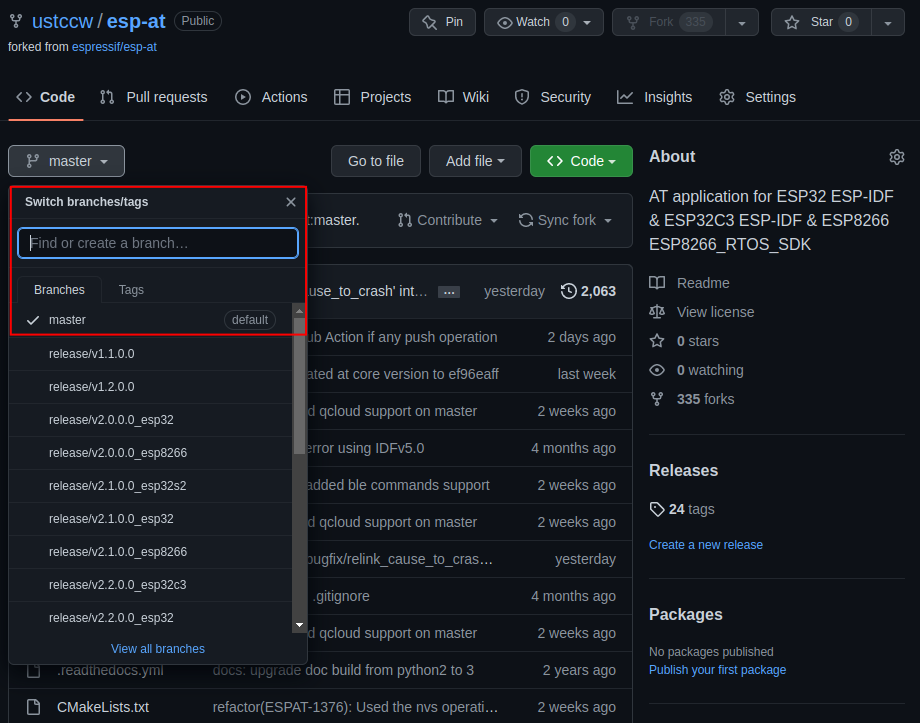
Detailed Steps

Please follow the detailed steps below to complete the Fork, environment configuration, code modification, and compilation of the ESP-AT project.

Step 1. Log in to your GitHub account

Before starting, please log in to your GitHub account as compile and firmware download require login credentials.

Step 2. Fork the ESP-AT project

Visit the ESP-AT repository and click Fork in the upper right corner of the page.

Click Fork

Click Fork

Click Create fork to copy the repository to your GitHub account. The default Fork only copies the master branch. If you need to modify the code based on a specific branch, uncheck Copy the master branch only.

Create Fork

Create Fork

Step 3. Enable GitHub Actions

Under the repository, click Actions to enter the GitHub Actions page.

Click Actions

Click Actions

Click I understand my workflows, go ahead and enable them to enable GitHub Actions.

Enable GitHub Actions

Enable GitHub Actions

GitHub Actions is now enabled.

GitHub Actions Enabled Successfully

GitHub Actions Enabled Successfully

Step 4. Configure the secrets required to compile the ESP-AT project

If you have an account and an OTA token of the Espressif OTA server, and you need to upgrade the AT firmware by using the AT+CIUPDATE command, you need to complete this step. Otherwise, it is recommended to disable CONFIG_AT_OTA_SUPPORT (see Step 5. Use the github.dev editor to modify and submit the code for details) or skip this step.

Under the repository, click Setting to enter the settings page.

Click on Settings

Click on Settings

Click on Settings -> Secrets and variables -> Actions to access the Action configuration page.

Enter Actions Configuration Page

Enter Actions Configuration Page

Click New repository secret to enter the secret creation page.

Create secret Page

Create Secret Page

Enter Name and Secrets, and click Add secret to create a new secret. This secret is the OTA token.

Create Secret

Create Secret

All the possible secret names that need to be configured are as follows:

AT_OTA_TOKEN_WROOM32
AT_OTA_TOKEN_WROVER32
AT_OTA_TOKEN_ESP32_MINI_1
AT_OTA_TOKEN_ESP32_PICO_D4
AT_OTA_TOKEN_ESP32_SOLO_1
AT_OTA_TOKEN_ESP32C3_MINI
ESP32C2_2MB_TOKEN
ESP32C2_4MB_TOKEN
ESP32C6_4MB_TOKEN

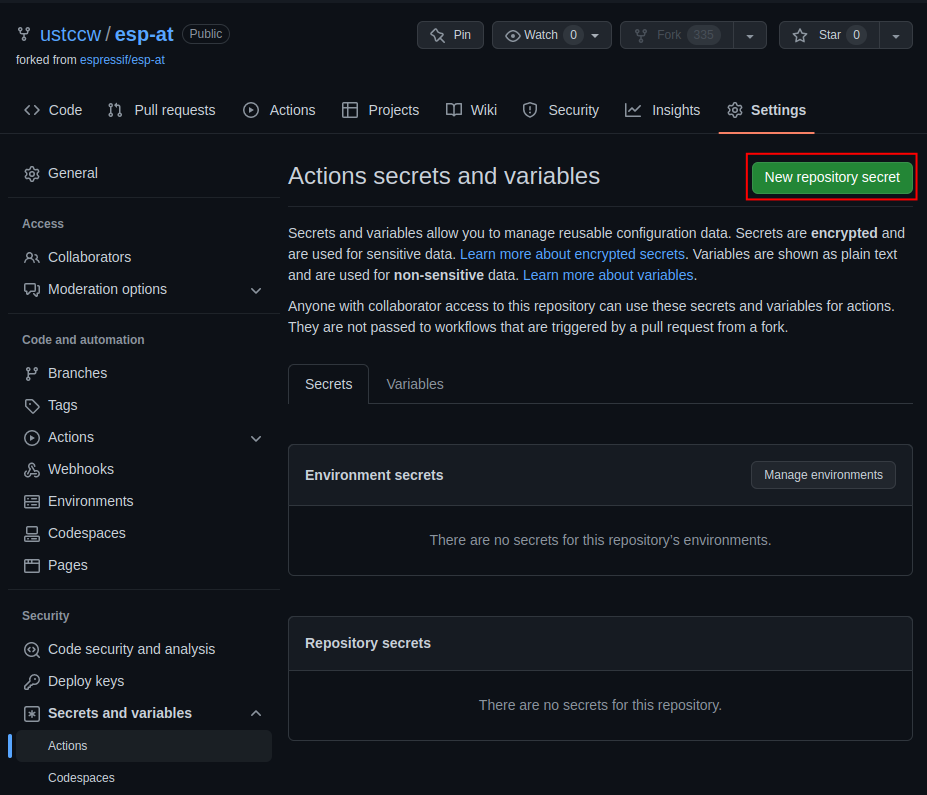
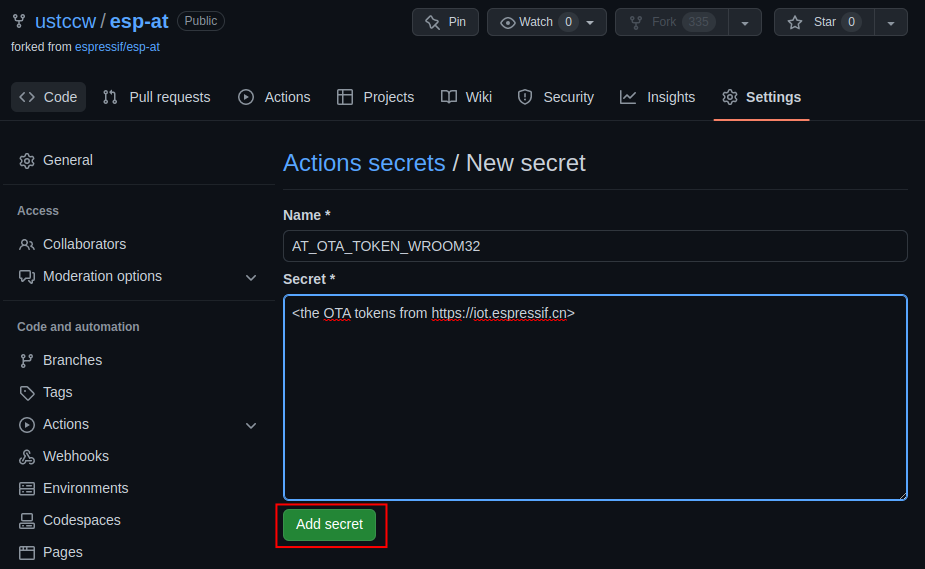
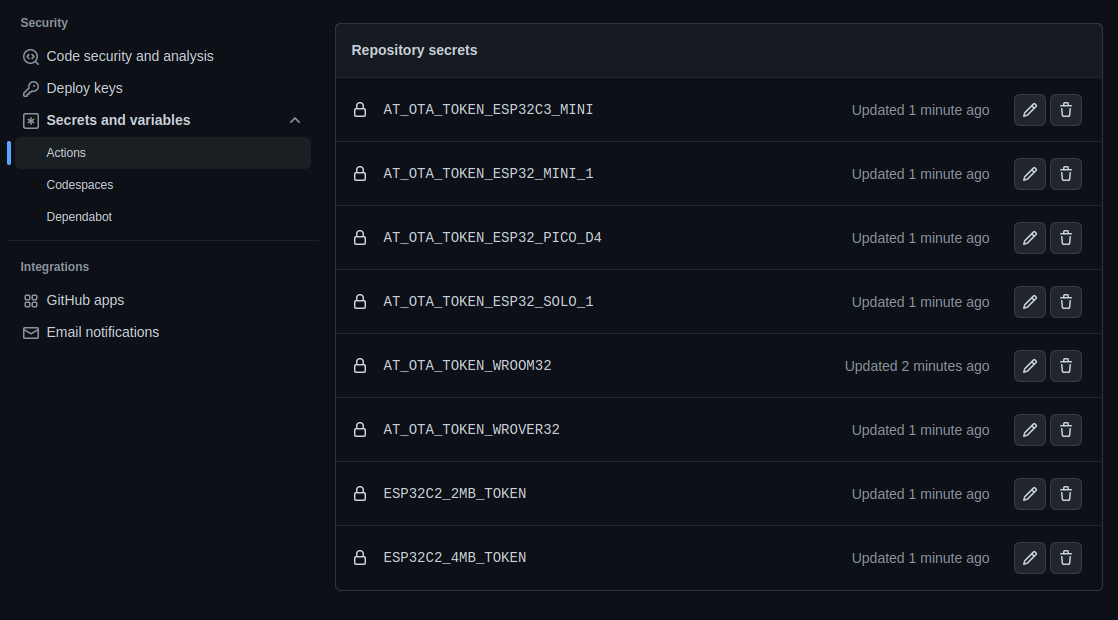
If you need to support AT firmware upgrades for more modules, please repeat the above steps and add different keys again. After creating all the secrets, you will have the following page.

Create Secrets Completed

Create Secrets Completed

Step 5. Use the github.dev editor to modify and submit the code

For how to use the github.dev editor, please refer to the official github.dev document. The example process is shown below.

5.1 Open the github.dev editor

Go back to the repository homepage and select the branch name that you want to modify.

Select Branch

Select Branch

Press the . key on the keyboard to open the branch code using the github.dev editor.

Open Branch Code

Open Branch Code

5.2 Create a new branch

At the bottom of the editor, click the branch name in the status bar. In the dropdown, enter the name for a new branch and click Create new branch.

Create New Branch

Create New Branch (Click to Enlarge)

Click Switch to Branch to create the branch.

Confirm Branch Creation

Confirm Branch Creation

The branch has been created.

Branch Created

Branch Created

5.3 Commit changes

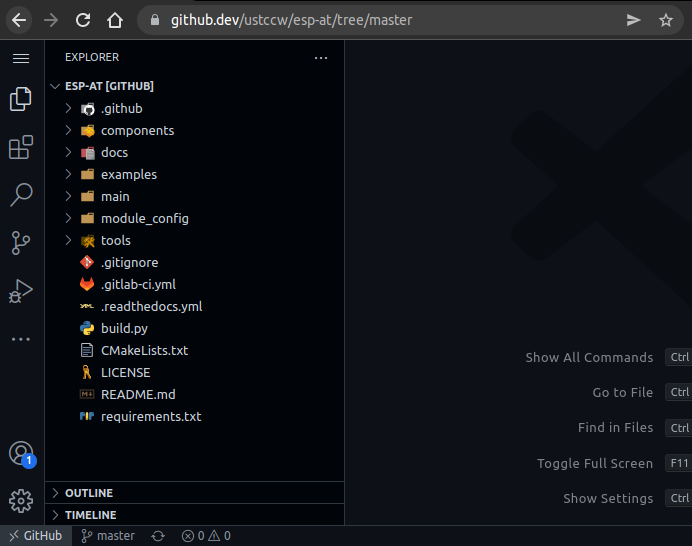
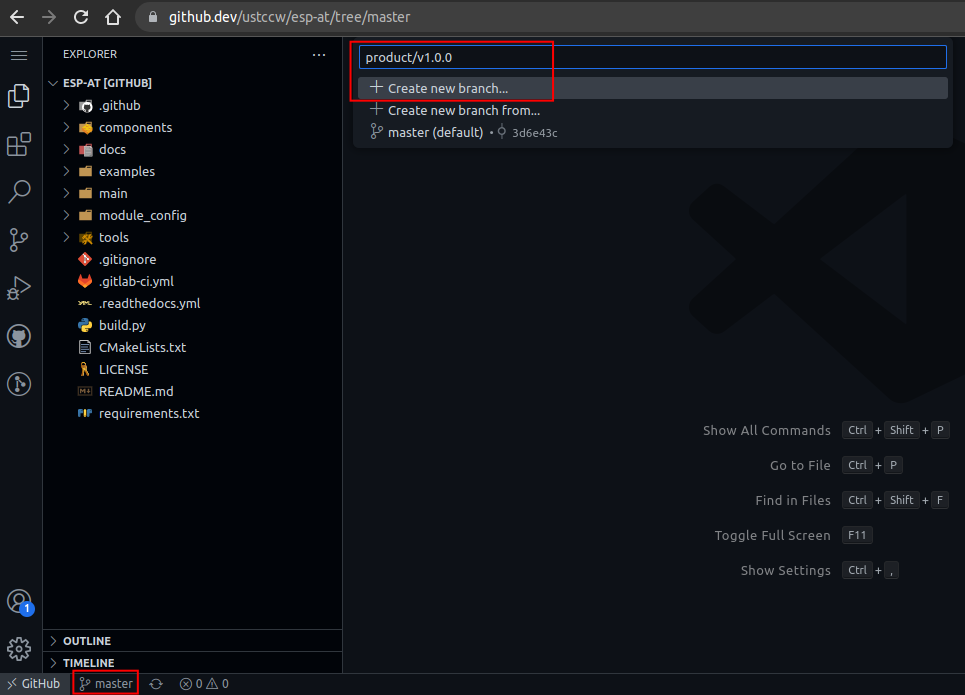
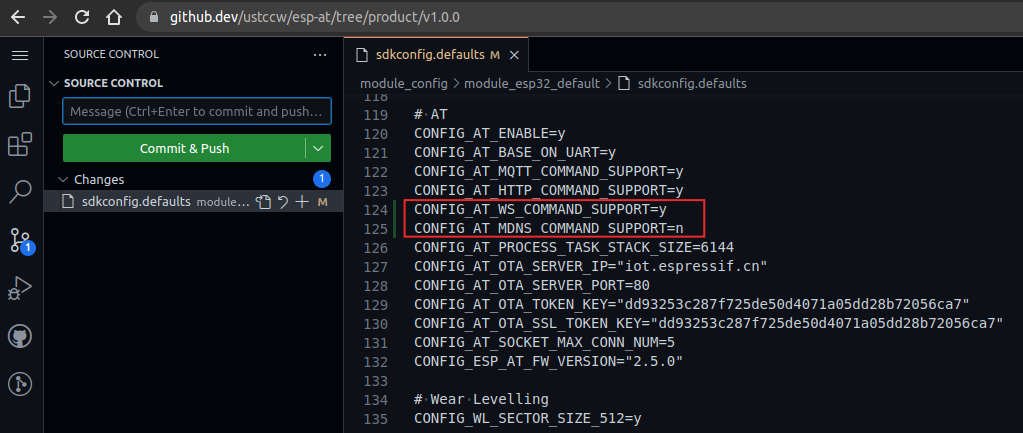
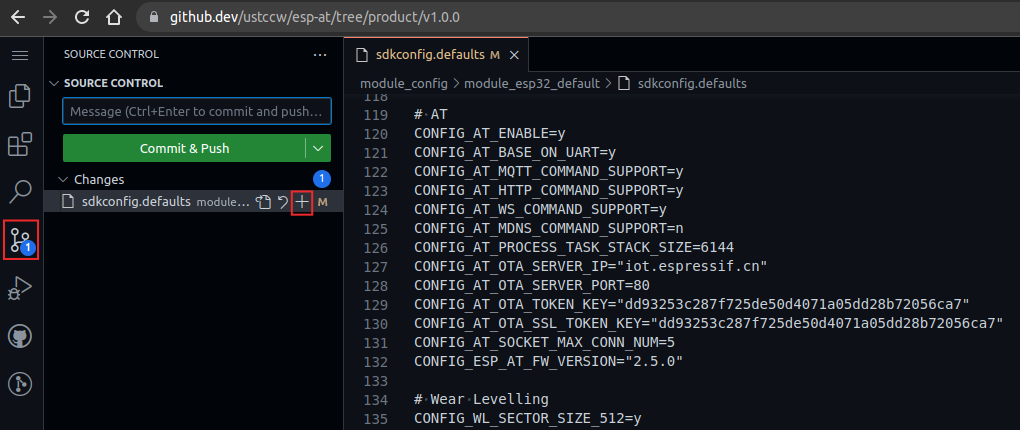
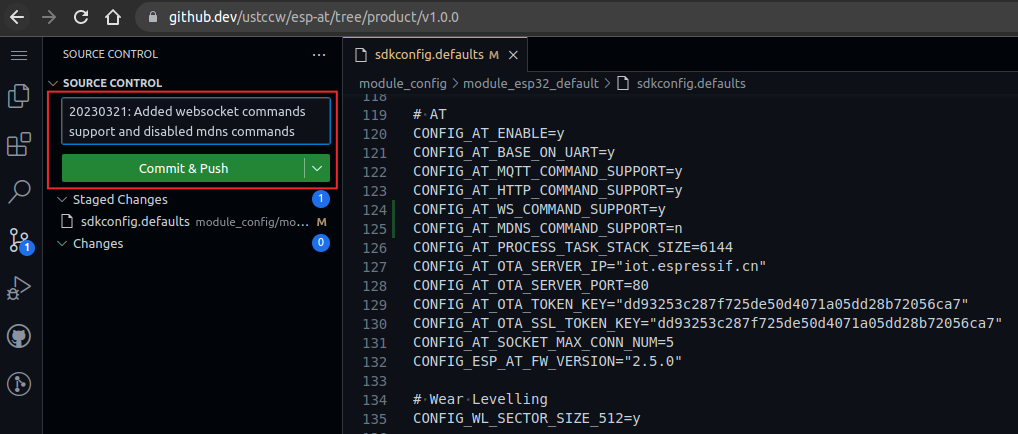
Modify the code in the github.dev editor. For example, to enable WebSocket functionality and disable mDNS functionality, open the configuration file esp-at/module_config/<your_module_name>/sdkconfig.defaults and add the following lines:

CONFIG_AT_WS_COMMAND_SUPPORT=y
CONFIG_AT_MDNS_COMMAND_SUPPORT=n
Add WebSocket Command Support and Disable mDNS Functionality

Add WebSocket Command Support and Disable mDNS Functionality (Click to Enlarge)

In the activity bar, click the Source Control view. Click the plus sign + next to the file that has been modified to stage the changes.

Stage Changes

Stage Changes (Click to Enlarge)

Enter a commit message to describe the changes you have made. Click Commit & Push to submit the changes.

Submit Changes

Submit Changes (Click to Enlarge)

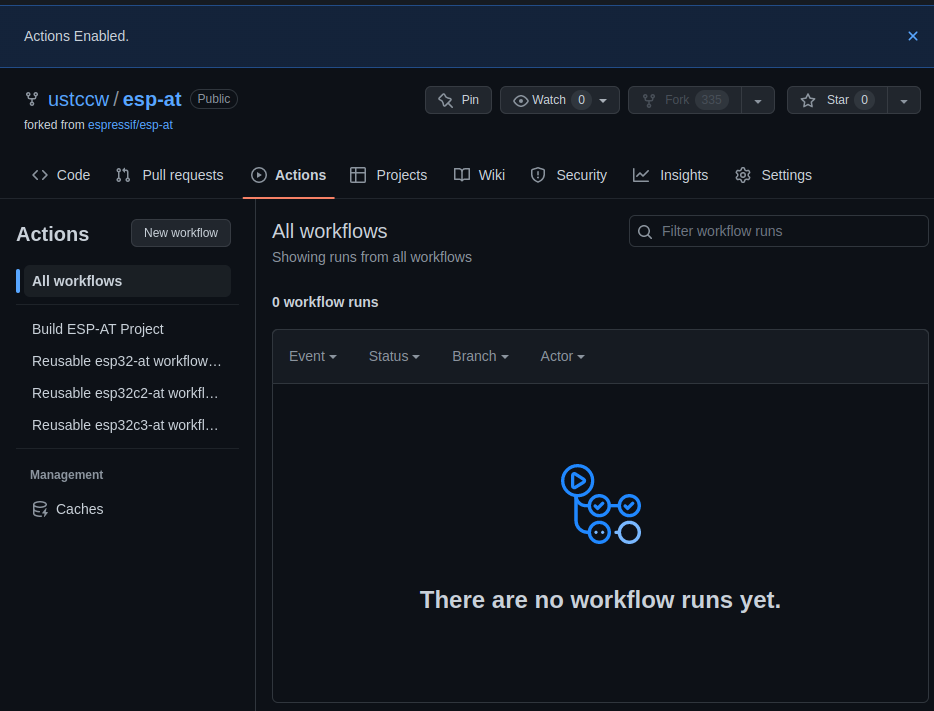
Step 6. Compile the AT firmware using GitHub Actions

After you complete the above steps, GitHub Actions will automatically trigger the compilation of your ESP-AT firmware. After compilation, please refer to How to Download the Latest Temporary Version of AT Firmware from GitHub to download the AT firmware you need. Note that the firmware is generated based on your own esp-at project, not the https://github.com/espressif/esp-at project.