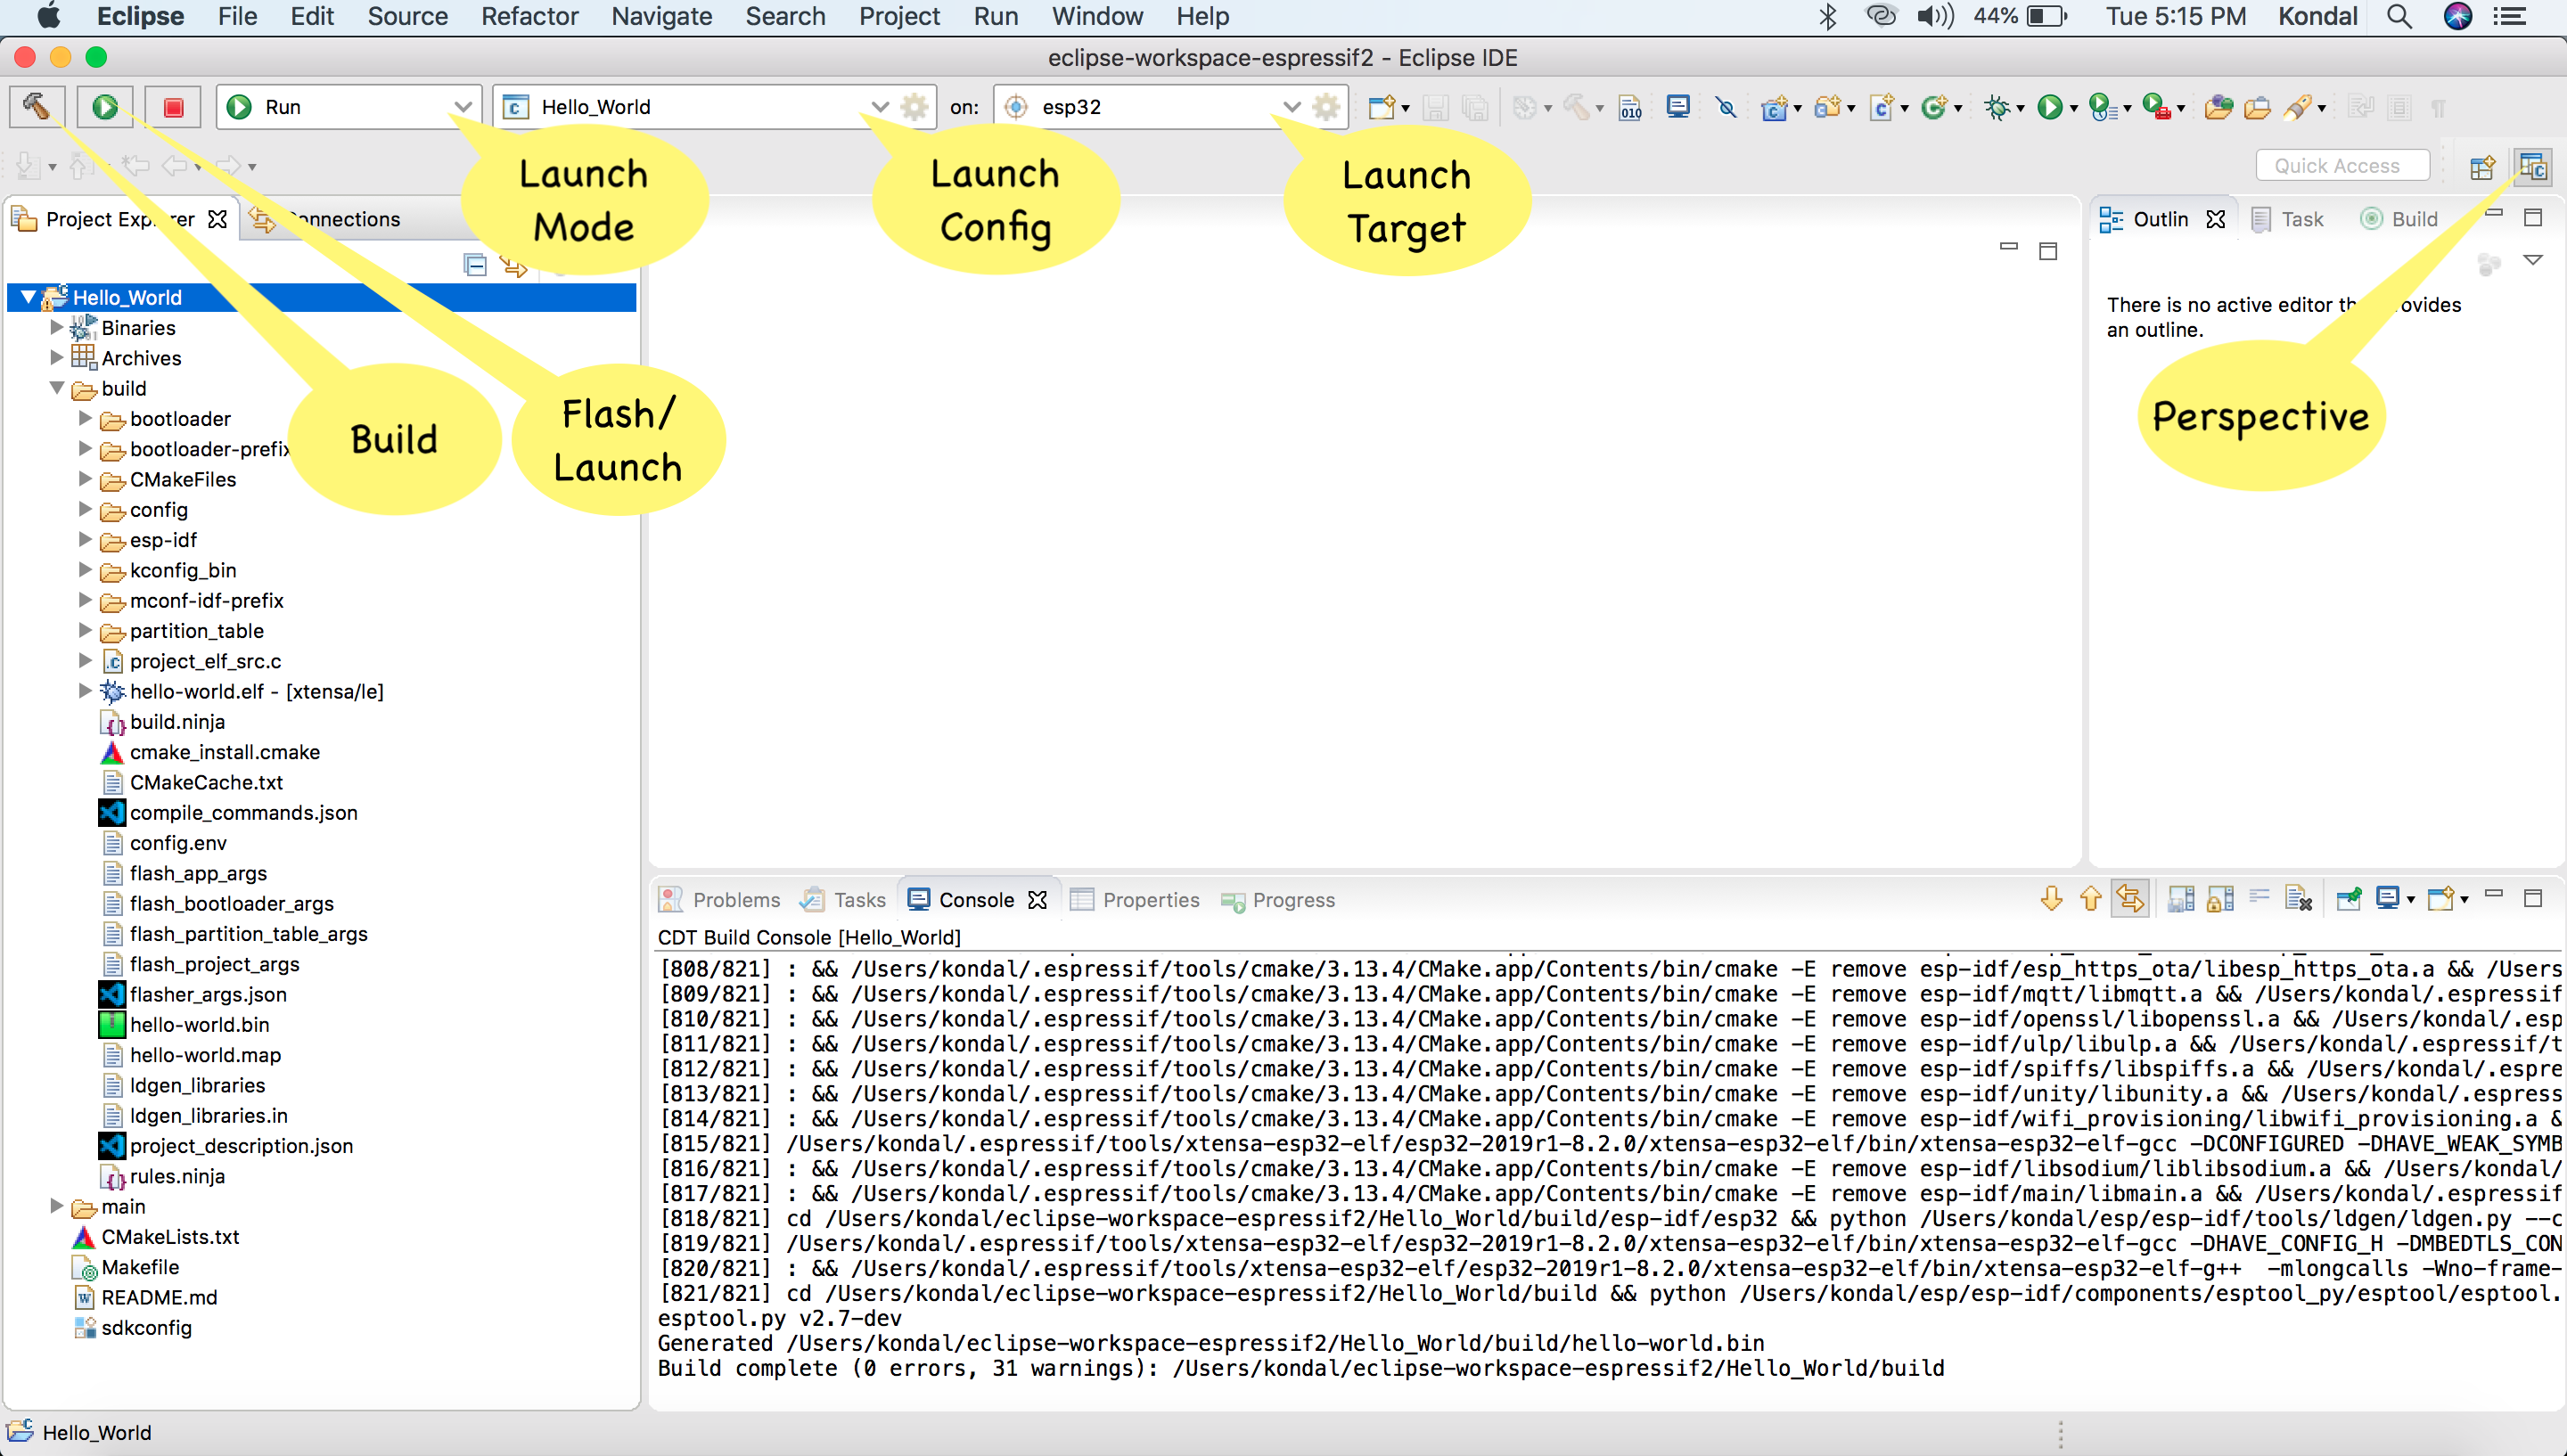
Build Your Project
Once you have created a project and configured the ESP target and serial port, you can build the project by clicking on  in the toolbar.
However, the following steps will guide you through the process of building the project if you are new to the IDE:
Select a project from the
Project Explorer.Select
Runfrom the first dropdown, which is called Launch Mode.Select your application from the second dropdown, which is called Launch Configuration (Auto-detected).
Select a target from the third dropdown, which is called Launch Target. For example,
esp32.Now click on the
Buildbutton to start the build process.
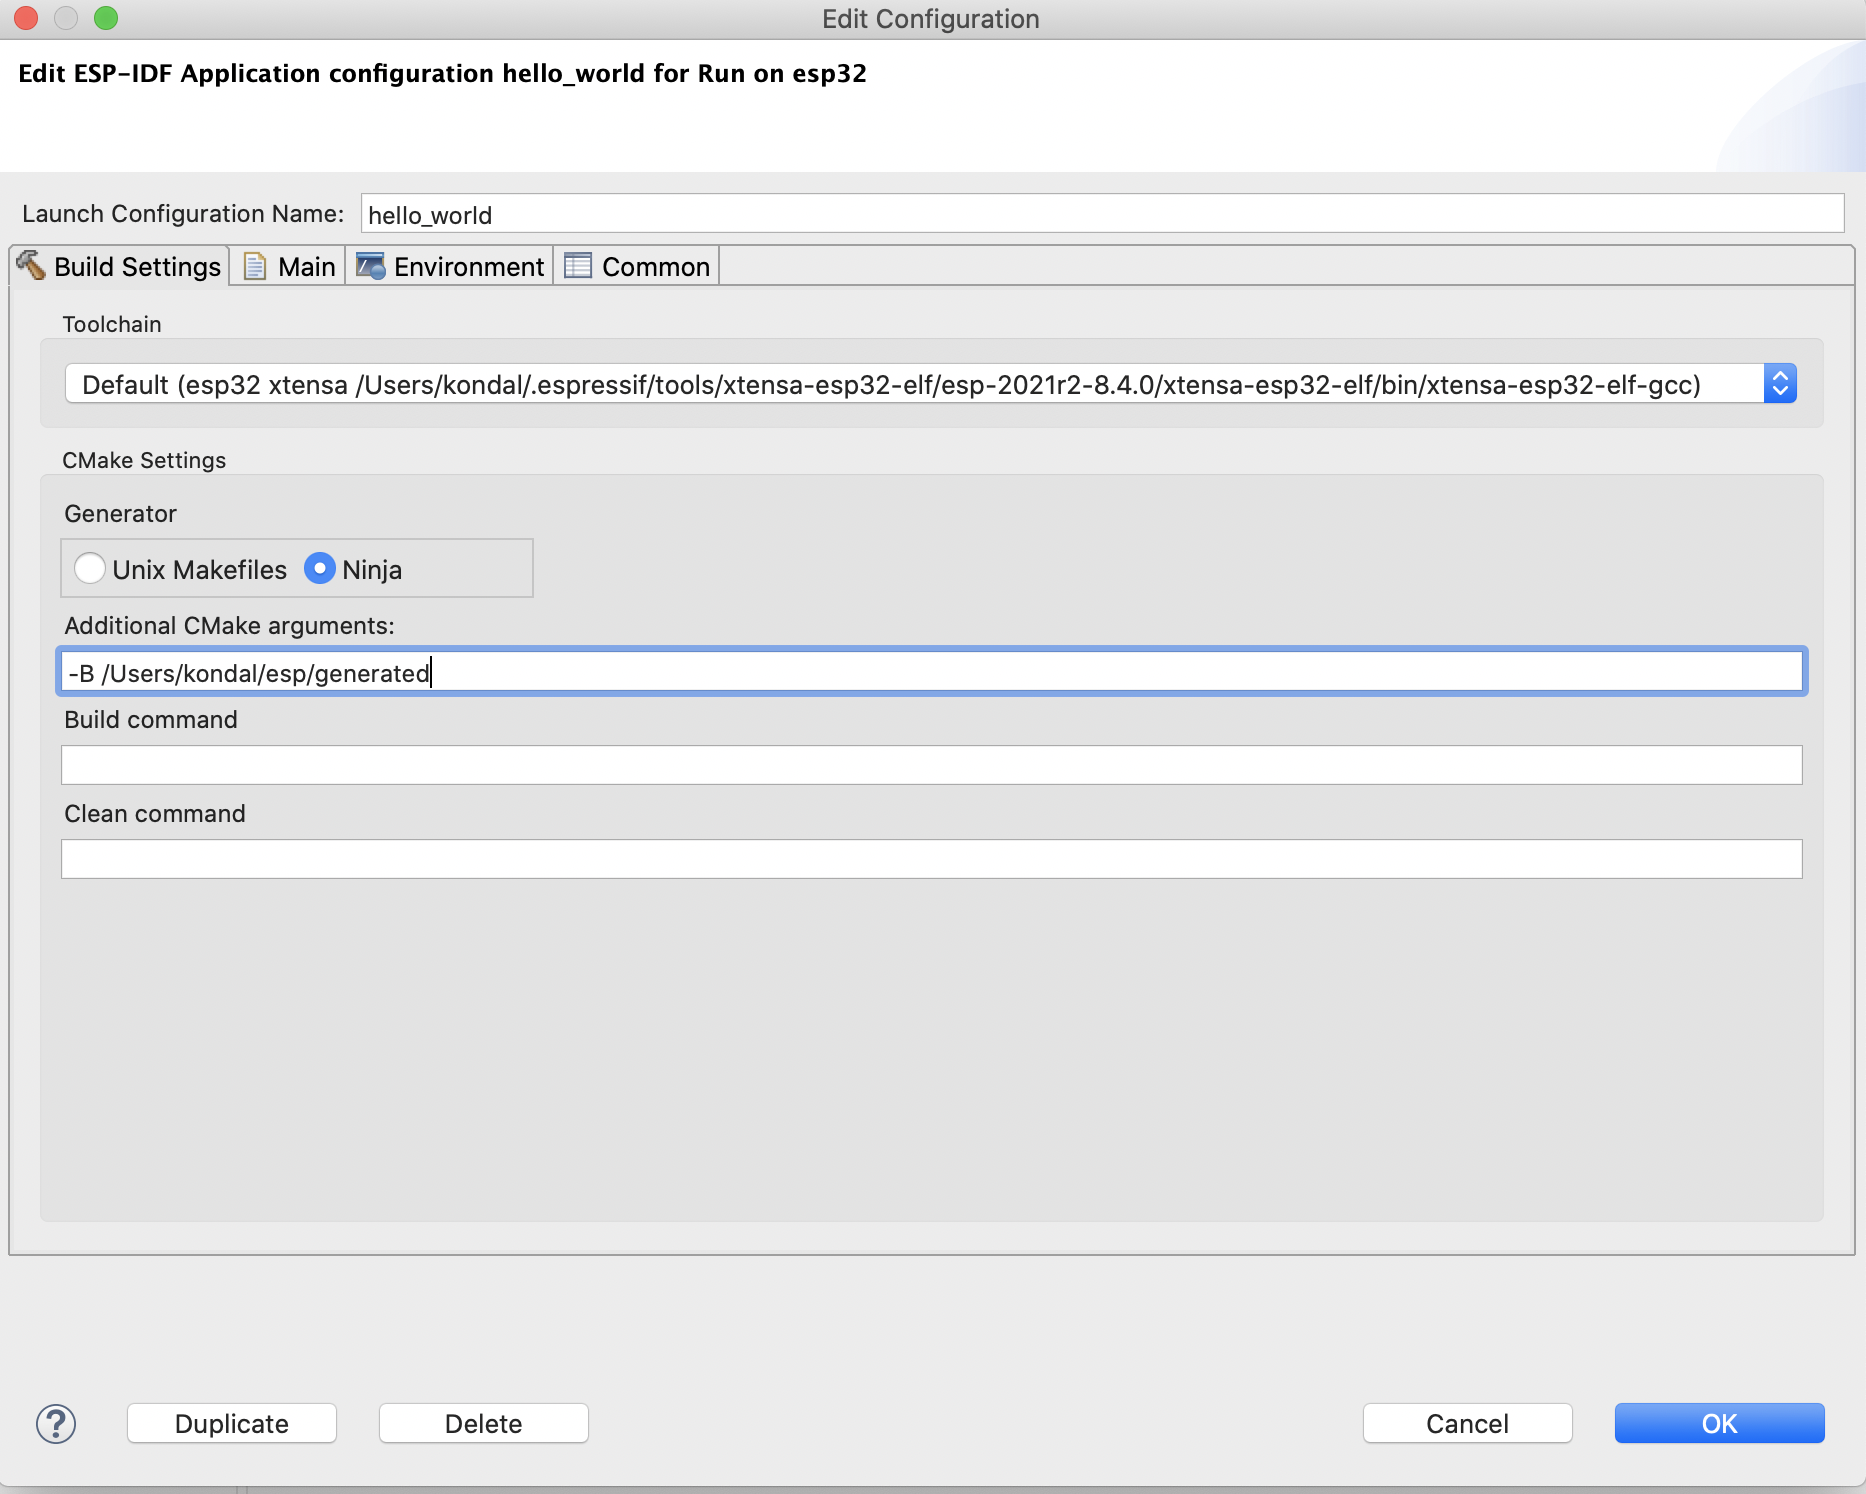
Custom Build Directory
The IDE allows configuring a custom build directory for the project:
Select a project and click on the
Editbutton for the launch configuration in the top toolbar to open theEdit Configurationwindow.Navigate to the
Build Settingstab.In the
Build folder locationsection, provide a custom build directory. The customized build directory path can be within the project or in any other location in the file system.Click on
Okand build the project.
Note
This configuration specifies the location where all the project build artifacts will be generated.