Flash onto the Device
Select the serial port: Go to
View>Command Palette, enterESP-IDF: Select Port to Use, and choose the command to specify the serial port of your device.Start flashing the device: Go to
View>Command Palette, enterESP-IDF: Flash your Project, and choose the command to start flashing your device. You can chooseUART,JTAGorDFUflashing method.Note
UARTis the most common option for most Espressif devices.If you are using
JTAG, ensure OpenOCD is properly configured. Go toView>Command Paletteand enterESP-IDF: Select OpenOCD Board Configurationto select the correct configuration for your board.
Note
There is an
idf.flashBaudRateconfiguration setting to modify the flashing baud rate.The flashing task will begin on the selected serial port, launching a new terminal displaying the flashing task output. While flashing is in progress, a notification bar will display
ESP-IDF: Flashing project. Once the process is complete, the message will change toFlash Done ⚡️.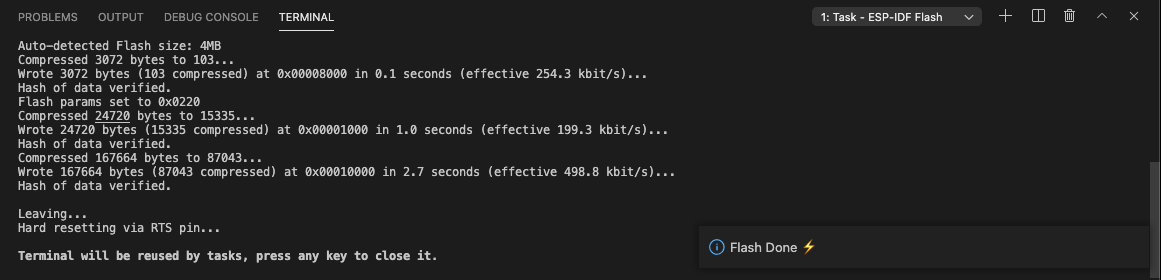
Please refer to Configuration of OpenOCD for Specific Target to select the appropriate OpenOCD configuration file based on your hardware.
Make sure to configure your drivers as mentioned in Configure JTAG Interface.
Next, proceed to Monitor the Output.
Other Flashing Commands
You can also choose the flashing method UART, JTAG, or DFU (ESP32-S2 or ESP32-S3) based on your hardware connection.
Go to
View>Command Palette, enterESP-IDF: Select Flash Method, and select the flashing method for your device. The selected choice will be saved in theidf.flashTypeconfiguration setting.You can also use the following commands to flash with a specific flashing method:
ESP-IDF: Flash (UART) your Projectfor UART flashingESP-IDF: Flash (DFU) your Projectto flash using DFU (only for ESP32-S2 and ESP32-S3)ESP-IDF: Flash (with JTAG)to flash using JTAG and OpenOCD