Create an ESP-IDF Project
You can start a project in three ways:
The first option is recommended because it allows to configure the project. The second and third options create the project with the current workspace folder configuration.
Using ESP-IDF: New Project
In Visual Studio Code:
Navigate to
View>Command Palette.Type
ESP-IDF: New Projectand select the command to launch the New Project wizard.A dropdown menu appears with all ESP-IDF setups detected by the extension. Select the desired ESP-IDF setup to use for the new project creation.
A menu with all examples from the ESP-IDF is displayed. You can select one of the examples as a template for your new project.
Note
If you want to create a blank project, choose ESP-IDF
sample_projector Extensiontemplate-app.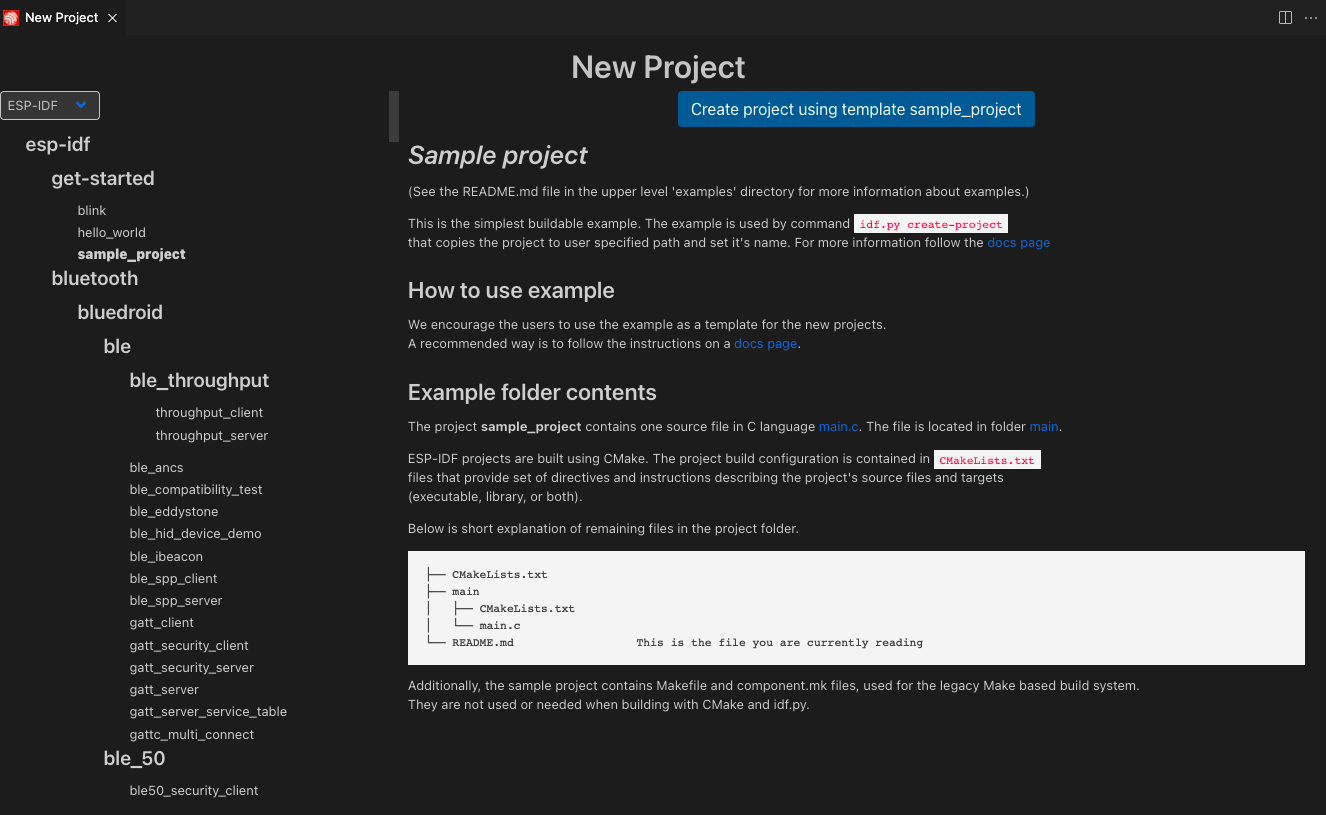
Choose your desired template and click the
Create Project Using Template <template-name>button, where<template-name>is the name of the selected template.The New Project configuration window appears. Fill in the required fields:
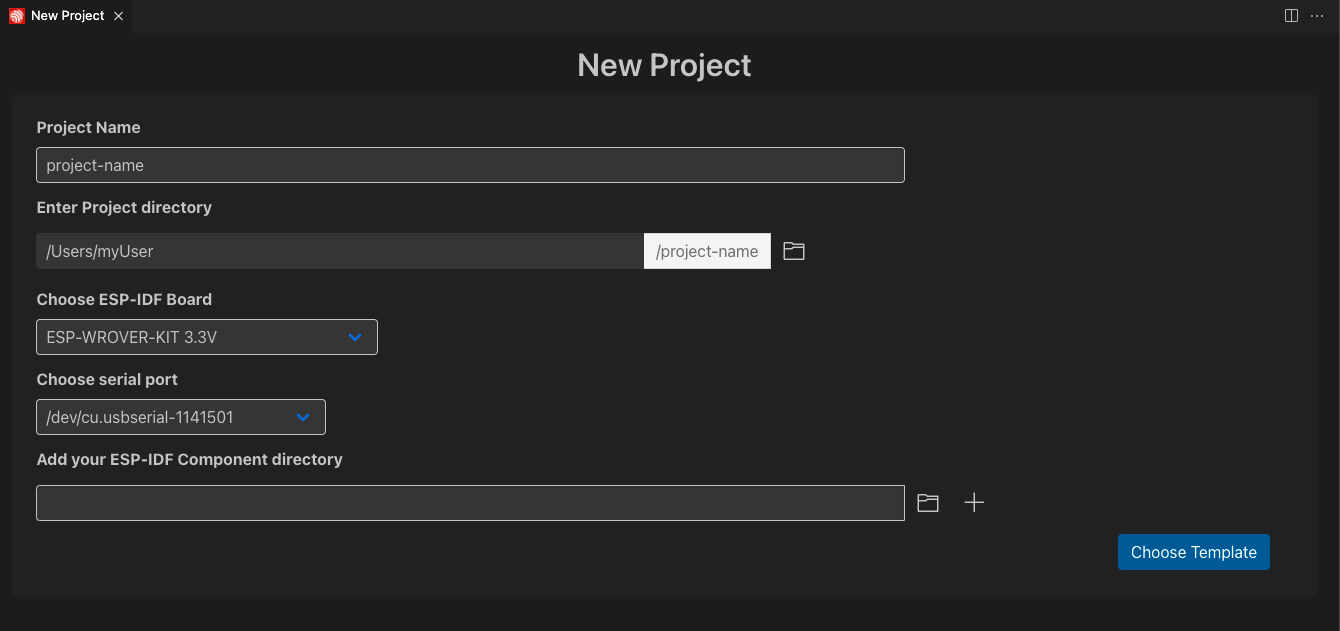
Choose the project name.
Choose the location for the new project.
Select the Espressif IDF_TARGET and Board to use in this new project.
Select the serial port of the device (a list of currently connected serial devices appears in the dropdown).
Note
If you are not sure about the serial port name, refer to Establish Serial Communication.
Note
Please refer to Configuration of OpenOCD for Specific Target to select the appropriate OpenOCD configuration file based on your hardware.
Optionally, you can import any ESP-IDF component directory
component-dirto the new project. This will copy it to the new project’scomponentssubdirectory (<project-dir>/components/component-dir).Click the
Create Projectbutton.Wait for the project to be created and then click on
Open Project.
Opening an Existing ESP-IDF Project
ESP-IDF projects follow this directory structure:
- myProject/
            - CMakeLists.txt
            - sdkconfig
            - components/ - component1/ - CMakeLists.txt
                                        - Kconfig
                                        - src1.c
                          - component2/ - CMakeLists.txt
                                        - Kconfig
                                        - src1.c
                                        - include/ - component2.h
            - main/       - CMakeLists.txt
                          - src1.c
                          - src2.c

            - build/
In Visual Studio Code:
Navigate to
View>Command Palette.Type
ESP-IDF: Import ESP-IDF Projectand select the command to import an existing ESP-IDF project.
This command adds both Visual Studio Code configuration files (settings.json, launch.json) and Docker container files (Dockerfile and .devcontainer.json).
The next step is to Connect a device.
Adding Visual Studio Code configuration files and Docker container
In Visual Studio Code, go to File > Open Folder and open a directory containing a CMakeLists.txt file in the root (e.g., myProject), which follows the ESP-IDF structure.
To add Visual Studio Code configuration files (settings.json, launch.json):
Navigate to
View>Command Palette.Type
ESP-IDF: Add VS Code Configuration Folderand select the command.
To open the project within the ESP-IDF Docker container:
Navigate to
View>Command Palette.Type
ESP-IDF: Add Docker Container Configurationand select the command to add the.devcontainerdirectory to your current directory.Navigate to
View>Command Palette.Type
Dev Containers: Open Folder in Remote Containerand select the command to open the existing project inside the container created from the Dockerfile in the previous step.
ESP Component Registry
The ESP Component Registry is a collection of ESP-IDF components that can be easily added to your project. You can browse the registry, install components and create new ESP-IDF projects from component examples directly from Visual Studio Code.
In Visual Studio Code:
Navigate to
View>Command Palette.Type
ESP-IDF: Show ESP Component Registryand select the command to open the ESP Component Registry UI.
The ESP-IDF: Show ESP Component Registry command launches a UI showing the ESP Component Registry.
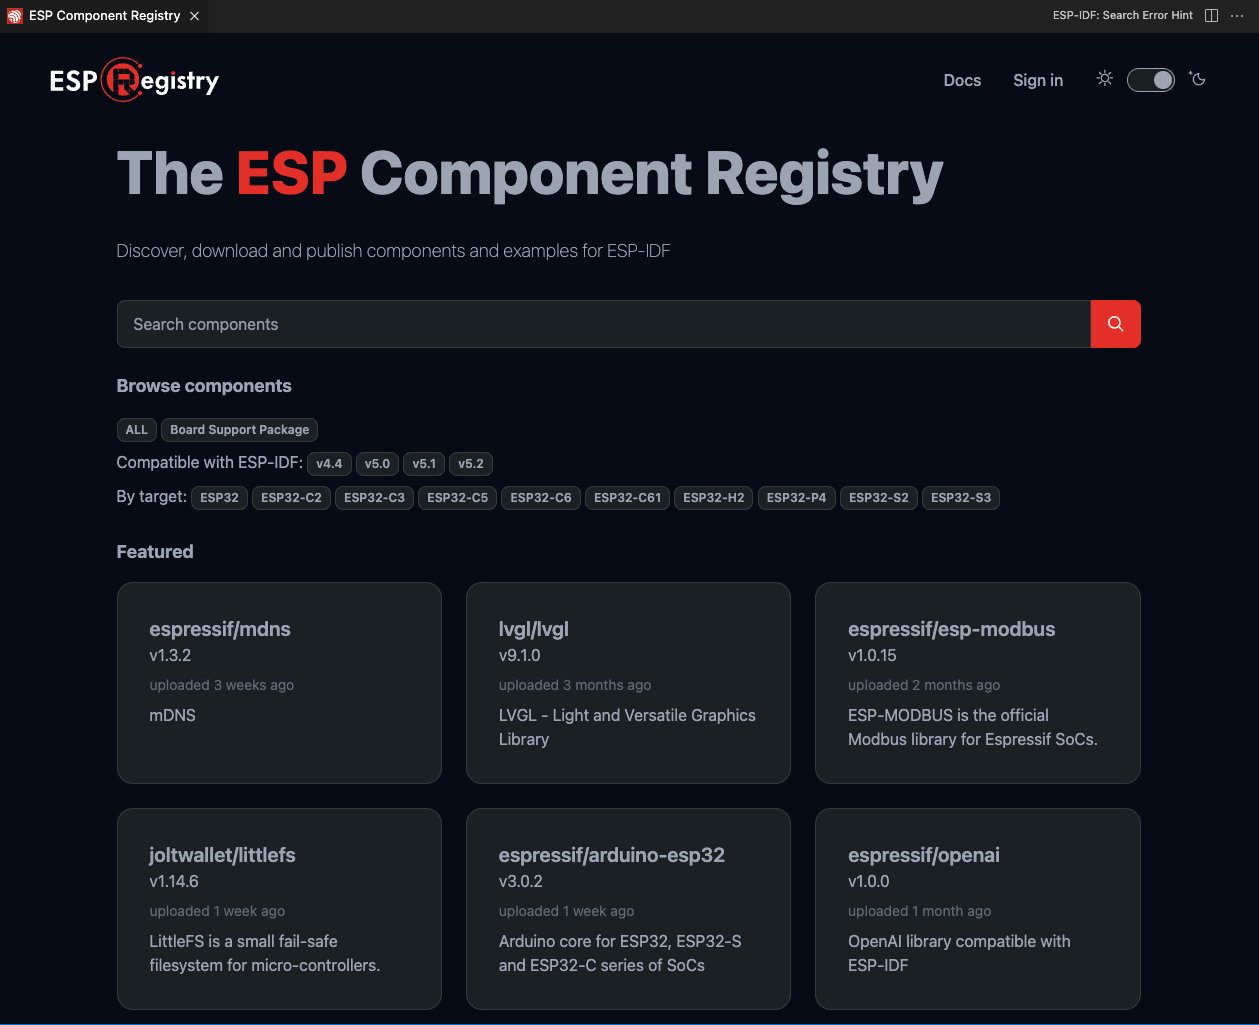
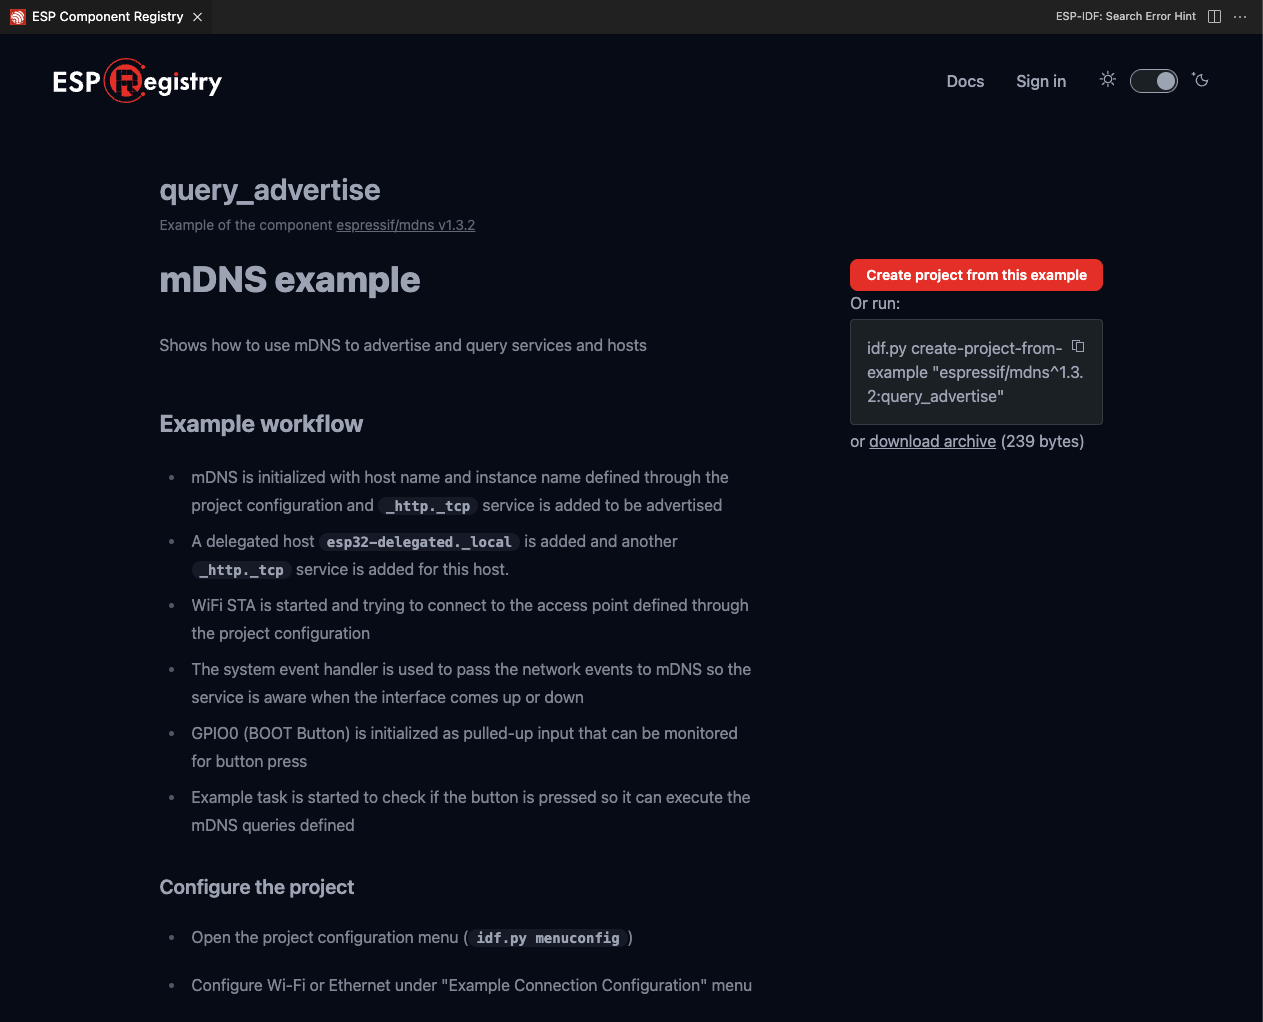
You can also create a new project from an ESP component example using the Create project from this example button.
For more information, refer to ESP Component Registry Documentation.