Working with Multiple Projects
For big projects, the user often manage multiple projects for building, flashing or monitoring. The ESP-IDF extension follows the Visual Studio Code Workspace File Schema to identify all project folders inside the current workspace (the root folder). For more details, please refer to User and Workspace Settings.
Configuration settings are overridden in the following order:
Workspace folder configuration settings in
${workspaceFolder}/.vscode/settings.jsonWorkspace configuration settings in the workspace’s
<name>.code-workspacefileUser settings defined in
settings.jsonWindows:
%APPDATA%\Code\User\settings.jsonMacOS:
$HOME/Library/Application Support/Code/User/settings.jsonLinux:
$HOME/.config/Code/User/settings.json
This extension uses the idf.saveScope configuration setting to specify where to save settings for features such as the Setup Wizard. You can modify this using the ESP-IDF: Select where to Save Configuration Settings command.
Select the current project by clicking the ESP-IDF: Current Project icon in the Visual Studio Code status bar or by pressing F1 and typing ESP-IDF: Pick a Workspace Folder. This determines the folder for ESP-IDF settings such as the current device USB port, ESP-IDF path, etc.
Project folders (known in VS Code as workspace folders) and workspace-level settings are defined in a <name>.code-workspace file, such as:
{
  "folders": [
    {
      "path": "./project1"
    },
    {
      "path": "./project2"
    }
  ],
  "settings": {
    "idf.port": "/dev/ttyUSB1",
  }
}
Settings in the root folder’s .code-workspace are used when your ESP-IDF: Current Project directory lacks a .vscode/settings.json file.
To open a project with multiple sub-projects in Visual Studio Code, go to File > Open Workspace to select the .code-workspace file describing your workspace.
You can either manually create this .code-workspace file and define all sub-folders (sub-projects), or go to File > Save Workspace as to save it, which does not automatically add any folder inside the current directory.
Add a folder to the workspace by clicking File > Add Folder to Workspace.
Note
You must manually select the corresponding debug configuration in the Debug tab of your current workspace folder. Each debug configuration has a project directory suffix.
Example
Consider the following multiple projects directory tree example:
---> /my-projects-root
------> /my-projects-root/project1
------> /my-projects-root/project2
------------> /my-projects-root/project2/.vscode/settings.json
And my-ws.code-workspace:
{
  "folders": [
    {
      "path": "/my-projects-root/project1"
    },
    {
      "path": "/my-projects-root/project2"
    }
  ],
  "settings": {
    "idf.port": "/dev/ttyUSB1",
  }
}
Open Visual Studio Code, go to
File>Open Workspaceand openmy-ws.code-workspace, you will see only the folders defined in this workspace (/my-projects-root/project1and/my-projects-root/project2).For
project1, Visual Studio Code uses the settings frommy-ws.code-workspacefirst, then other required settings from the User Settings.For
project2, Visual Studio Code uses those settings from/my-projects-root/project2/.vscode/settings.jsonfirst, then any missing settings frommy-ws.code-workspace, and finally from the User settings.
Open the
/my-projects-rootor/my-projects-root/project1directory, Visual Studio Code uses the User Settings.If you just open the
/my-projects-root/project2directory, Visual Studio Code uses/my-projects-root/project2/.vscode/settings.jsonfirst, then other required settings from the User Settings.
Note
If you open
/my-projects-root, any of the sub-projects will not be recognized as workspace folders. You need to add them tomy-ws.code-workspace(manually or by clickingFile>Add Folder to Workspace) and open this workspace as specified before.
Use Multiple Build Configurations in the Same Workspace Folder
Use the ESP-IDF CMake Multiple Build Configurations Example to follow this tutorial.
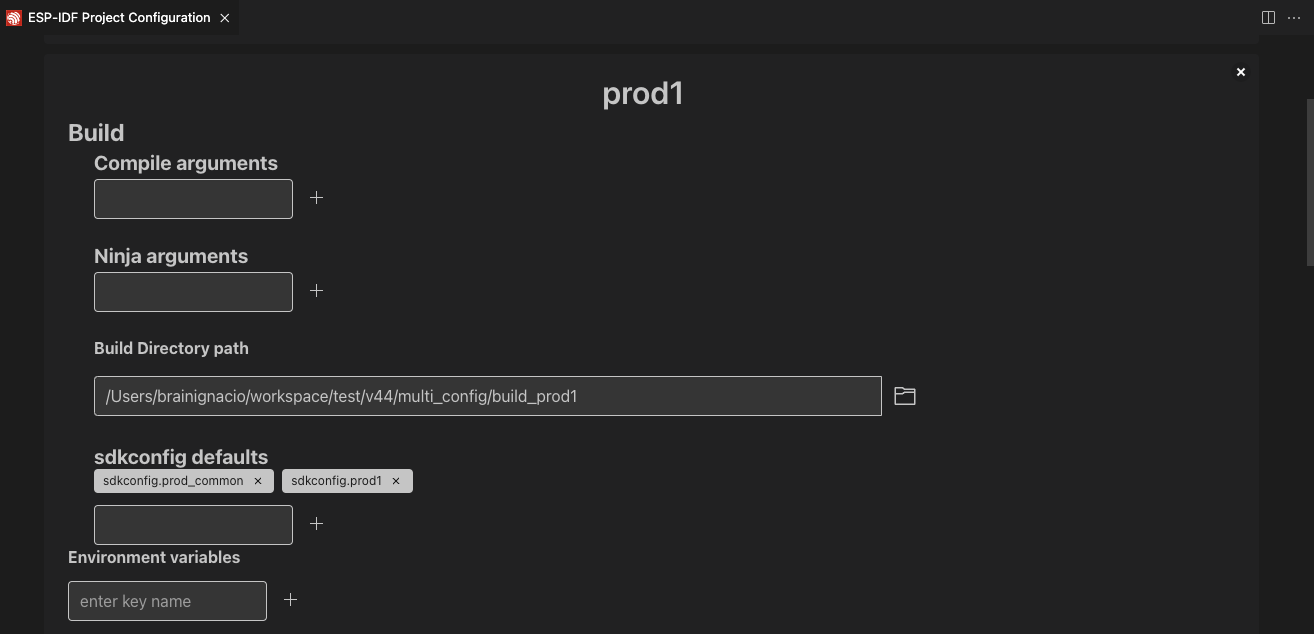
Use the ESP-IDF: Open Project Configuration command to create two configuration profiles: prod1 and prod2. Set sdkconfig.prod_common;sdkconfig.prod1 and sdkconfig.prod_common;sdkconfig.prod2 in the sdkconfig defaults field as shown below:
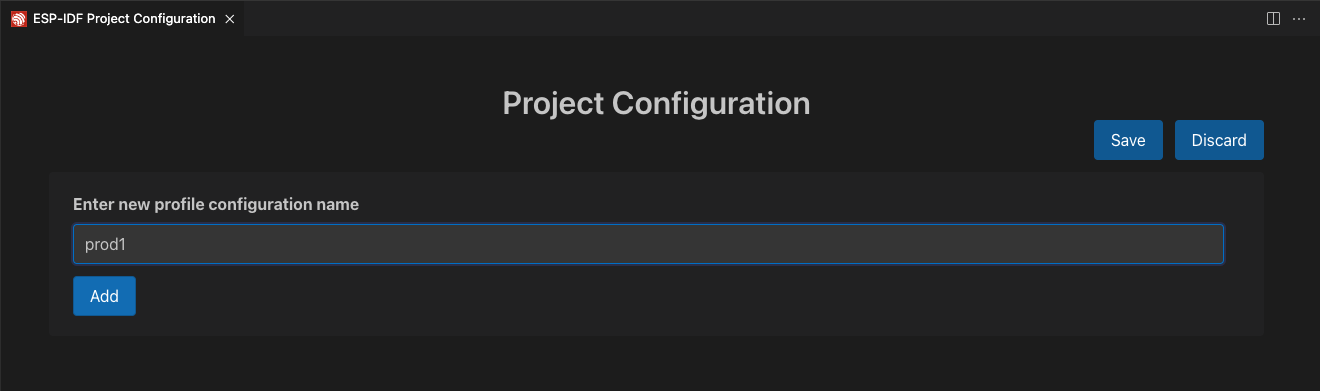

After creating each profile and setting the configuration, click the Save button. Use the ESP-IDF: Select Project Configuration command to choose the configuration to override extension configuration settings.

Once a configuration profile is selected, it will appear in the status bar as shown before.

Now, use the ESP-IDF: Build your Project command to build the project for prod1 and prod2. You will see binaries generated for each profile in the specified path. Use the ESP-IDF: Select Project Configuration command to switch between configurations.
Use the ESP-IDF: Open Project Configuration command to modify, add, or delete the configuration profiles. To stop using these profiles, delete all configuration profiles.
Multiple ESP-IDF Versions
You can use multiple ESP-IDF versions, one for each project, by explicitly defining your configuration settings in the .vscode/settings.json file of your current project directory.
Set
idf.saveScopeto workspace folder using theESP-IDF: Select where to Save Configuration Settingscommand, or by directly editing the.vscode/settings.jsonfile of the desired project in Visual Studio Code.Configure the extension as described in Install ESP-IDF and Tools.
Delete any previous build directory, as an different ESP-IDF version will not work if there is any cache of previous build.
Repeat from step 1 for any project where you want to use an ESP-IDF version different from the global user settings.
Using Multiple Build Configurations Manually
As shown in the ESP-IDF CMake Multiple Build Configurations Example, you can use multiple build directories and multiple sdkconfig defaults files to produce different production outputs.
In this extension, you can define the build directory with the idf.buildPath (idf.buildPathWin for Windows) configuration setting, and define the list of sdkconfig defaults files with idf.sdkconfigDefaults. These settings will be used by the extension build command.
For example, to create product 1:
Create sdkconfig files
sdkconfig.prod_commonandsdkconfig.prod1, and the resulting firmware will be generated in<your-project>/build_prod1, wherebuild_prod1is the custom build folder name.In your project’s
.vscode/settings.jsonfile, add the following settings:{ // ... "idf.buildPath": "${workspaceFolder}/build_prod1", "idf.sdkconfigDefaults": ["sdkconfig.prod_common", "sdkconfig.prod1"] // ... }
Build your project using the
ESP-IDF: Build your Projectcommand.The resulting files will be generated in
<your-project>/build_prod1, and the sdkconfig used by the SDK Configuration Editor will be<your-project>/build_prod1/sdkconfig.Change the values in step 2 for different products and configurations accordingly.